Build so far
+13
bazzer
its-me
LiveSteam
hartshaulage
chas12154
lynnr
Pitpup
phil gomez
Mike King
IanR
Tony King
Steve H
Crazy_jim
17 posters
Page 5 of 7
Page 5 of 7 •  1, 2, 3, 4, 5, 6, 7
 Re: Build so far
Thats absolutely superb Jim, i just hope thag i end up doing such a good job as you.
Mike
Mike
Last edited by Mike King on Thu 23 Apr 2015, 1:36 pm; edited 1 time in total
 Re: Build so far
I scrub bare metal with emery then clean with white spirit. Some of the larger bits like the horn plates arrive still covered in pres and cutting oil etc.

Crazy_jim- Number of posts : 150
Age : 42
Location : Harrogate
Registration date : 2012-10-25
 Re: Build so far
I will bear that in mind. Theres no doubt that the finish is in the preparation.
Mike
Mike
 Re: Build so far


My next engineering challenge is figuring out how to get the pins all the way in when the butt up against the grate inside the ash pan?

Crazy_jim- Number of posts : 150
Age : 42
Location : Harrogate
Registration date : 2012-10-25
 Re: Build so far
File a small round bit where the pin hits the fire bar, thats what has had to be done to a 4 Burrell that i help out with
Russ
Russ

hartshaulage- Number of posts : 231
Age : 35
Location : Ilkeston, Derbyshire
Registration date : 2014-01-22
 Re: Build so far
Cheers russ I sussed something similar in the end. All in place now looking good.

Crazy_jim- Number of posts : 150
Age : 42
Location : Harrogate
Registration date : 2012-10-25
 Re: Build so far


Quick progress report. Received my crankshaft kit just before the weekend but was away until the Monday. As the kit instruction said it takes a bit of time to get right. I spent last night honing and shaving the steam head to achieve a nice tight fit for the globe valves. The pipe work took some lining up, refitting and lining up some more and first impressions are that the crank has enough room not to catch.

Crazy_jim- Number of posts : 150
Age : 42
Location : Harrogate
Registration date : 2012-10-25
 Re: Build so far
Not sure why photobucket won't let me post all the picture?

Crazy_jim- Number of posts : 150
Age : 42
Location : Harrogate
Registration date : 2012-10-25
 Re: Build so far
Looking great Jim. Coming together nicely. Ive had trouble putting pics on here too, photo bucket is a pain sometimes!!
chas12154- Number of posts : 412
Age : 63
Location : Totton, Southampton, Hampshire
Registration date : 2015-01-21
 Inner Name Ring
Hi, quick question. On the inner name ring, what did you find was the best way was to ensure the lettering stands out in brass when painted. When I did my Allchin, the letters were flush with the outer shoulder so simply painting it all and then rubbing it back with wet n dry did the trick. With the letters not being flush on the Burrell ring I don't think this will work...any advice would be welcome.
P.S.....Nice build so far.
P.S.....Nice build so far.

Pitpup- Number of posts : 108
Age : 55
Location : Cleveland
Registration date : 2015-02-28
 Re: Build so far

A few updated shots. Not much happening to the engine the past few weeks as I was waiting for the steering gear to be delivered.
Shiny chimney top.


Crankshaft in place. The eccentrics took some titivating in order to fit into the shaft with the key fitted. The tolerances are tight once all the bearings are in place between the two hornplates. So far though everything rotates fairly freely cold. No doubt some interesting times ahead once all fired up.

Crazy_jim- Number of posts : 150
Age : 42
Location : Harrogate
Registration date : 2012-10-25
 Re: Build so far
Pitpup in answer to your question I painted the inner ring and than painstakingly filed back the paint on the lettering with a needle file (pain in the arse job) debating wether to acquire another name ring where the letters are flush like the outer ring to create a better finish. To be fair both inner and outer rings were not the best castings I've ever seen. Not STW usual quality.

Crazy_jim- Number of posts : 150
Age : 42
Location : Harrogate
Registration date : 2012-10-25
 Re: Build so far
Due to moving house again! Build has been a bit slow. A few pictures of the steering gear painted and fitted ready for flywheel and gears hopefully at the end of this month (provided Isabel has my received new change of address)


Rear wheels held in place with split pins for now. Just makes it easier to move around while build progresses.


Rear wheels held in place with split pins for now. Just makes it easier to move around while build progresses.

Crazy_jim- Number of posts : 150
Age : 42
Location : Harrogate
Registration date : 2012-10-25
 Re: Build so far
Lovely build Jim, can I offer some advice, I can see you've got a split pin all neatly folded over in the damper flap lever pin, you may wish to revisit this as it will make removing the ash pan for cleaning harder.
Small R clip on a chain attached to the long lever makes ash pan removal much easier .
.
Small R clip on a chain attached to the long lever makes ash pan removal much easier
LiveSteam- Number of posts : 788
Location : Hampshire
Registration date : 2013-09-08
 Re: Build so far
Gleaming modification thank you for the pointer. That makes good sense. Have you told Steve from STW it could be a nice little R&D thing.

Crazy_jim- Number of posts : 150
Age : 42
Location : Harrogate
Registration date : 2012-10-25
 Re: Build so far
Ok been a while since I did an update what with moving house and working away for a while etc etc all that life boring stuff. Anyway been busy fitting gears and connecting rods etc. Here is a few update photos of the current work.

Flywheel painted before being tidied up and wrapped up away for a while as not needed just yet.

Sight glass plumbing in place.

Trial fitting of the support brackets for the piston and con rod etc. Again testament to STW machining precision very little adjustment was required.

Flywheel painted before being tidied up and wrapped up away for a while as not needed just yet.

Sight glass plumbing in place.

Trial fitting of the support brackets for the piston and con rod etc. Again testament to STW machining precision very little adjustment was required.

Crazy_jim- Number of posts : 150
Age : 42
Location : Harrogate
Registration date : 2012-10-25
 Re: Build so far

Trial fitting of flywheel.


The second gear on the diff needed cleaning up and a tap running through the entire threads for a cosy fit. Nobody wants to be snapping small bolts inside these wonderfully machined gears!

Crazy_jim- Number of posts : 150
Age : 42
Location : Harrogate
Registration date : 2012-10-25
 Re: Build so far

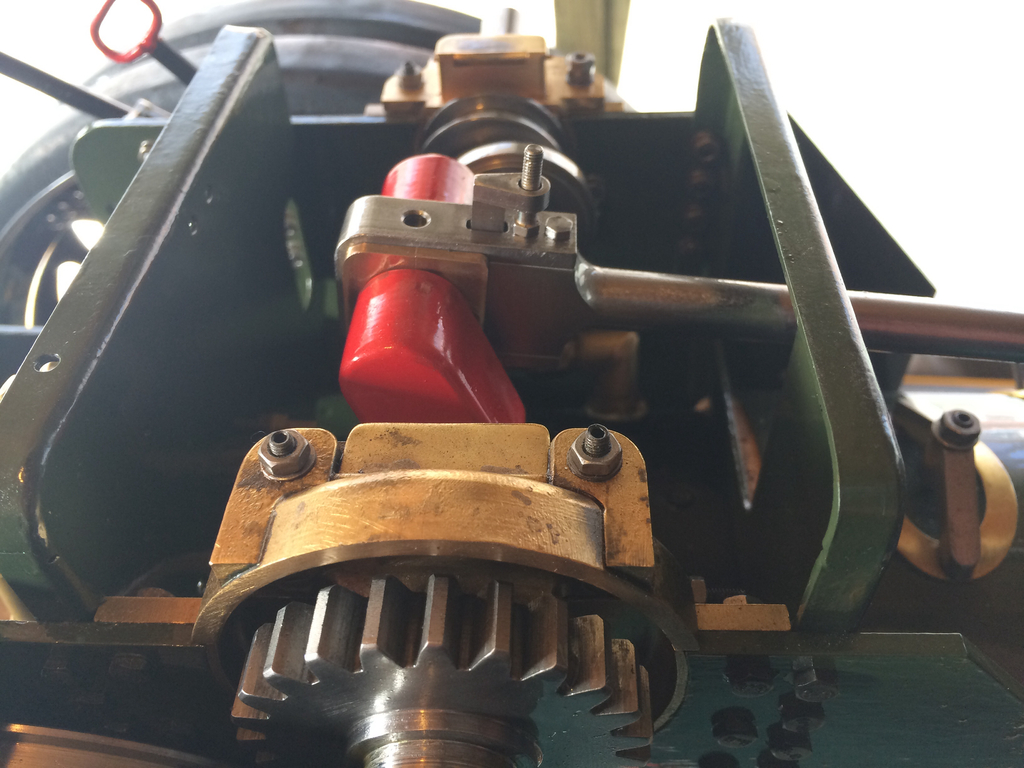
Inside crown wheel in place without having any fouling on the tender. Watch the bolts that hold the tender to the hornplates. I had to file the head of one slightly to stop the inside gear fouling against it.

Gears test fitted prior to some items receiving a lick of paint to reduce corrosion etc.
That's it for now. Hoping to get the final drives and gear guards squared away over Crimbo. Watch this space and don't eat too many sprouts.

Crazy_jim- Number of posts : 150
Age : 42
Location : Harrogate
Registration date : 2012-10-25
 Build so far
Hi Jim, Looking fabulous, Good to see your progress. I'm a few Kits behind you, I've just received Kit 9, arn't the dummy rivets tedious job fitting!
Tender finished and got primer on. Not done any lining yet, thought might do the hornplates first, as a nice flat surface.
Iv'e decide not to do many lines, just a black, on the edges and one yellow line, next to the black, well thats if all goes well:D
Keep up the good work and have a good crimbo and new year.
Charlie
chas12154- Number of posts : 412
Age : 63
Location : Totton, Southampton, Hampshire
Registration date : 2015-01-21
 Re: Build so far
Not as tedious as putting in dummy rivets on the rear wheels and a hunch tells you something doesn't add up. The moment of realisation they are supposed to be on the inside not the outside! Luckily the loctite hadn't cured as I frantically punched them out quietly muttering fcuk fcuk fcuk fcuk fcuk!!!!!

Crazy_jim- Number of posts : 150
Age : 42
Location : Harrogate
Registration date : 2012-10-25
 Build so far
LOL, yes I did that too, the first few, anyway!
chas12154- Number of posts : 412
Age : 63
Location : Totton, Southampton, Hampshire
Registration date : 2015-01-21
 Re: Build so far
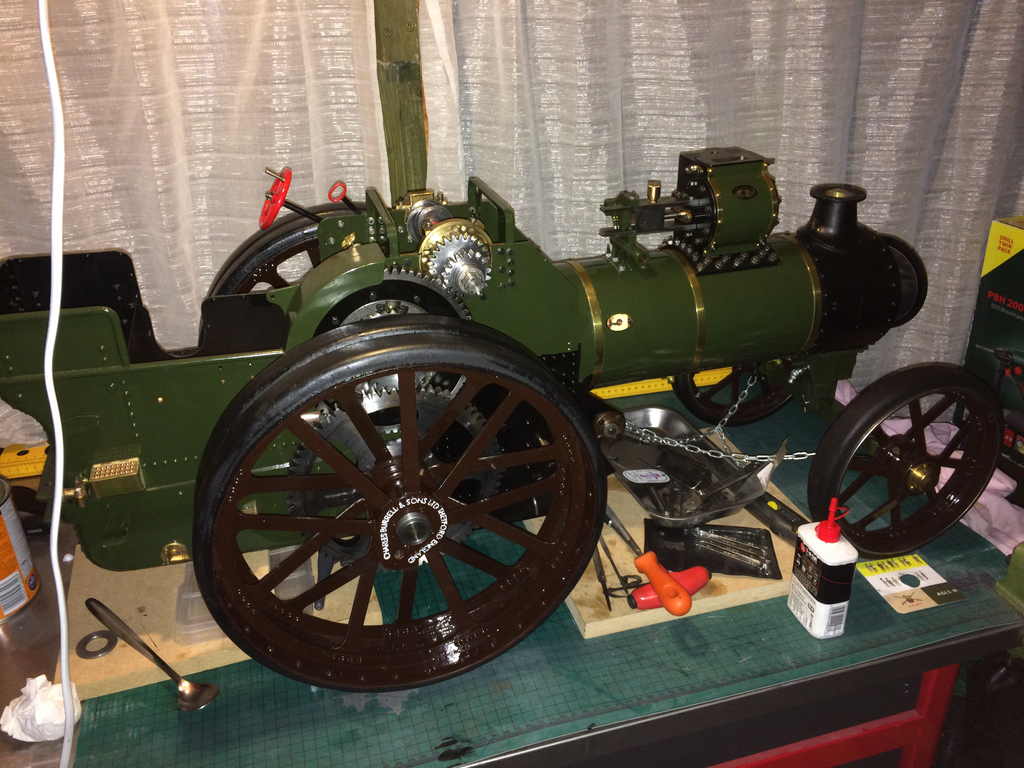
Been off the radar for a while but been busy the past few days working on the engine. So here goes.

So the diff is now assembled. I haven't yet fitted the roll pin to hold it all to its axle as I have had it on and off several times for fitting other pieces.

The spacer for the final drive was a little on the small side and so the final drive gear was fouling on the diff so I have to machine a washer to pack it out the extra 2mm or so. Nothing major but everything fits nice without any slop from side to side when the wheels are fitted.

So the diff is now assembled. I haven't yet fitted the roll pin to hold it all to its axle as I have had it on and off several times for fitting other pieces.

The spacer for the final drive was a little on the small side and so the final drive gear was fouling on the diff so I have to machine a washer to pack it out the extra 2mm or so. Nothing major but everything fits nice without any slop from side to side when the wheels are fitted.

Crazy_jim- Number of posts : 150
Age : 42
Location : Harrogate
Registration date : 2012-10-25
 Re: Build so far

Fitted the connecting rod and had a heart stopping moment when the crank locked up because the piston was hitting the top of the cylinder block preventing full rotation. A wee adjustment and all is well. But half hour of scratching my head and mild cursing.

Connecting rod trial fitted to crank. The photo angle makes my horn plates look wonky but rest assured they aren't!


Crazy_jim- Number of posts : 150
Age : 42
Location : Harrogate
Registration date : 2012-10-25
Page 5 of 7 •  1, 2, 3, 4, 5, 6, 7
 Similar topics
» Hi from a New Build
» Front tube plate plug
» 2" Burrel Builders first question!
» New boy on the block!
» New Build DCC
» Front tube plate plug
» 2" Burrel Builders first question!
» New boy on the block!
» New Build DCC
Page 5 of 7
Permissions in this forum:
You cannot reply to topics in this forum