
Mikes Road loco
Page 7 of 11 •  1, 2, 3 ... 6, 7, 8, 9, 10, 11
 ![]()
Re: Mikes Road loco
![]() lynnr Sat 20 Feb 2016, 4:24 pm
lynnr Sat 20 Feb 2016, 4:24 pm

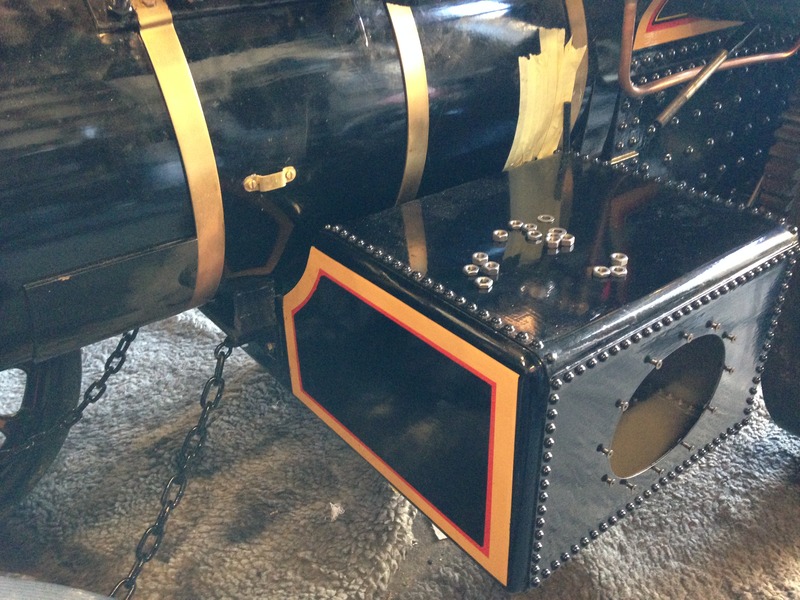
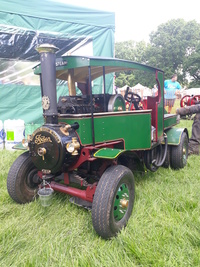
Also got the belly tank brackets changed over to the latest mod version. Tank remounted so I can sort the front bracket.
Ready for a steam test once the weather is not wet.

lynnr- Number of posts : 3242
Age : 55
Location : Highland, 4inch showman
Registration date : 2010-08-06
Road loco- Number of posts : 133
Location : Somerset
Registration date : 2014-08-04
Re: Mikes Road loco
![]() lynnr Sun 21 Feb 2016, 10:56 am
lynnr Sun 21 Feb 2016, 10:56 am
That is all.
Out.
lynnr- Number of posts : 3242
Age : 55
Location : Highland, 4inch showman
Registration date : 2010-08-06
Re: Mikes Road loco
![]() Road loco Sun 21 Feb 2016, 10:58 am
Road loco Sun 21 Feb 2016, 10:58 am
Road loco- Number of posts : 133
Location : Somerset
Registration date : 2014-08-04
Re: Mikes Road loco
![]() lynnr Sun 21 Feb 2016, 11:42 am
lynnr Sun 21 Feb 2016, 11:42 am
Weather wet and very cold.
Tidy up and tools away was a hint. But turns out to be a bit early.
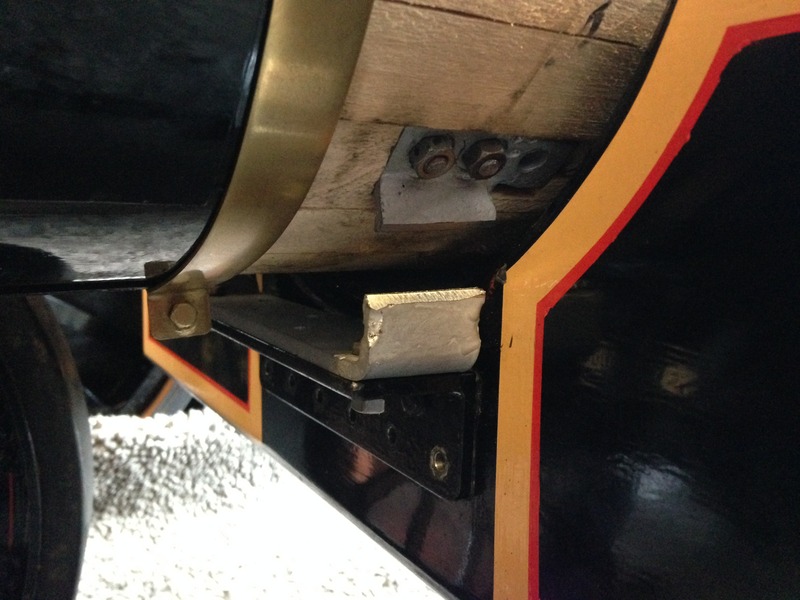
She is very close to complete. Just cotter pins to put in all over the motion. I have also cut the belly tank front mount ready to hot glue a bit in to make it fit the new rear tank mountings. Putting the tank in the correct location.
Nearly there.


Now for the bad news!
I think you have put the rear wheels together incorrectly. The hubs are too far in to the wheel. I guess this is why the brakes were off when delivered as they were binding up. I need to consult my book of words as there is an offset requirement when building. I think the hub as a slight polarity difference if I remember correctly.
lynnr- Number of posts : 3242
Age : 55
Location : Highland, 4inch showman
Registration date : 2010-08-06
Re: Mikes Road loco
![]() Road loco Sun 21 Feb 2016, 1:24 pm
Road loco Sun 21 Feb 2016, 1:24 pm
Road loco- Number of posts : 133
Location : Somerset
Registration date : 2014-08-04
Re: Mikes Road loco
![]() lynnr Sun 21 Feb 2016, 10:21 pm
lynnr Sun 21 Feb 2016, 10:21 pm
Only jobs left.
Cotter pins in valve gear, did not manage today.
Front belly tank bracket paint drying over tonight.
Remove belly tank and fit bracket and cleading.
Refit belly tank. Install balance pipe and end covers.
Attach steering chains, steering wheel shaft and worm.
Hook up water lifter steam supply pipe.
Create tails for all the oilers.
Big one. Sort the rear wheel fit or plan a brake assembly modification. By the way. I am only talking about 1/4" each side.
Next puzzle. Figure out how to turn the engine around in a space slightly less than her total length. Hummmm
Need her smokebox to front of garage for firing. Might be a trip down the driveway and back up on the push pole connected to the car.
lynnr- Number of posts : 3242
Age : 55
Location : Highland, 4inch showman
Registration date : 2010-08-06
Re: Mikes Road loco
![]() Road loco Mon 22 Feb 2016, 4:53 am
Road loco Mon 22 Feb 2016, 4:53 am
Road loco- Number of posts : 133
Location : Somerset
Registration date : 2014-08-04
Re: Mikes Road loco
![]() lynnr Mon 22 Feb 2016, 5:34 pm
lynnr Mon 22 Feb 2016, 5:34 pm
Progress made today. The big issue over the brakes binding on the wheels I have solved. Judicious grinding of flanges etc and many hours soaked up the wheels are on without binding.
Got the belly tank front fitting attached this morning

I think my bracket modifications will look fine. Saves waiting for the new one from STW.
Reminder to builders. Make sure you fit the backing flange for the drain pipework before you fit the cleading.


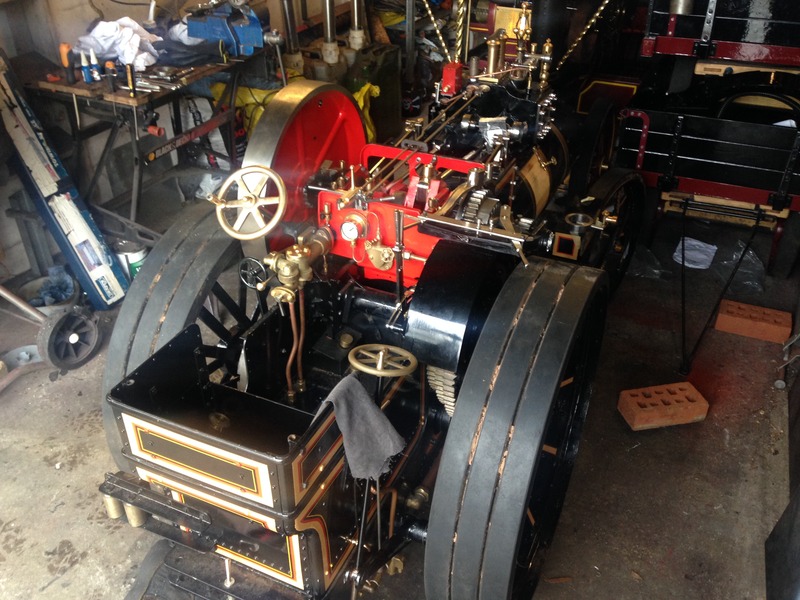
Belly tank mounted
Look who's back on her wheels!

A few things to tidy up and tighten up. Otherwise she is almost ready.

Belly tank end covers to fit.

Cotter pins in everything. Not clipped or curled until after testing.

Still to mark and cut the reverser quadrant and washer and pin the bottom pivot.
Still to make the wicks for the oil pots as the rear wheel and brake issue took up a lot of time today.
No first fire tomorrow. Finishing list is still too long and would make things rushed. Thursday or the weekend is now the target.
Not bad for 75 hours work to date.
lynnr- Number of posts : 3242
Age : 55
Location : Highland, 4inch showman
Registration date : 2010-08-06
Re: Mikes Road loco
![]() Road loco Mon 22 Feb 2016, 6:35 pm
Road loco Mon 22 Feb 2016, 6:35 pm
Road loco- Number of posts : 133
Location : Somerset
Registration date : 2014-08-04

lynnr- Number of posts : 3242
Age : 55
Location : Highland, 4inch showman
Registration date : 2010-08-06

lynnr- Number of posts : 3242
Age : 55
Location : Highland, 4inch showman
Registration date : 2010-08-06
Re: Mikes Road loco
![]() Road loco Tue 23 Feb 2016, 4:41 pm
Road loco Tue 23 Feb 2016, 4:41 pm
Road loco- Number of posts : 133
Location : Somerset
Registration date : 2014-08-04
Re: Mikes Road loco
![]() lynnr Tue 23 Feb 2016, 5:51 pm
lynnr Tue 23 Feb 2016, 5:51 pm
Today was meant to be snow but it has been a bright and sunny day.
lynnr- Number of posts : 3242
Age : 55
Location : Highland, 4inch showman
Registration date : 2010-08-06
Re: Mikes Road loco
![]() LiveSteam Tue 23 Feb 2016, 7:01 pm
LiveSteam Tue 23 Feb 2016, 7:01 pm
LiveSteam- Number of posts : 778
Location : Hampshire
Registration date : 2013-09-08
Re: Mikes Road loco
![]() lynnr Tue 23 Feb 2016, 8:08 pm
lynnr Tue 23 Feb 2016, 8:08 pm
I will get the macro lens out when I install the wicks to let you see what I do. Again no idea if it is correct but it works for me.
lynnr- Number of posts : 3242
Age : 55
Location : Highland, 4inch showman
Registration date : 2010-08-06
Re: Mikes Road loco
![]() hartshaulage Tue 23 Feb 2016, 8:28 pm
hartshaulage Tue 23 Feb 2016, 8:28 pm
Russ
hartshaulage- Number of posts : 231
Age : 35
Location : Ilkeston, Derbyshire
Registration date : 2014-01-22
Re: Mikes Road loco
![]() lynnr Tue 23 Feb 2016, 8:32 pm
lynnr Tue 23 Feb 2016, 8:32 pm
Worsted wood. It has to be untreated otherwise it does not work.
lynnr- Number of posts : 3242
Age : 55
Location : Highland, 4inch showman
Registration date : 2010-08-06
Re: Mikes Road loco
![]() lynnr Tue 23 Feb 2016, 8:38 pm
lynnr Tue 23 Feb 2016, 8:38 pm
Just realised I need another 2 wicks for the, not fitted, slidebar oilers.
lynnr- Number of posts : 3242
Age : 55
Location : Highland, 4inch showman
Registration date : 2010-08-06
Re: Mikes Road loco
![]() hartshaulage Tue 23 Feb 2016, 8:46 pm
hartshaulage Tue 23 Feb 2016, 8:46 pm
Russ
hartshaulage- Number of posts : 231
Age : 35
Location : Ilkeston, Derbyshire
Registration date : 2014-01-22
Re: Mikes Road loco
![]() lynnr Tue 23 Feb 2016, 9:06 pm
lynnr Tue 23 Feb 2016, 9:06 pm
Their pack even comes with drawings on the different styles in use. Golden rule ==== Always use soft copper wire for support ==== It it gets to the bearing surface. It don't score and kill the surface as its softer.
lynnr- Number of posts : 3242
Age : 55
Location : Highland, 4inch showman
Registration date : 2010-08-06
Re: Mikes Road loco
![]() Mark the spark Tue 23 Feb 2016, 9:07 pm
Mark the spark Tue 23 Feb 2016, 9:07 pm
Mark the spark- Number of posts : 389
Location : Edinburgh
Registration date : 2015-04-26
Re: Mikes Road loco
![]() hartshaulage Tue 23 Feb 2016, 9:34 pm
hartshaulage Tue 23 Feb 2016, 9:34 pm
Russ
hartshaulage- Number of posts : 231
Age : 35
Location : Ilkeston, Derbyshire
Registration date : 2014-01-22
Re: Mikes Road loco
![]() lynnr Wed 24 Feb 2016, 11:26 am
lynnr Wed 24 Feb 2016, 11:26 am

Traditionally, rotating parts have a bob wick i.e. no tail in the bottom of the pot. So the wick only gets oil when the crank is rotating and splashing in to the top of the pot. This stops the wick from emptying the pot when idle. I prefer the tail in to the bottom of the pot so oil gets into the bearing even when crank is stopped or going very slowly.
Crank done. Filled up with oil to test. The oil should be on the garage floor by tomorrow morning. Its -2 so the oil is very very thick so very good test.

Just another 8 oil wicks to make.
lynnr- Number of posts : 3242
Age : 55
Location : Highland, 4inch showman
Registration date : 2010-08-06
Re: Mikes Road loco
![]() Road loco Wed 24 Feb 2016, 12:21 pm
Road loco Wed 24 Feb 2016, 12:21 pm
Road loco- Number of posts : 133
Location : Somerset
Registration date : 2014-08-04
Page 7 of 11 • 1, 2, 3 ... 6, 7, 8, 9, 10, 11 ![]()
» What will it be? (next showmans/road loco kit)
» Lynn Robinson. Showman Scenic
» I spy with my little eye.......the sample flywheel!!!!
» Tone's Showmans second lot!
|
|
|