Road Loco - 'Blackbeard'
+25
MrStationHouse
richspoo
mikero
Steam Traction World
ejparrott
the coleman
iain
IanL
Robfishman
northburrell
Flasback
craig@STW
Graeme81
highpressure
Tim Watson
Brian M
Rickster
LilyJack
Steve Traill
hughb
sonick45
Kevster
lynnr
Tony King
bjwlancashire
29 posters
Page 14 of 17
Page 14 of 17 •  1 ... 8 ... 13, 14, 15, 16, 17
 Blackbeard
Only one thing to say mate brilliant just brilliant what a story.
I would love to understand more about these hills, its flat here where i live but if I ever get the chance would welcome some knowledge.
Please keep posting the outing reports they are so interesting, well done hope to meet you an at GDSF. I shall be there on the Friday and Saturday
Richard
I would love to understand more about these hills, its flat here where i live but if I ever get the chance would welcome some knowledge.
Please keep posting the outing reports they are so interesting, well done hope to meet you an at GDSF. I shall be there on the Friday and Saturday
Richard
richspoo- Number of posts : 15
Age : 70
Location : kings lynn norfolk
Registration date : 2013-05-06
 Re: Road Loco - 'Blackbeard'
Well not much build going on now although I have some things still to do like that bloody gear guard that seems to be all shapes from the tack welding of the front to the sides!!!!!
I did finally get the RH motion plate to fit and last night put the beading on and fitted it to the engine. I liked the fact Tim has used the curved motion cover on his showman's engine and added the extra beading up the front curve of the lower edge as it is on the full-size engines. As I did not use the LH cover vertical bead I decided I would do the same and boy did it take some bending, twisting and drilling to get it on and fitting snug - it was worth it though, I personally think it looks great. Just the bolts to paint today.
Sorry about the picture quality from my phone camera but my daughter has nicked the memory card out of my camera and left both batteries flat after going to see Robbie Williams at the weekend.


bjwlancashire- Number of posts : 938
Location : Mellor, Lancashire
Registration date : 2010-09-07
 Re: Road Loco - 'Blackbeard'
Looking very smart Brian.
John
John
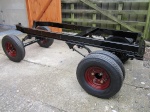
SSGR- Number of posts : 88
Age : 59
Location : North Yorkshire
Registration date : 2012-05-14
 Re: Road Loco - 'Blackbeard'
I finally got some videos off Declan's phone so here are a couple edited together into a compilation including the last two which are from last Saturday's day out. Some wonky bits and fingers on the lens but not to much 

bjwlancashire- Number of posts : 938
Location : Mellor, Lancashire
Registration date : 2010-09-07
 Re: Road Loco - 'Blackbeard'
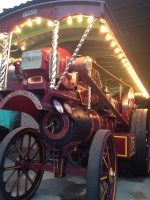
When are you going to get him cleaned. Tisk tisk.
lynnr- Number of posts : 3242
Age : 56
Location : Highland, 4inch showman
Registration date : 2010-08-06
 Road trip to Longridge Agricultural Show
Finally got the videos edited together, I will write abut it another day as I am just going to Astle Park rally right now.

bjwlancashire- Number of posts : 938
Location : Mellor, Lancashire
Registration date : 2010-09-07
 Re: Road Loco - 'Blackbeard'
Nice one brain you do like your road runs il being doing some next year.

the coleman- Number of posts : 216
Age : 55
Location : worthing
Registration date : 2011-06-07
 Re: Road Loco - 'Blackbeard'
Great vid Brian
Thanks for posting
Kev
Thanks for posting
Kev

Kevster- Number of posts : 424
Location : Hertfordshire 4 inch; DCC road loco
Registration date : 2011-01-27
 Re: Road Loco - 'Blackbeard'
Tremendous!!! Well done & as others have said, thanks for posting it!!
Regards,
Tony
Regards,
Tony
Tony King- Number of posts : 856
Age : 69
Location : scotland
Registration date : 2008-10-31
 Re: Road Loco - 'Blackbeard'
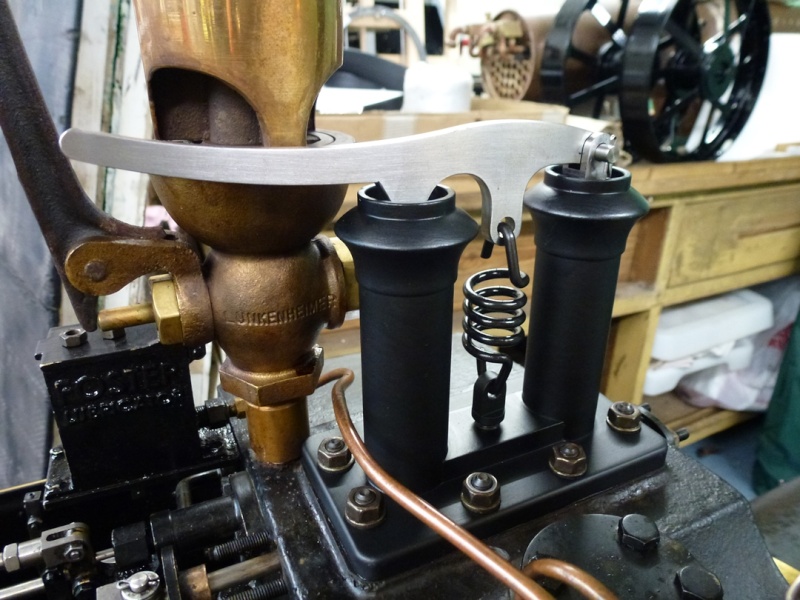
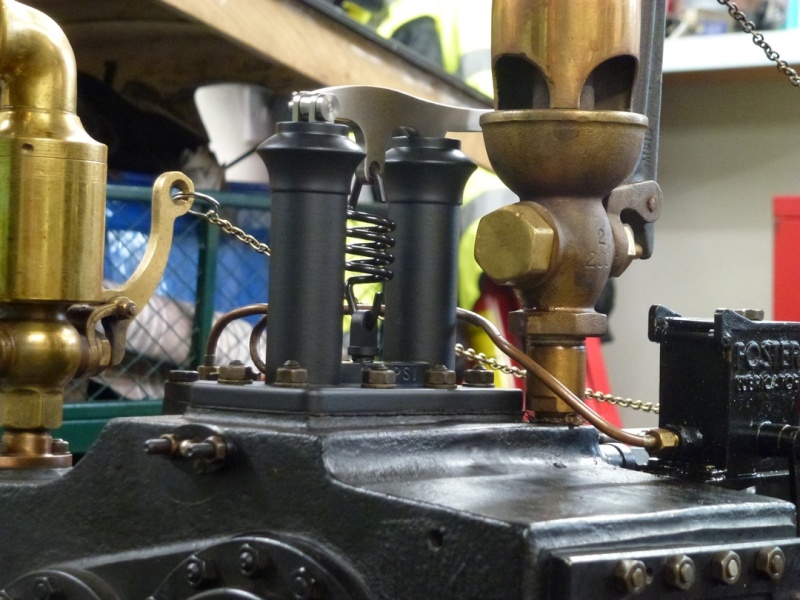
Managed to do one more job before the last outing to Onslow Park rally, took the safety valves off and stripped them down for painting with etching primer and then used the same engine paint as used on the cylinder block applied with a brush and it went on better than I thought it would if don't mind saying so myself. I also chemical blacked the spring and tried to do the other parts too then realised they are stainless steel which does not work so just debured and lightly polished them to make them look decent. Just need to paint all the nuts now and the lubricator oil pipe.


bjwlancashire- Number of posts : 938
Location : Mellor, Lancashire
Registration date : 2010-09-07
 Re: Road Loco - 'Blackbeard'
Look what I found on the net.

lynnr- Number of posts : 3242
Age : 56
Location : Highland, 4inch showman
Registration date : 2010-08-06
 Re: Road Loco - 'Blackbeard'
I know I found a few myself - we will have to ask Kevin why they ended up pushing him up the hill 

bjwlancashire- Number of posts : 938
Location : Mellor, Lancashire
Registration date : 2010-09-07
 Re: Road Loco - 'Blackbeard'
Couldn't manage to pull the skin off a rice pudding!!! That's why!!!!
On a serious note, not sure why it struggled on the second run up the hill, on the first attempt it managed admirably with a good solid bark from the exhaust but the chap filming didn't have this camera running, he has uploaded the Iphone first run I believe. I think we picked up an extra passenger on the second run which might be the difference, the safeties were lifting and the reg was still behaving at this point. The crap being flung up the chimney was quite amusing and had it been a touch darker we would have seen showers of sparks, which would have looked very good. Melted the bloody powder coat on the chimney base though!!!!
Shouldn't you have tagged this to my thread rather than Brians??
 Re: Road Loco - 'Blackbeard'
This is the proper run which I notice does have one less passenger, which means we seem to have found the engines limit!!
 Re: Road Loco - 'Blackbeard'
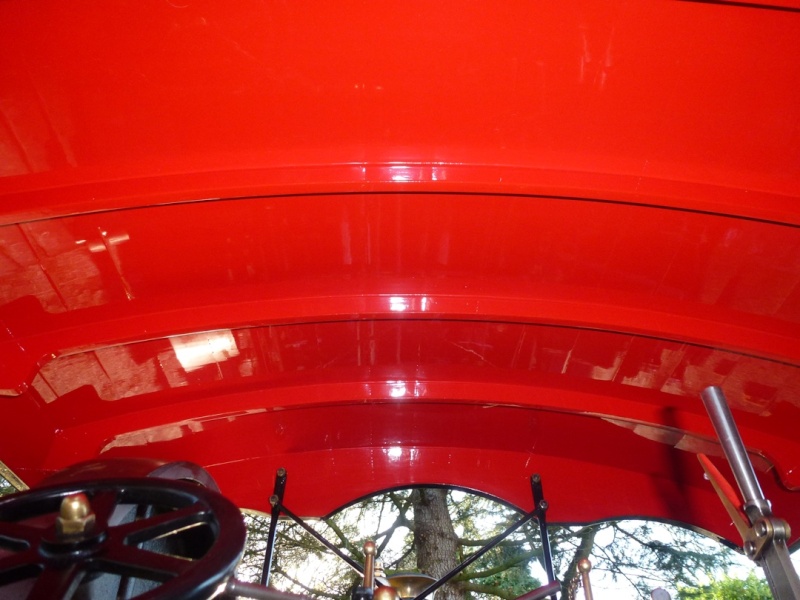
Well it has been a while but there is another update to getting Blackbeard finished, the roof is now painted and back at my house ready for going to the sign writers, and what an absolutely superb job my friend Dale has made of it. The underside is Ayres red, a colour used on Fife buses in the past (check out Google Images) and it really looks well, particularly the edges of the ribs which being plywood were really difficult to cover to make it look solid. I have to say that Nick (Sonic45) did a wonderful job on my tender and belly tank but he is now a dad and needs to find time to do his own things too. I did not realise Dale did painting to the level he achieves until this year and found out that he is doing it commercially too - he was responsible for the visual restoration of the vintage railway locomotive "Lion" including all the painting as he is responsible for the museum collections in the North West and works at National Museums, Liverpool.
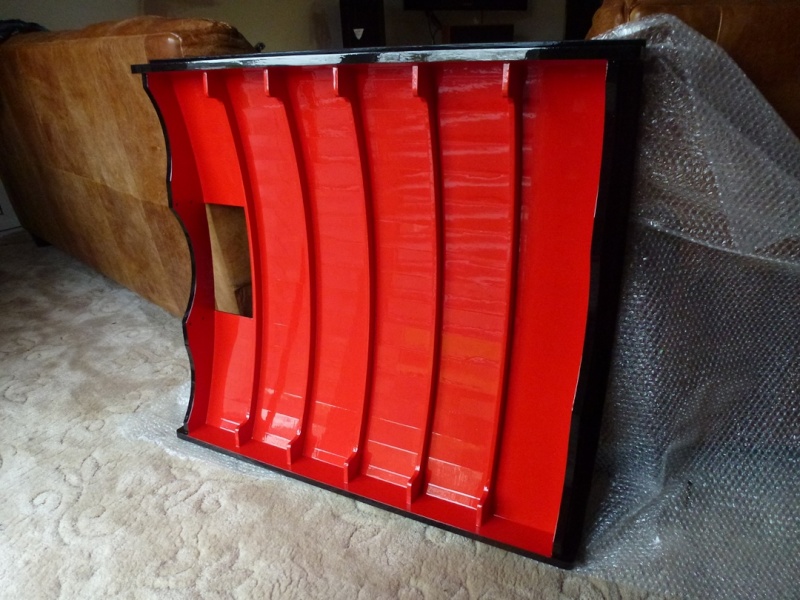
The wording on the canopy will be "RED ROSE HEAVY HAULAGE Ltd." and there will be a red Lancashire rose at either end of the sentence. For the font/style of letters I had not been able to decide what colours to use until I went to Dale's house last night to collect my canopy and when we discussed it he gave me an idea which just hearing it did not work and then I saw the lettering in a book he had, it is the lettering style and block shading as used by the Lancashire & Yorkshire Railway on their locomotives. The Lancashire connection was perfect and the letters looked great as they were designed for use on a black background as all the locos were black at this stage. The picture below is a bad mobile phone picture of the information in the book but it does give you an idea of what it is like.
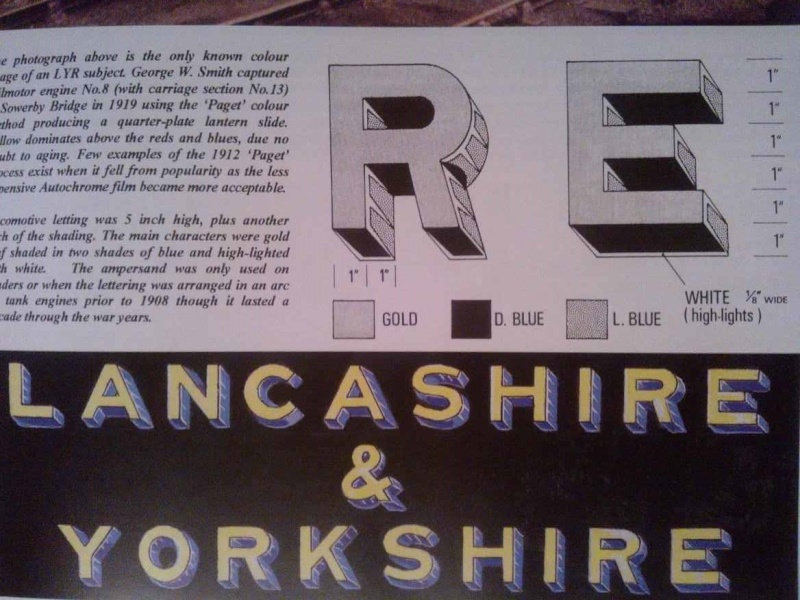
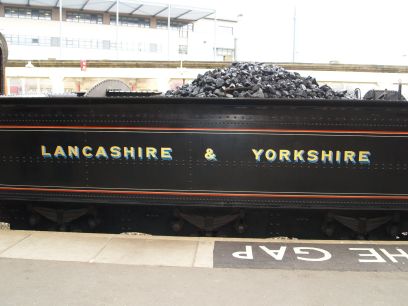


The wording on the canopy will be "RED ROSE HEAVY HAULAGE Ltd." and there will be a red Lancashire rose at either end of the sentence. For the font/style of letters I had not been able to decide what colours to use until I went to Dale's house last night to collect my canopy and when we discussed it he gave me an idea which just hearing it did not work and then I saw the lettering in a book he had, it is the lettering style and block shading as used by the Lancashire & Yorkshire Railway on their locomotives. The Lancashire connection was perfect and the letters looked great as they were designed for use on a black background as all the locos were black at this stage. The picture below is a bad mobile phone picture of the information in the book but it does give you an idea of what it is like.


bjwlancashire- Number of posts : 938
Location : Mellor, Lancashire
Registration date : 2010-09-07
 Re: Road Loco - 'Blackbeard'
Excellent on the roof and welcome back. The lettering looks exceedingly nice.

lynnr- Number of posts : 3242
Age : 56
Location : Highland, 4inch showman
Registration date : 2010-08-06
 Red roof
Really like the red roof, was going to do mine pale green but seriously thinking of a red underside now, great job.

Steve Traill- Number of posts : 800
Age : 67
Location : Illogan Redruth Cornwall
Registration date : 2008-06-29
 red roof
really nice I think mine is gonna be red to one day when I get that far, well done 

tractor mike- Number of posts : 74
Age : 40
Location : taunton somerset
Registration date : 2012-01-29
 Re: Road Loco - 'Blackbeard'
Well I finally took the safety valves off and got to the leaking regulator on Blackbeard to see what was causing my running on issues for the last couple of steamings.
Just to clarify, I had been using boiler treatment for a while, I had some priming issues which is normal on a new boiler and I had probably not been blowing down the boiler often enough as I think there is evidence of foliac build up around the valve on the cast iron valve face. I did blow down the boiler to empty at the Astle Park rally in mid-August and I have since run without treatment for the last four steamings blowing down to empty again after the last event at the Leigh Arms. The last two were the problematic ones and that would be after steaming at Dorset for a half day using the questionable water from the lagoon.
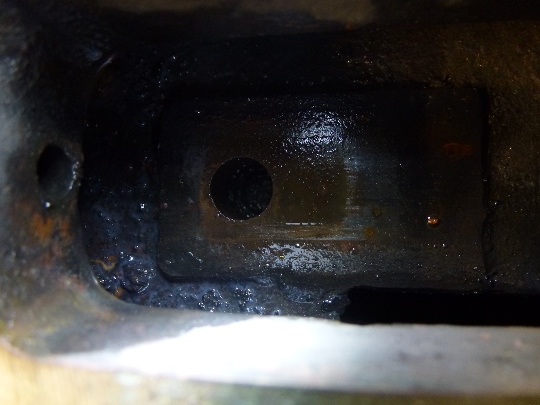
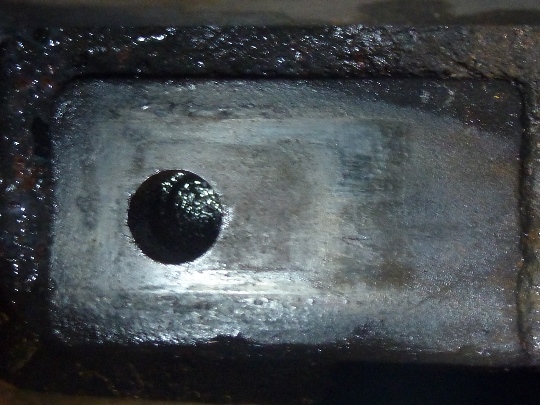
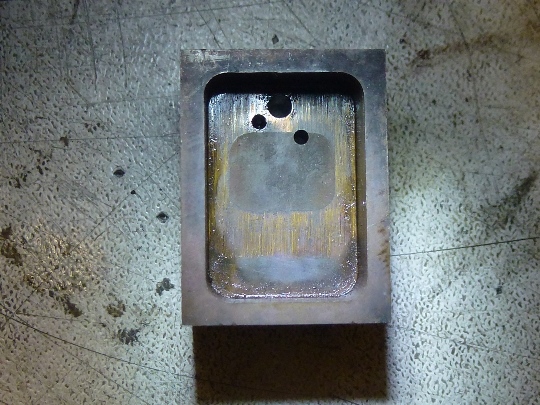
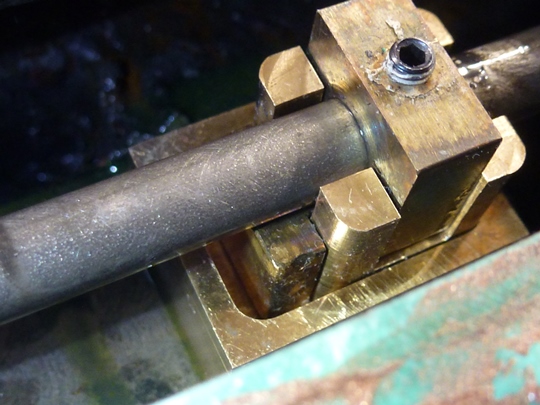
Here is before and after wiping of the cast iron valve face, you can see where the valve has been and the build up of material around the endges and partiucuarly at the front where the steam would be rushing into the hole as it becomes expeosed. I plan to scrape this clean using a scraper made from brass so as not to damage the cast iton surface. I will then LIGHTLY clean with a flat steel block and fine emery paper.
Here you can see the underside of the main valve itself and quite clearly there is a very dark area at the front of the valve where it would be close the hole in the cylinder block. this corresponds with the build up of material on the photos above. This could be made worse by having the valve just barely covering the hole to give maximum opening at full regulator handle travel, it was probably only overlapping by around 2mm. I intend to fit a solid regulator but I want to use it directly onto the cast iron surface for now and have decided on a round valve of 24mm diameter which does not reach to the edge of the machined surface but give a lot of surface area to seal on. Hopefully this will be fitted and tested this weekend all being well
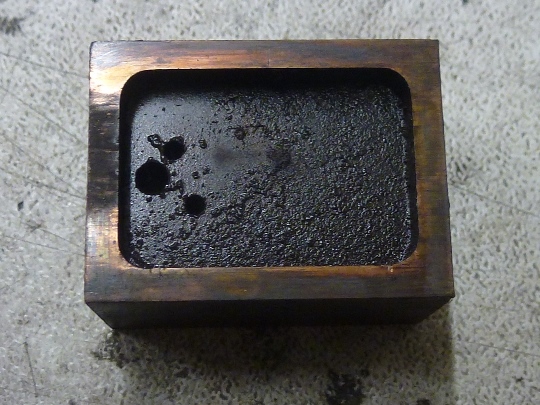
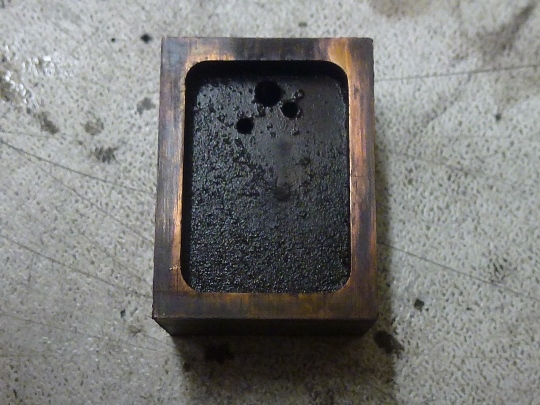
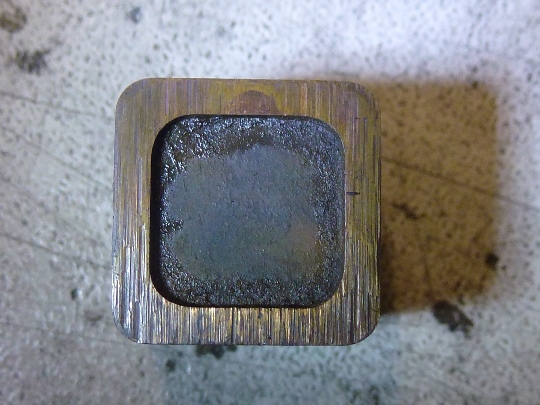
These last photos show the sealing faces of the two stage valve piece, as you can see from the main valve picture on the left there seems to be good overall marking proving that this part has a reasonable seal however, the underside of the small valve itself on the right hand picture does have some deep scoring so I am not sure if any steam actually got by this. It could be that because the small valve is in a recess in the large valv that any foreign matter would be trapped in this area to eventually find its way under the edge causing the scoring. there is also a witness mark showing here the largest of the three holes is when the regulator is fully closed. On my regulator I fitted a restrictor so that I only exposed the first hole and then the main valve was opened. When I spoke to Steve about the regulator being hollowed out underneath he informed me it was done after recommendation from a number of people he had spoke to. However, the localised higher pressure on the small valve could have contributed to the level of scoring here - in my own humble opinion.
For reference here is the designed condition in the open position.
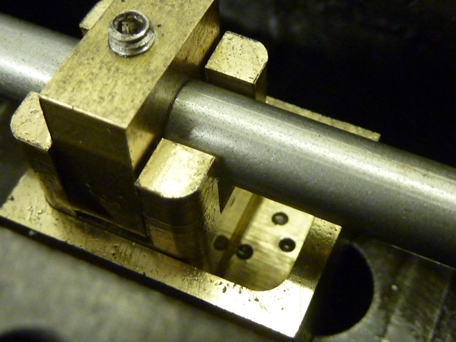
Here is the modified regulator set as it was for running with the maximum opening available compared to the design intent and also a picture of it closed.
[/url]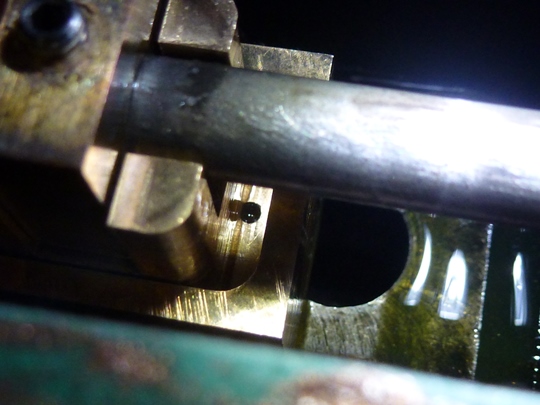
Just to clarify, I had been using boiler treatment for a while, I had some priming issues which is normal on a new boiler and I had probably not been blowing down the boiler often enough as I think there is evidence of foliac build up around the valve on the cast iron valve face. I did blow down the boiler to empty at the Astle Park rally in mid-August and I have since run without treatment for the last four steamings blowing down to empty again after the last event at the Leigh Arms. The last two were the problematic ones and that would be after steaming at Dorset for a half day using the questionable water from the lagoon.
Here is before and after wiping of the cast iron valve face, you can see where the valve has been and the build up of material around the endges and partiucuarly at the front where the steam would be rushing into the hole as it becomes expeosed. I plan to scrape this clean using a scraper made from brass so as not to damage the cast iton surface. I will then LIGHTLY clean with a flat steel block and fine emery paper.


Here you can see the underside of the main valve itself and quite clearly there is a very dark area at the front of the valve where it would be close the hole in the cylinder block. this corresponds with the build up of material on the photos above. This could be made worse by having the valve just barely covering the hole to give maximum opening at full regulator handle travel, it was probably only overlapping by around 2mm. I intend to fit a solid regulator but I want to use it directly onto the cast iron surface for now and have decided on a round valve of 24mm diameter which does not reach to the edge of the machined surface but give a lot of surface area to seal on. Hopefully this will be fitted and tested this weekend all being well


These last photos show the sealing faces of the two stage valve piece, as you can see from the main valve picture on the left there seems to be good overall marking proving that this part has a reasonable seal however, the underside of the small valve itself on the right hand picture does have some deep scoring so I am not sure if any steam actually got by this. It could be that because the small valve is in a recess in the large valv that any foreign matter would be trapped in this area to eventually find its way under the edge causing the scoring. there is also a witness mark showing here the largest of the three holes is when the regulator is fully closed. On my regulator I fitted a restrictor so that I only exposed the first hole and then the main valve was opened. When I spoke to Steve about the regulator being hollowed out underneath he informed me it was done after recommendation from a number of people he had spoke to. However, the localised higher pressure on the small valve could have contributed to the level of scoring here - in my own humble opinion.


For reference here is the designed condition in the open position.

Here is the modified regulator set as it was for running with the maximum opening available compared to the design intent and also a picture of it closed.
[/url]


bjwlancashire- Number of posts : 938
Location : Mellor, Lancashire
Registration date : 2010-09-07
 Re: Road Loco - 'Blackbeard'
Interesting photos for reference, certainly looks like a steam leak on the main valve and the secondary valve scoring cant be good, no wonder you were having issues. I have the two solid test regulators here, one hollowed and one not, Steve said for me to send them to you for trials if you want them. PM me your address and I'll get then in the post.
 Re: Road Loco - 'Blackbeard'
Kev
Steve is making me a solid round one, possibly could be in the post today - personal preference and a good comparison as I have driven Dwain's engine which has a nice regulator, let me see how that goes first. Which did you use in your test video and accompanying description, the hollowed out one or the solid face?
Brian

bjwlancashire- Number of posts : 938
Location : Mellor, Lancashire
Registration date : 2010-09-07
 Re: Road Loco - 'Blackbeard'
The test valve was from Julia and is a soild faced rectangular one, obviously faced to the insert too.
 Re: Road Loco - 'Blackbeard'
Well I recently got some time to fit the new solid 24mm round regulator to Blackbeard that Steve sent me in the post along with a new injector globe valve body and valve stem.
First I used a sharpened piece of brass to scrape away the build up of crud (foliac??) that had formed on the valve face around the valve, then using a piece of emery wrapped around a piece of tool steel I patiently rubbed the valve face to clean it up making sure I was not just rubbing in one place. A change to a finer grade was used to finish off. I did not get rid of every last witness mark of where the old valve had been sitting but got rid of the dark areas where steam had been getting by. I then put some very fine emery on my surface plate and in a circular motion carefully polished the bottom of the regulator valve. During assembly of the new valve I also changer the PTFE packing for some graphite impregnated stuff in the rear gland. I adjusted the valve so that the edge overlapped the hole by at least 4-5mm. This still gave me a valve that would uncover around 80% of the steam port. Please note that this regulator does not include the insert that sits inside the steam port, this is a different solution to that Kev has been trialling on His Majesty - my own personal preference after driving Dwain's engine and I thank Steve for doing this different one for me.
Due to a lot of things going on at home and a spending a week away on business (including getting caught in the Heathrow fiasco on Saturday) I finally got to test Blackbeard's new regulator valve at the weekend, or rather my friend did as I rode on the trailer. 4 miles up and down dark country roads in the rain with some steep hills, second gear blowing off was the limit on one of the hills. The regulator was working very nice and was sealing, I had the odd weep past but it was not the regulator but the starter button still managing to let a very light wisp of steam past some times, the engine never ran on when driving but you could hear the slightest hiss in the chimney when you stopped. I quick prod and the ball would seal so I just need to do a proper job of getting the sealing face right by hitting a solid ball on it hard - Flashback's advice.
I also replaced the injector globe valve with a new valve body and valve stem which Steve tells me are now made using a different set up which better maintains the concentricity of the various parts to ensure a good seal. The new valve worked once it had been tightened down a little and I can inject water easily again.
No photos this time as I forgot to take any when I put the valve in and it was too dark and wet to bother with the camera while we were out on the test run. We certainly surprised a few people walking dogs as we approached in the dark. Two flashing cycling lights clipped to the number plate at the front, one large magnetic white LED lamp stuck to the front of the toolbox, two flashing red cycling lights clipped to the back of the water bowser and a big flashing yellow light taped to the top of a car battery and sat in the back of the trailer. I did also light the oil lamps but they were not lit when we got back, could just be we burnt all the oil in the tanks. Also wearing hi-vis waterproofs too and we survived the trip, with no animosity from car drivers, just the odd friendly wave and one even stopped to make sure we were alright when we had pulled up for a minute.
Double seat is nearly finished and the chimney is now off and going for re-powder coating this week so hopefully I can get some good pictures of the engine with it's painted roof on and the chimney looking good again because I plan to enter Blackbeard into the NTET 60th Anniversary road run starting from Old Warden. SONIC45 can join us if we get in and ride along or share some of the driving unless he has a bigger engine in the run.
Next steam up is CHRISTMAS DAY!!!!

bjwlancashire- Number of posts : 938
Location : Mellor, Lancashire
Registration date : 2010-09-07
 Re: Road Loco - 'Blackbeard'
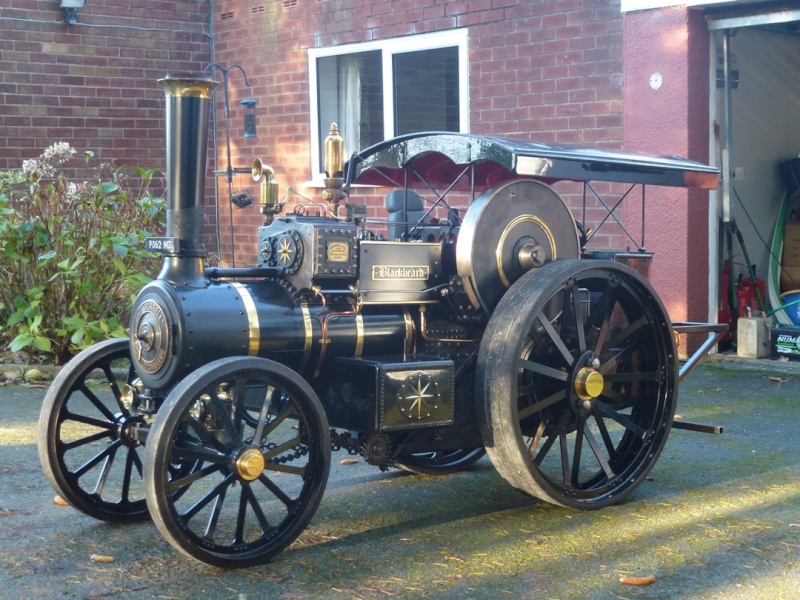
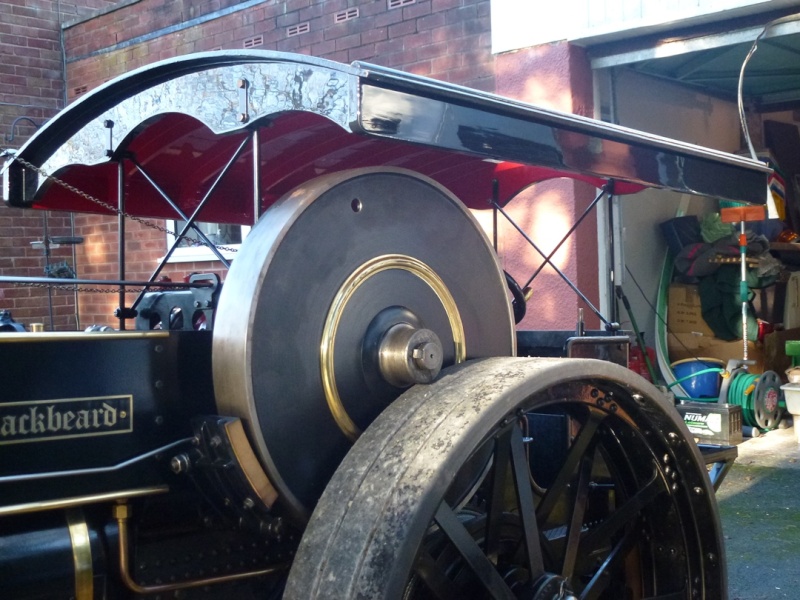
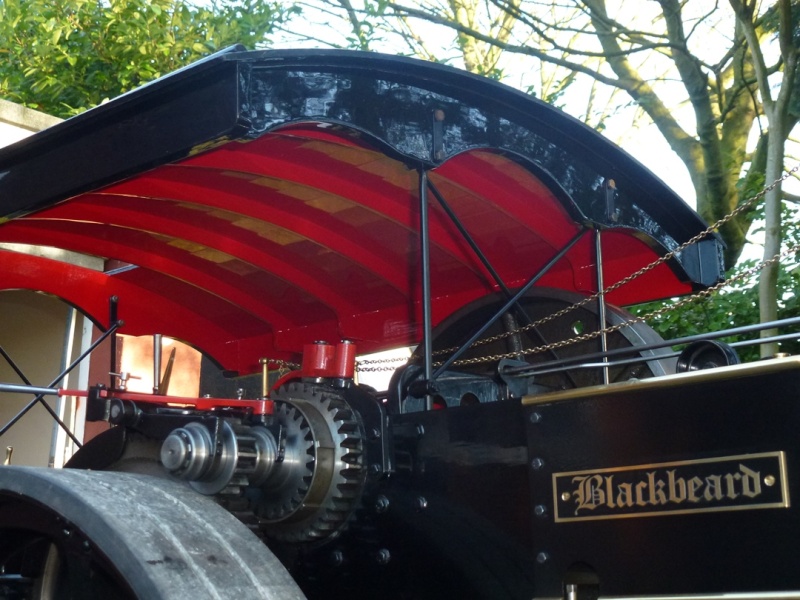
Well I need to put some pictures on of Blackbeard with the painted roof on here so here goes.


bjwlancashire- Number of posts : 938
Location : Mellor, Lancashire
Registration date : 2010-09-07
 Re: Road Loco - 'Blackbeard'
Looking very nice indeed

Kevster- Number of posts : 424
Location : Hertfordshire 4 inch; DCC road loco
Registration date : 2011-01-27
Page 14 of 17 •  1 ... 8 ... 13, 14, 15, 16, 17
 Similar topics
» STW 2" road loco
» DCC road loco
» Road Loco wagon
» Andy's 4"dcc road loco
» New Batch 4" DCC Road Loco
» DCC road loco
» Road Loco wagon
» Andy's 4"dcc road loco
» New Batch 4" DCC Road Loco
Page 14 of 17
Permissions in this forum:
You cannot reply to topics in this forum