Road Loco - 'Blackbeard'
+25
MrStationHouse
richspoo
mikero
Steam Traction World
ejparrott
the coleman
iain
IanL
Robfishman
northburrell
Flasback
craig@STW
Graeme81
highpressure
Tim Watson
Brian M
Rickster
LilyJack
Steve Traill
hughb
sonick45
Kevster
lynnr
Tony King
bjwlancashire
29 posters
Page 2 of 17
Page 2 of 17 •  1, 2, 3 ... 9 ... 17
 Re: Road Loco - 'Blackbeard'
All those tiny rivet bolts.. 
 = saw fingertips
I found a couple of long sash clamps came in really useful when manipulating the sides together getting the final few holes to meet up.

I found a couple of long sash clamps came in really useful when manipulating the sides together getting the final few holes to meet up.

sonick45- Number of posts : 511
Location : Barton-Le-Clay (Beds)
Registration date : 2009-01-26
 Re: Road Loco - 'Blackbeard'
Ouch,
How many bolts are used (I don't want to open the box after seeing all those holes )?
)?
Regards,
Brian M
How many bolts are used (I don't want to open the box after seeing all those holes
Regards,
Brian M
Brian M- Number of posts : 261
Location : Cheshire
Registration date : 2011-01-30
 Re: Road Loco - 'Blackbeard'
Not many per inch!
Tim
Tim

Tim Watson- Number of posts : 585
Location : Herts
Registration date : 2008-07-02
 Re: Road Loco - 'Blackbeard'
Having just done the tender that was like the starter before the main course, belly tank still in box yet though 
Just been fighting with axle bearings trying to get the axle through without polishing to much out of the bearing, the bearing was lightly oval when measured - a good lead on the axle ends would have helped though
Just been fighting with axle bearings trying to get the axle through without polishing to much out of the bearing, the bearing was lightly oval when measured - a good lead on the axle ends would have helped though

bjwlancashire- Number of posts : 938
Location : Mellor, Lancashire
Registration date : 2010-09-07
 Re: Road Loco - 'Blackbeard'
Brian M wrote:What a great idea, if the Sunday is for customers anyway, why not hold informal workshops (between the beer drinkingRickster wrote:Hi Brian,
If it helps, I can bring some scrap I practised with, paint, lining tape and brushes, to show you how I did my lining - I have spare tape so you can get a feel for it yourself. I will be there on the Sunday. I'm not saying my way is the only way, just that I'm offering to try to help if you need it.
Let me know.
cheers
Rick) on best practice. I would certainly listen any speakers on their advice (as I am about to build my belly tank
) .
All the best,
Brian
Rick
I would like to take you up on your kind offer of practice for painting on the Sunday. I do not have any materials lying around the workshop to practice on apart from one spoke. Also, I notice Sonick proposed bringing his masking film and compasses to demosntrate how he achived some of his curves.
I can't waint for Sunday now, so much expertise/knowledge in one place, we will need Health & Saftey involved

bjwlancashire- Number of posts : 938
Location : Mellor, Lancashire
Registration date : 2010-09-07
 Re: Road Loco - 'Blackbeard'
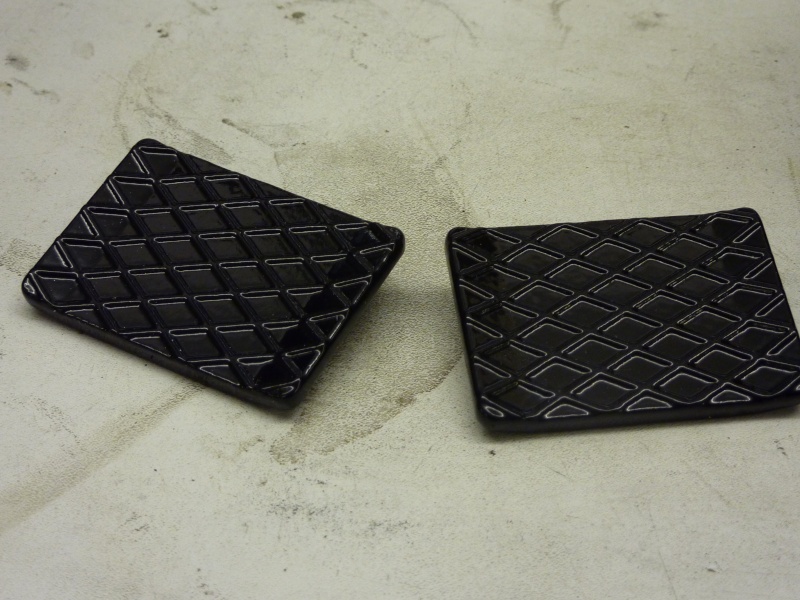
Here are a couple of photos of the latest batch powder coating by my brilliant anonymous contact who is helping provide such a good durable finish to many of Blackbeard's parts - 0.5mm thick. A few of you asked about the finish on my front end at the open weekend and were amazed to find out that the currency for doing business is fags!!!
Seriously though, the second shaft tube, axle and oil boxes plus many other parts are in the line of fire for damage due to firing etc. as the access to the fire hole is not so easy as some of you ahead of me are probably realising. How many time will we knock paint off with a mis directed shovel, lump of coal, frying pan etc.. Also the sides of the oilboxes are now sealed
Crankshaft bearing housings, water pumb shaft bearing, flywheel brake pivot shaft, tender steps, plus other small items also done - the finsh is good if "industrial" but thats what I wanted. Dad is having a go at painting the hornplates at the moment (in know some of you are tutting already!) ready for the final asembly to the boiler, just top coats of coach paint to do. I will collect boiler either tomorrow or next Tuesday. Just need to make the space for it, nearly time for the first major milestone - standing on it's wheels in the garage.
My car is going to hate me after this!!

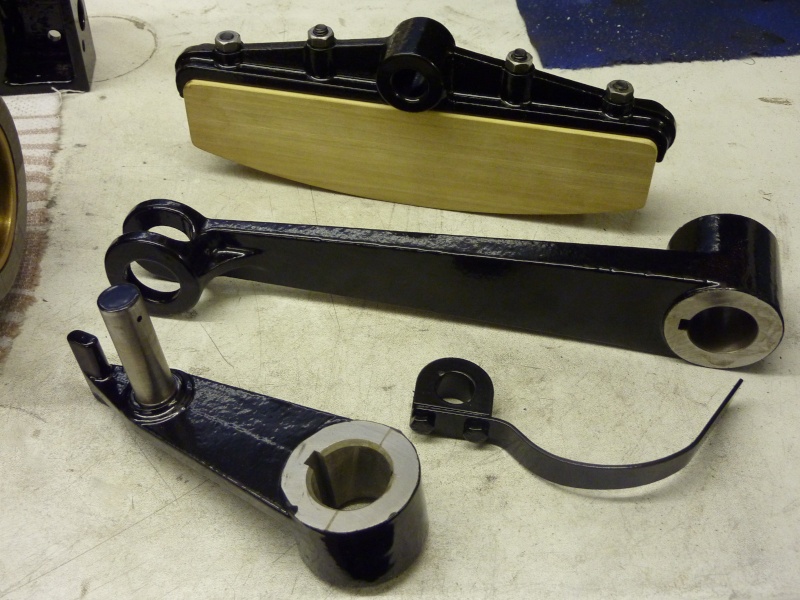

Seriously though, the second shaft tube, axle and oil boxes plus many other parts are in the line of fire for damage due to firing etc. as the access to the fire hole is not so easy as some of you ahead of me are probably realising. How many time will we knock paint off with a mis directed shovel, lump of coal, frying pan
Crankshaft bearing housings, water pumb shaft bearing, flywheel brake pivot shaft, tender steps, plus other small items also done - the finsh is good if "industrial" but thats what I wanted. Dad is having a go at painting the hornplates at the moment (in know some of you are tutting already!) ready for the final asembly to the boiler, just top coats of coach paint to do. I will collect boiler either tomorrow or next Tuesday. Just need to make the space for it, nearly time for the first major milestone - standing on it's wheels in the garage.
My car is going to hate me after this!!


bjwlancashire- Number of posts : 938
Location : Mellor, Lancashire
Registration date : 2010-09-07
 Paint job
Hi Brian,
Having seen "President" a couple of weeks ago, I have to admit that Black is a really smart colour to have on these engines!!
I reckon yours is going to be a real head turner!! Enjoy seeing how your getting on, the boiler is as you say a real mile stone....Very exciting & boy does it give you some idea of the size & weight of these things!!
Keep the pictures comming!!
Regards,
Tony
Tony King- Number of posts : 856
Age : 69
Location : scotland
Registration date : 2008-10-31
 Re: Road Loco - 'Blackbeard'
Hi
I rember when I did my 2" all the bits But yours are a lot more . Pluss they are bigger. Love the work
thanks for posting well done
I rember when I did my 2" all the bits But yours are a lot more . Pluss they are bigger. Love the work
thanks for posting well done
hughb- Number of posts : 575
Age : 54
Location : hertfordshire
Registration date : 2009-03-13
 Re: Road Loco - 'Blackbeard'
Thanks for the positive comments folks. The only frustrating bit is all the masking it takes to ensure you only get 0.5mm of coating on the bits you want. Taking it off is satifying though.
Collecting boiler on Tuesday and if I am not mistaken the fire hole door parts come with it so they are perfect for poweder coating. Must remember to leave lots of clearance on the runners though.
More pictures very soon - front end and hornplate assembly to boiler.
Brian
Collecting boiler on Tuesday and if I am not mistaken the fire hole door parts come with it so they are perfect for poweder coating. Must remember to leave lots of clearance on the runners though.
More pictures very soon - front end and hornplate assembly to boiler.
Brian

bjwlancashire- Number of posts : 938
Location : Mellor, Lancashire
Registration date : 2010-09-07
 Re: Road Loco - 'Blackbeard'
If your coater can do chemical blackening that would be better for the door assembly and also the steering chains. I believe the one I use can do this as they are "metal finishers" not just powder coaters. On my agricultural the smoke box door is always sticky cos the damm stuff gets soft with heat, I suspect it would just run off the inside of the fire doors!!!. It has sagged on the perch bracket of the other engine because of the heat.
Kev.
Kev.
 Re: Road Loco - 'Blackbeard'
Kev
Thanks for that advice, I may use the matt black BBQ paint on the doors. I am going to put that on the boiler too. Probably still powder coat the levers though - I will ask the Manager at my source, he understands what I am building, he is currently building a Wallis Simplicity roller.
Brian
Thanks for that advice, I may use the matt black BBQ paint on the doors. I am going to put that on the boiler too. Probably still powder coat the levers though - I will ask the Manager at my source, he understands what I am building, he is currently building a Wallis Simplicity roller.
Brian

bjwlancashire- Number of posts : 938
Location : Mellor, Lancashire
Registration date : 2010-09-07
 Re: Road Loco - 'Blackbeard'
I recently put the brake components together for the first time to do a sanity check on assembly with the powder coating on and to see how the part look together. All went well after I got the brake shaft the correct way round. My shaft is a modified one with keyways for the operating arm at both ends but at two different angles relative to the brake arm key ways. This is reference an update from STW regarding brake material to be provided at a later date for thos who are still to get to this point. Unfortunately there was no red paint on my particular brake shaft to say which way round it goes and, you guessed it, I put it the wrong way the first time I tried it 
Anyhow, got it the right way, put it together and it needed the two washers that were included to be put on the end of the shaft, inside the brake arm bore - the shaft is slightly shorter than what is actually required and the washers fill the gap so the large washers that retain the brake arms are clamped against the end of the shaft.

Anyhow, got it the right way, put it together and it needed the two washers that were included to be put on the end of the shaft, inside the brake arm bore - the shaft is slightly shorter than what is actually required and the washers fill the gap so the large washers that retain the brake arms are clamped against the end of the shaft.


bjwlancashire- Number of posts : 938
Location : Mellor, Lancashire
Registration date : 2010-09-07
 Re: Road Loco - 'Blackbeard'
Well I got there, that amazing milestone of finally getting my boiler!! I just wanted to point out the obvious to those who already have one and for those that have yet to collect - it is heavy, 145kg!!! 
On Tuesday two guys managed to pick up the boiler at STW and carry it to my car but once it is in the car it is a different proposition when you get home.
1) Make sure there are enough people to help, there was three of us
2) Ensure you are all wearing steel toe capped boots.
3) Ideally have lifting gear available - the boiler is a dead weight and why struggle when it can be done easily and safely
Room for two in there!!

The boiler was carefully slid out of car onto the two blocks of wood so positioned as to miss the fire hole door mounting plate to avoid the possibility of distorting it.

It was then laid in the normal position on more wood blocks under the boiler barrel. The slings were then positioned and connected to the engine bracket in an attempt to balance the boiler, allow for the strap lengths and allow enough space for the straps on the hook as the hook on the engine hoist is only small enough for two loops and still allow the locking catch to spring back in place preventing the sling from coming out of the hook.
The slings are 1 ton capacity each, more than enough to lift the whole engine (Road Loco) when complete. We should only ever need to lift one half at once so there is more than enough safety factor. Also, the engine hoist is in its shortest position giving the maximum 2 ton lifting capacity and keeping the load as stable as possible when moving it the 40 feet to the garage. I could not drive up to the garage at the back of the house due to various obstructions along the way.
Two moved the hoist and one steadied the boiler to prevent it swinging.

The smokebox end was set on an axle stand at a height to allow for mounting the smokebox assembly and fitting of the front wheels. The firebox end was set on wood blocks allowing for the boiler barrel having a slight slope back to the firebox.

Voila!

Last night I managed an hour and a half in the workshop after my daughter went to bed and while my wife was still at the Neil Diamond concert with her mum (she also leads an exciting life ). I put the smokebox on using the left over wheel assembly nuts and bolts. I then fitted one wheel. I just needed to clear the paint overspray from end of the wheel hub bushes where it is against the axle and the retaining collar. I hope to do the other one tonight as we are off to the Cheshire Rally on Friday night for the weekend.


On Tuesday two guys managed to pick up the boiler at STW and carry it to my car but once it is in the car it is a different proposition when you get home.
1) Make sure there are enough people to help, there was three of us
2) Ensure you are all wearing steel toe capped boots.
3) Ideally have lifting gear available - the boiler is a dead weight and why struggle when it can be done easily and safely
Room for two in there!!

The boiler was carefully slid out of car onto the two blocks of wood so positioned as to miss the fire hole door mounting plate to avoid the possibility of distorting it.

It was then laid in the normal position on more wood blocks under the boiler barrel. The slings were then positioned and connected to the engine bracket in an attempt to balance the boiler, allow for the strap lengths and allow enough space for the straps on the hook as the hook on the engine hoist is only small enough for two loops and still allow the locking catch to spring back in place preventing the sling from coming out of the hook.
The slings are 1 ton capacity each, more than enough to lift the whole engine (Road Loco) when complete. We should only ever need to lift one half at once so there is more than enough safety factor. Also, the engine hoist is in its shortest position giving the maximum 2 ton lifting capacity and keeping the load as stable as possible when moving it the 40 feet to the garage. I could not drive up to the garage at the back of the house due to various obstructions along the way.
Two moved the hoist and one steadied the boiler to prevent it swinging.

The smokebox end was set on an axle stand at a height to allow for mounting the smokebox assembly and fitting of the front wheels. The firebox end was set on wood blocks allowing for the boiler barrel having a slight slope back to the firebox.

Voila!

Last night I managed an hour and a half in the workshop after my daughter went to bed and while my wife was still at the Neil Diamond concert with her mum (she also leads an exciting life


bjwlancashire- Number of posts : 938
Location : Mellor, Lancashire
Registration date : 2010-09-07
 Re: Road Loco - 'Blackbeard'
looking great, she is starting to take shape

Graeme81- Number of posts : 178
Location : Ireland
Registration date : 2009-05-25
 Re: Road Loco - 'Blackbeard'
Sure is Graeme, hornplates are almost finsihed painting too so not far from being able to slide the axle through and pop that on the axle stands.
Incidentally, just collected the Frost Auto blacking kit at lunch time. Thanks to Tony for the reccomendation in the Kit 16 thread in the 4" DCC section. I can sort the fire hole doors out next week!!
Brian
Incidentally, just collected the Frost Auto blacking kit at lunch time. Thanks to Tony for the reccomendation in the Kit 16 thread in the 4" DCC section. I can sort the fire hole doors out next week!!
Brian

bjwlancashire- Number of posts : 938
Location : Mellor, Lancashire
Registration date : 2010-09-07
 Re: Road Loco - 'Blackbeard'
oh so jealous.
Looking really good Brian.
I've been working on the Tiger the last few weeks readying for the season. Still saving hard for the boiler.
I've found a supplier for working drain cocks for the tender.
Got one delivered yesterday. (very nice too) i'll post a thread on here so others can see if they wish to get them too.
I didn't like the idea of having stuff on the engine which is just for show.. things should work as far as i'm concerned, even if they aren't used very often.
Looking forward to catching up at Bedford.
Nick
sonick45- Number of posts : 511
Location : Barton-Le-Clay (Beds)
Registration date : 2009-01-26
 Re: Road Loco - 'Blackbeard'
sonick45 wrote:oh so jealous.
I've found a supplier for working drain cocks for the tender.
Got one delivered yesterday. (very nice too) i'll post a thread on here so others can see if they wish to get them too.
I didn't like the idea of having stuff on the engine which is just for show.. things should work as far as i'm concerned, even if they aren't used very often.
Tender drain cocks sounds interesting, I was going to modify the ones we got as per the description by Tim Watson elsewhere on here. However, for speed if they look right and work then I am always interested. One question is the thread, is it the same as already cut into the tender for the dummy ones?
I was also considering a water level indicator on the man stand. I have seen one on the Bosworth's Foster, Sprig and noticed that The President has one while looking at the STW photo CD. It is a tube with an indicator, basically a small rod with a pointer on the end and a float on the other end. Bothe engines have it just by the water pump feed pipe coming through the man stand floor.
Brian

bjwlancashire- Number of posts : 938
Location : Mellor, Lancashire
Registration date : 2010-09-07
 Re: Road Loco - 'Blackbeard'
The thread is bigger so you will have to re drill the holes to 1/8".
The tender cocks are bigger but don't look out of place in my mind..
I was going to put a float type device in the corner by the water pump and a dip stick on the belly tank as it is this that feeds the tender so if the float drops you know you only have the tender left full and will need to fill the belly tank.
i'll put the photos of the try cock on here sometime this afternoon.
Nick
sonick45- Number of posts : 511
Location : Barton-Le-Clay (Beds)
Registration date : 2009-01-26
 Re: Road Loco - 'Blackbeard'
i would have gone to the Neil Diamond concert  i actually quite like him

craig@STW- Number of posts : 1410
Location : location Location
Registration date : 2010-05-06
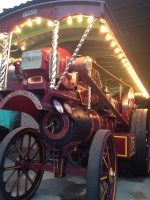
 Progress
Progress indead!
Nice to see these engines going together.
Nice to see these engines going together.
lynnr- Number of posts : 3242
Age : 56
Location : Highland, 4inch showman
Registration date : 2010-08-06
 Re: Road Loco - 'Blackbeard'
craig@STW wrote:i would have gone to the Neil Diamond concerti actually quite like him

I'm afraind Danielle and I are going to Iron Maiden next weekend - it was a difficult choice but the right one on the end

bjwlancashire- Number of posts : 938
Location : Mellor, Lancashire
Registration date : 2010-09-07
 Re: Road Loco - 'Blackbeard'
bjwlancashire wrote:craig@STW wrote:i would have gone to the Neil Diamond concerti actually quite like him

I'm afraind Danielle and I are going to Iron Maiden next weekend - it was a difficult choice but the right one on the end
gonna have to agree to disagree on that one

craig@STW- Number of posts : 1410
Location : location Location
Registration date : 2010-05-06
 Re: Road Loco - 'Blackbeard'
For those of you who have looked at my lamp brackets and intend to use the sketch I loaded onto the forum, I checked the clearance to the front wheel tonight and it misses 


This is at all angles of steering with it lifted up until axle movement is halted by the pivot bracket - our lamps are safe, just need to drill the hole in the lamp so I can bolt them in place to stop them dissapearing.

This is at all angles of steering with it lifted up until axle movement is halted by the pivot bracket - our lamps are safe, just need to drill the hole in the lamp so I can bolt them in place to stop them dissapearing.


bjwlancashire- Number of posts : 938
Location : Mellor, Lancashire
Registration date : 2010-09-07
 Re: Road Loco - 'Blackbeard'
Thats a relief as I have just finished making mine today. Spent this afternoon drilling and tapping the perch.
will finish painting them tomorrow.
will finish painting them tomorrow.
sonick45- Number of posts : 511
Location : Barton-Le-Clay (Beds)
Registration date : 2009-01-26
 Re: Road Loco - 'Blackbeard'
Ummm, seems very very tight there, how's the clearance once the steering linkages are fitted?
LilyJack...
LilyJack...
LilyJack- Number of posts : 236
Location : UK
Registration date : 2009-04-01
Page 2 of 17 •  1, 2, 3 ... 9 ... 17
 Similar topics
» STW 2" road loco
» DCC road loco
» Road Loco wagon
» Andy's 4"dcc road loco
» New Batch 4" DCC Road Loco
» DCC road loco
» Road Loco wagon
» Andy's 4"dcc road loco
» New Batch 4" DCC Road Loco
Page 2 of 17
Permissions in this forum:
You cannot reply to topics in this forum