
IanL Road Loco
Page 5 of 9 •  1, 2, 3, 4, 5, 6, 7, 8, 9
 ![]()
Re: IanL Road Loco
![]() Robfishman Sun 21 Oct 2012, 11:40 pm
Robfishman Sun 21 Oct 2012, 11:40 pm
lynnr wrote:The pessimist says th cup is 1/2 empty.
The optimist says the cup is 1/2 full.
The engineer says the cup is over engineered and wasting materials.
The Physicist says the glass is neither. It is completely full, half with water and half with air.
And the realist says it doesn't matter it's got to be washed up anyway.

Robfishman- Number of posts : 1061
Age : 49
Location : Chandlers Ford Hants 4" showmans & 4" Roller
Registration date : 2010-11-26 -

Re: IanL Road Loco
![]() IanL Tue 23 Oct 2012, 10:29 am
IanL Tue 23 Oct 2012, 10:29 am
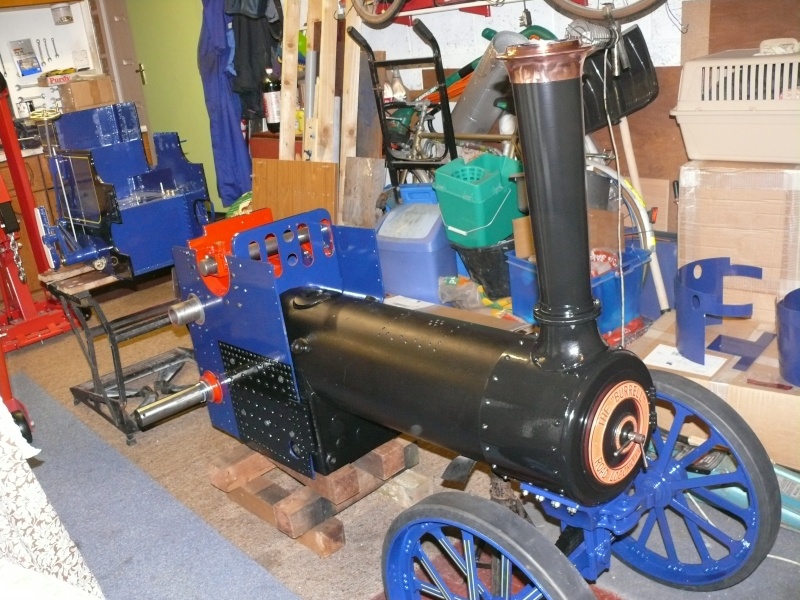
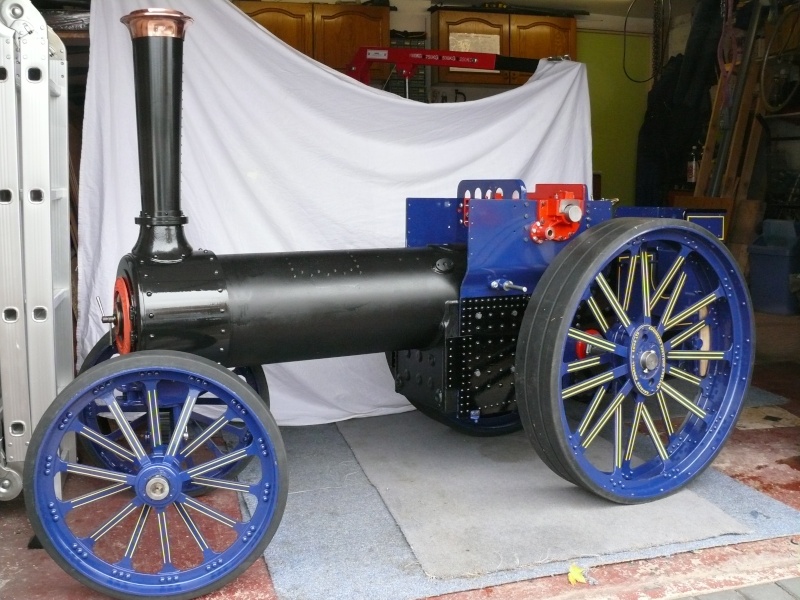
Front end on and sitting on its wheels for the first time.

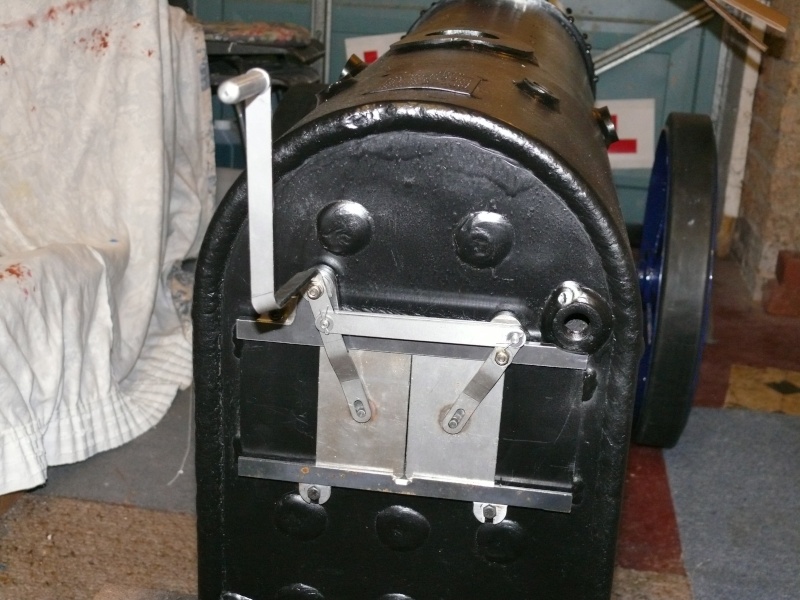
test fitted the fire box doors
then on to fitting the hornplates I decided to do it the way suggested in the instructions ie lift the whole lot but with the bolts loosened on the left hand side. in this picture those of you who have done this will know the way I have the boiler supported will not work!

the reason being that the hornplates when fitted are lower than the boiler foundation ring so having supports sticking out the sides holds the hornplates too high.
eventually I got the 12 bolts fitted.

then came trying to align the hornplates I thought I would try the idea of supporting the weight on the axle as this would be a natural position once on its wheels. I used the engine hoist to lift the entire rear end with the hownplates bolts just slack.

I spent what seemed like ages trying to get the alignment to work so decided to do something simple and fitted the chimney on to complete the front end.
After much fidling and use of the adjustment screws on the left hand bearing I got the hornplates done up tight and still able to just turn the alingment tool.

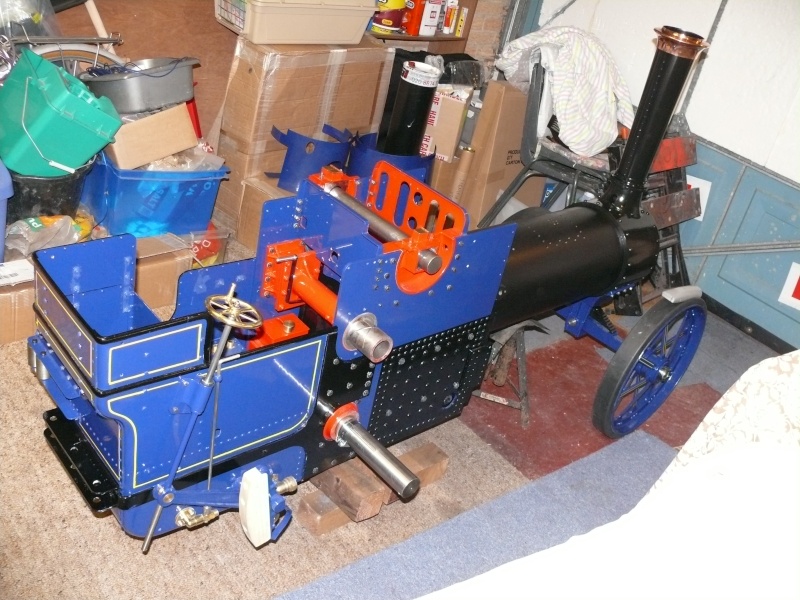
next came fitting the tender this is getting exciting as it is, after 15 months, beginning to look like a traction engine. This is how I lifted the tender using strops on the engine crane.

Finally all fitted.
I have blacked the fire doors and mechanism also the steering chains and smoke box door darrt bolt. I have been wondering how to black the steering column and fire damper rod, need to find a long narrow tray, have decided a length of guttering will do nicely. I have the belly tank and cleading available to fit but will probably try to get the first piece of the cleading o=around the man hole trimmed before fitting the belly tank.
So that is as far as I have got todate.
Really nice to see it looking like an engine, I may pop the rear wheels on next weekend just to get it rolling.
Thank you STW
ian

IanL- Number of posts : 437
Age : 68
Location : Nottinghamshire
Registration date : 2011-07-25
Re: IanL Road Loco
![]() lynnr Tue 23 Oct 2012, 10:39 am
lynnr Tue 23 Oct 2012, 10:39 am
It is a nice feeling when you start bolting sub assemblies together
Watch the rear wheels when on the axle before you have any packing as they will track inwards and mash the brake blocks on the nicely painted rivets.
Couple bits of 2" drain pipe will remove the problem and a small bit of 10mm bar to stop the wheel tracking off the axle.
With a couple of large brass home made washers this is how Crystal got pulled round the ring at Castle Fraser.

lynnr- Number of posts : 3242
Age : 55
Location : Highland, 4inch showman
Registration date : 2010-08-06
Re: IanL Road Loco
![]() IanL Tue 23 Oct 2012, 11:08 am
IanL Tue 23 Oct 2012, 11:08 am
Ian
IanL- Number of posts : 437
Age : 68
Location : Nottinghamshire
Registration date : 2011-07-25
Re: IanL Road Loco
![]() lynnr Tue 23 Oct 2012, 11:14 am
lynnr Tue 23 Oct 2012, 11:14 am
lynnr- Number of posts : 3242
Age : 55
Location : Highland, 4inch showman
Registration date : 2010-08-06

Richard- Number of posts : 105
Location : sway hampshire
Registration date : 2011-09-08
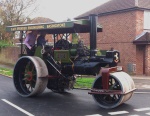
It rolls at last
![]() IanL Mon 29 Oct 2012, 11:18 am
IanL Mon 29 Oct 2012, 11:18 am
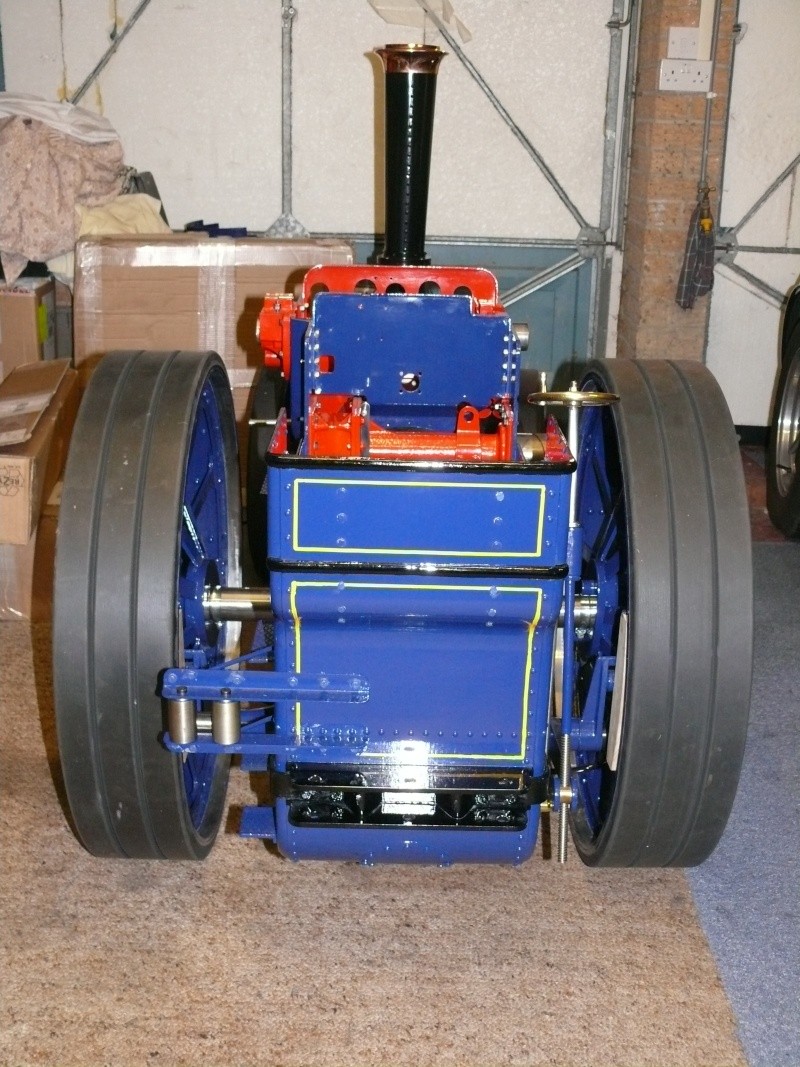
It is heavy to push around the garage but at least he now moves.
Ian
IanL- Number of posts : 437
Age : 68
Location : Nottinghamshire
Registration date : 2011-07-25
Re: IanL Road Loco
![]() IanL Wed 19 Dec 2012, 8:56 am
IanL Wed 19 Dec 2012, 8:56 am
Fitted the steering I blacked everything but forgot the pins through the front axle. something else to do over the Christmas break.
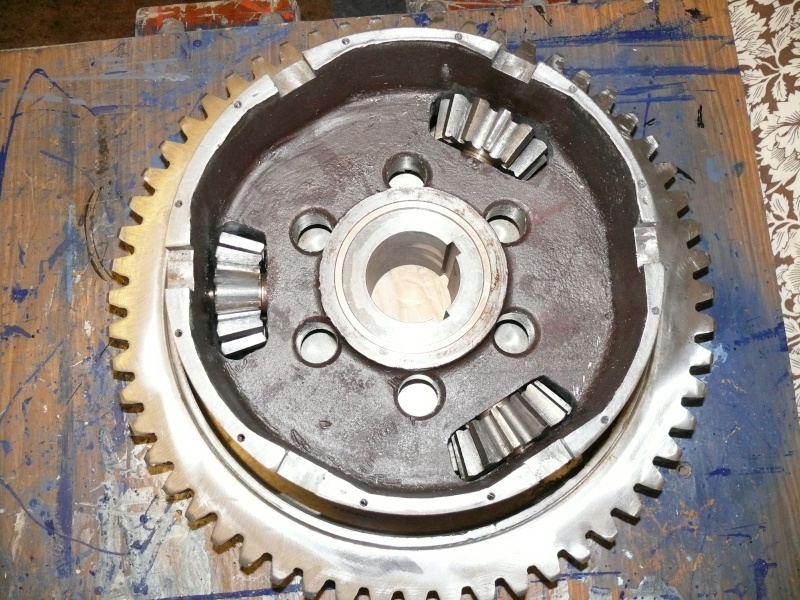
NOvembers kit arrived in Dec and was kit 23 not what I had expected but the first of the gears, the delivery man had it balanced on his shoulder and turning purple with the effort, the box says 37kg but it felt a whole lot heavier than that. I have now got all three planet wheels fitted and they spin nice and smoothly but as the instructions say the holes for them may need opening up they did, took me all of Saturday to acheive this. I read the comments on previuos posts that a shim was needed to hold the wheel out from the centre. mine needed a slight polish on the bush to get them in the hole so no shims needed there is no slack on the spindle. Have decided to paint the parts prior to test fitting on the axle as the engine is sitting on its wheels and I do not have the 2 outer thrust washers in the kit.
Ian
IanL- Number of posts : 437
Age : 68
Location : Nottinghamshire
Registration date : 2011-07-25
Re: IanL Road Loco
![]() lynnr Wed 19 Dec 2012, 9:00 am
lynnr Wed 19 Dec 2012, 9:00 am
lynnr- Number of posts : 3242
Age : 55
Location : Highland, 4inch showman
Registration date : 2010-08-06
Re: IanL Road Loco
![]() IanL Wed 19 Dec 2012, 1:13 pm
IanL Wed 19 Dec 2012, 1:13 pm
I have found that I do not need any spacers on the inner bevel in fact the thrust washer could do with being slimmer a bit to remove all the slack in the bevel to planet wheel gears. But overall I am very impressed with the smoothness of turning the inner bevel on the planet wheels, no notchiness at all.
Ian
IanL- Number of posts : 437
Age : 68
Location : Nottinghamshire
Registration date : 2011-07-25
Re: IanL Road Loco
![]() IanL Tue 08 Jan 2013, 4:40 pm
IanL Tue 08 Jan 2013, 4:40 pm

I have also been fitting the 2nd shaft gears and found the square drive end of the shaft is not quite central as Brian mentions in one of his posts. Currently only a slight stiff radius for about 30degrees so am now reasonably happy the shaft actually eases up when both end bolts are tightened fully.
Ian
IanL- Number of posts : 437
Age : 68
Location : Nottinghamshire
Registration date : 2011-07-25
Re: IanL Road Loco
![]() IanL Tue 08 Jan 2013, 4:49 pm
IanL Tue 08 Jan 2013, 4:49 pm

I do not have a crank yet so only able to fit the 2nd shaft gears
IanL- Number of posts : 437
Age : 68
Location : Nottinghamshire
Registration date : 2011-07-25
Re: IanL Road Loco
![]() Robfishman Tue 08 Jan 2013, 9:56 pm
Robfishman Tue 08 Jan 2013, 9:56 pm
Looking good, I love the blue and yellow combination.
Robfishman- Number of posts : 1061
Age : 49
Location : Chandlers Ford Hants 4" showmans & 4" Roller
Registration date : 2010-11-26 -
Re: IanL Road Loco
![]() lynnr Tue 08 Jan 2013, 10:05 pm
lynnr Tue 08 Jan 2013, 10:05 pm
Looking good.
Just been looking at your pics and noticed you have the damper rod held on with a split pin. I would suggest you use a R clip or even easier U shaped bit of wire. As you may want to remove the pan in a hurry. Where you need to take the damper rod off first.
lynnr- Number of posts : 3242
Age : 55
Location : Highland, 4inch showman
Registration date : 2010-08-06
Re: IanL Road Loco
![]() IanL Wed 09 Jan 2013, 4:19 pm
IanL Wed 09 Jan 2013, 4:19 pm
Lynn you spotted the split pin in the damper rod. this was changed last weekend to an R clip much easier when dropping the ash pan out. I spent quite a while trying to get the ashpan tight to the foundation ring to try and get a good seal so I would have more control over the fire. but when it was tight the damper plate was jammed and would not open, so I have lowered the front of the ashpan slightly to free it up.
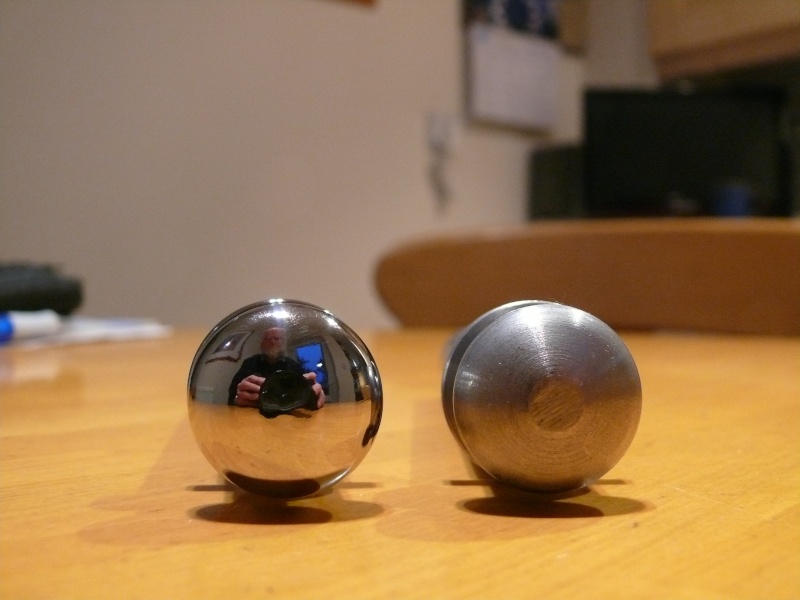
Rob the drive pin took me less than an hour to do just the knob, that was doing it twice as I was not completly happy with having removed the machining marks the first time just means I will spend more time on the first stage ie 80grit mop to remove them when doing the remaining three pins. I used the Frost polishing kit, having seen how well the steel work has come up I may have a go at some of the other steel items rather than having them bright nickel plated. Only concern may be rust but time will tell.
The pictures show the blue as being lighter than in day light must be the flash settings. My colour scheme is very simple, I really do take my hat off to everyone on here and what they are doing with the complex detailed lining schemes.
It seems impossible to stop greasy finger marks from showing up in the pictures and some odd reflections on my pictures.
Ian
Last edited by IanL on Wed 09 Jan 2013, 6:36 pm; edited 1 time in total
IanL- Number of posts : 437
Age : 68
Location : Nottinghamshire
Registration date : 2011-07-25
Re: IanL Road Loco
![]() Kevster Wed 09 Jan 2013, 5:28 pm
Kevster Wed 09 Jan 2013, 5:28 pm
Kev

Kevster- Number of posts : 424
Location : Hertfordshire 4 inch; DCC road loco
Registration date : 2011-01-27
Re: IanL Road Loco
![]() Rickster Wed 09 Jan 2013, 6:24 pm
Rickster Wed 09 Jan 2013, 6:24 pm
Trust me when I say greasy finger marks will be the last thing you think about as soon as you light the first fire in the box, as Highpressure, Lynn and myself will testify!!! Don't worry about it, just enjoy driving it.
Cheers
Rick
Rickster- Number of posts : 267
Location : canterbury, Kent
Registration date : 2010-02-19
Re: IanL Road Loco
![]() IanL Tue 09 Apr 2013, 8:42 am
IanL Tue 09 Apr 2013, 8:42 am
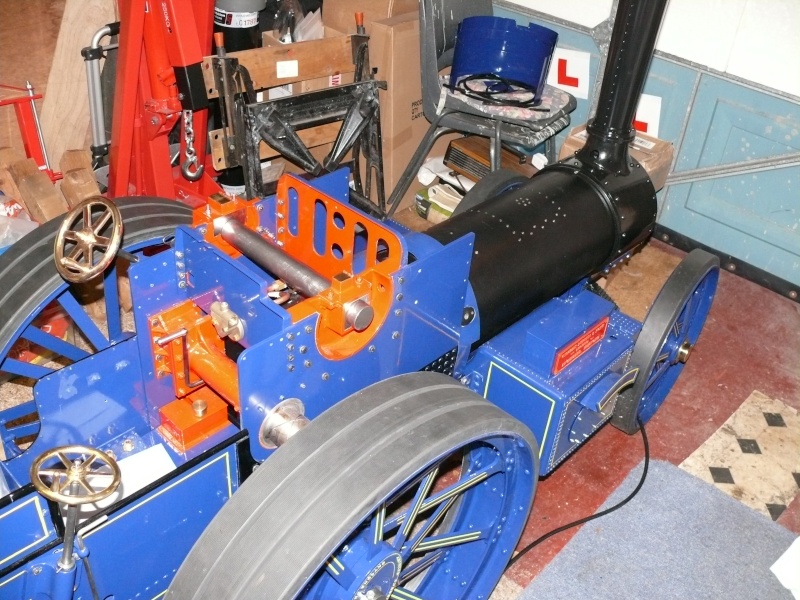
The water pump arrived a few months ago so have assembled that and really enjoyed doing it. not got around to painting it yet but the drive eccentric and rod was very easy to fit as I do not have the crank. Still waiting for Steve to supply the modified oiler mount which he said he had forgotten for the Road loco guys.


The weighshaft arrived in Feb so have dropped that in place but cannot align it as I still have no cylinder, hopefully later this month

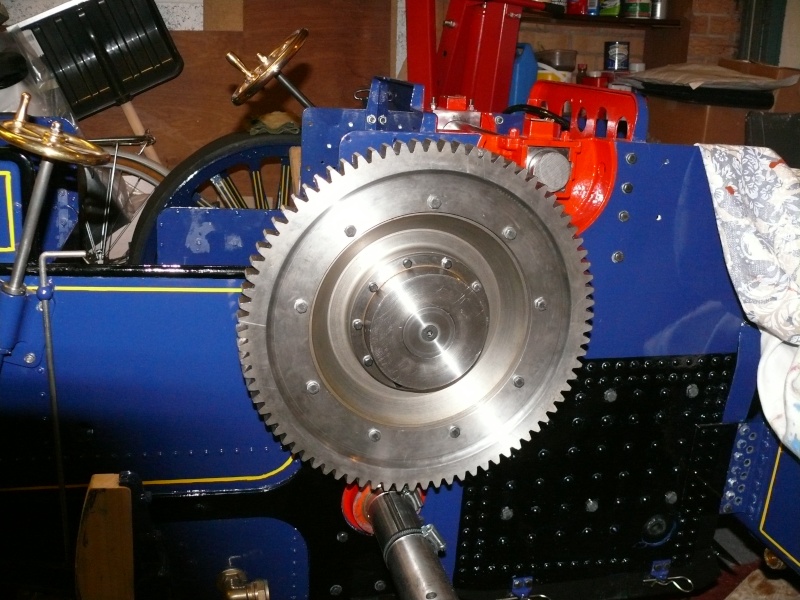
I have dropped it back on its wheels now that the diff and drive gears are fitted, at least I can move it around the garage. and have tried to extracate the swarf from inside the boiler I have a growing pot of the stuff and may post a photo of it when I remember but it looks the same as Robs incase you need to see.
I have the pressure gauage to fit but was wondering what others have done in way of preparing the wooden plinth?

Looking forward to some warmer weather to start painting again.
Ian
IanL- Number of posts : 437
Age : 68
Location : Nottinghamshire
Registration date : 2011-07-25
Re: IanL Road Loco
![]() lynnr Tue 09 Apr 2013, 10:42 am
lynnr Tue 09 Apr 2013, 10:42 am
Looking good.
Pressure gauge plinth. I just put 3 coats of varnish on it. Looks very good.
lynnr- Number of posts : 3242
Age : 55
Location : Highland, 4inch showman
Registration date : 2010-08-06
Re: IanL Road Loco
![]() IanL Tue 09 Apr 2013, 4:26 pm
IanL Tue 09 Apr 2013, 4:26 pm
Three coats of varnish it is.
First time I have used water based varnish, looks white in the tin, so hope it dries as stated clear gloss. Well it is from the people who say it does what it says on the tin!
Ian
IanL- Number of posts : 437
Age : 68
Location : Nottinghamshire
Registration date : 2011-07-25
Re: IanL Road Loco
![]() IanL Tue 23 Apr 2013, 8:50 am
IanL Tue 23 Apr 2013, 8:50 am
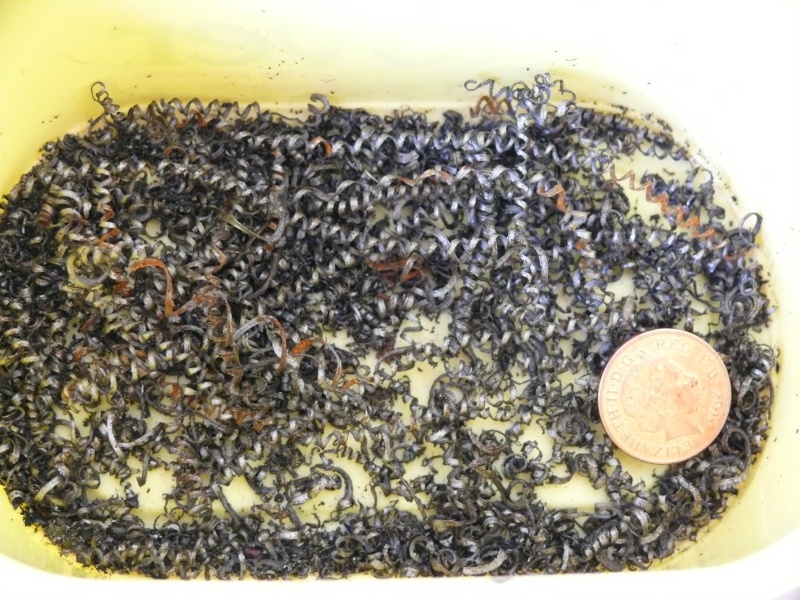
some of them were really long.

The copper penny was not in the boiler but it does stick to the magnet, honest.
Ian
With the price of copper now so high then new pennies and two ps are made from steel. As the old 2 pee actually was worth 4 pence as scrap metal and hence why so many disappeeared!!
IanL- Number of posts : 437
Age : 68
Location : Nottinghamshire
Registration date : 2011-07-25
Re: IanL Road Loco
![]() IanL Mon 17 Jun 2013, 11:10 am
IanL Mon 17 Jun 2013, 11:10 am


I still have the half nut to fit and to cut down the stud length.
Ian
IanL- Number of posts : 437
Age : 68
Location : Nottinghamshire
Registration date : 2011-07-25
Re: IanL Road Loco
![]() IanL Tue 18 Jun 2013, 4:02 pm
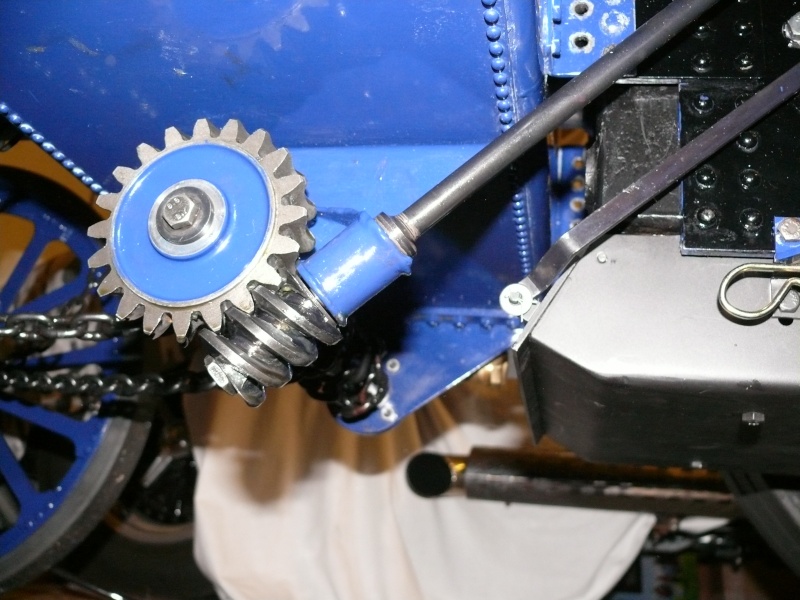
IanL Tue 18 Jun 2013, 4:02 pm

The two govenor pulleys are visible at the top of the picture.
Finally fitted to the engine along with the oiler with modified connector. Thanks Steve for supplying this.

IanL- Number of posts : 437
Age : 68
Location : Nottinghamshire
Registration date : 2011-07-25
Re: IanL Road Loco
![]() IanL Wed 26 Jun 2013, 9:03 am
IanL Wed 26 Jun 2013, 9:03 am
Now need to remove and add the insulation, Oh and to repaint the section that slipped and fell to the floor. I had put a piece of carpet underneath but I dropped the spanner in my hand as well and now have a chunk taken out of the paint.

Will be at Banbury on Saturday after all as my wifes op has been cancelled. See some of you there.
Ian
IanL- Number of posts : 437
Age : 68
Location : Nottinghamshire
Registration date : 2011-07-25
Re: IanL Road Loco
![]() bjwlancashire Wed 26 Jun 2013, 9:21 am
bjwlancashire Wed 26 Jun 2013, 9:21 am

bjwlancashire- Number of posts : 938
Location : Mellor, Lancashire
Registration date : 2010-09-07
Page 5 of 9 • 1, 2, 3, 4, 5, 6, 7, 8, 9 ![]()
» STW 2" road loco
» mikes road loco
» Burrell Road Loco Kit 30B
» Thetford Works (Cornwall)
|
|
|