EVELYN my Road Loco build
5 posters
Page 1 of 1
 EVELYN my Road Loco build
Hi all,
I started my build in November 2019, I've always enjoyed steam especially Sentinel waggons.
I spent many hours firing waggons to and from rallies.
Helped a good friend with his Aveling & Porter roller, which was steamed to most rallies.
So there's a bit about me.....
My road loco build.
Early assembly of the smoke box.
 20200501_160847 by Trev Read, on Flickr
Start of building rear wheel.
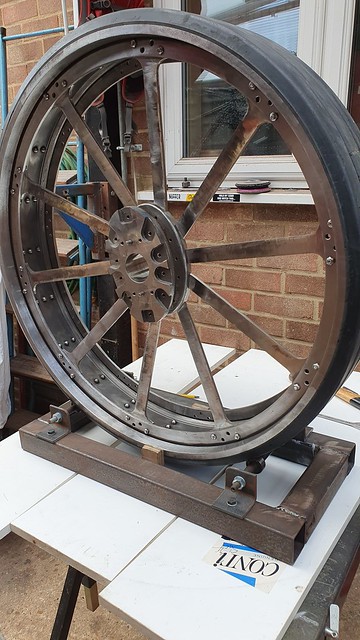 20200801_121113 by Trev Read, on Flickr
It very useful having built a hoisting gantry for my old Land Rover (that's another story...)
 20200811_141213 by Trev Read, on Flickr
Oozing of JB weld....
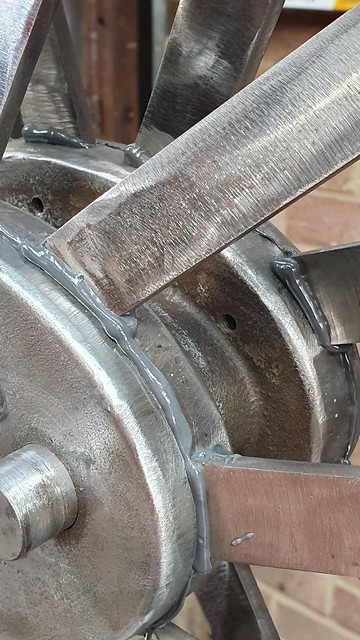 20200811_141232 by Trev Read, on Flickr
Prepping rivet bolts.
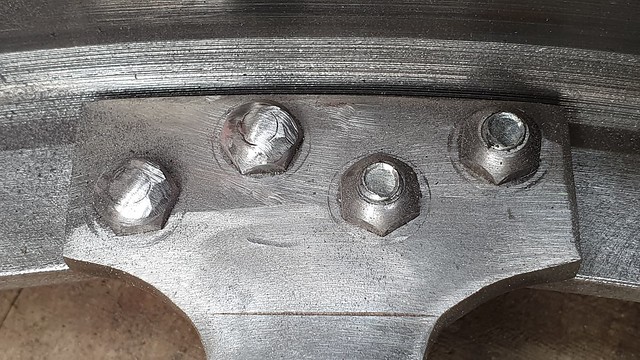 20200816_130930 by Trev Read, on Flickr
Front wheel lining, my first attempt at using a Beugler lining toll.
 20210718_194936 by Trev Read, on Flickr
I have been listing some of the modification and improvements other builders have done.
Some of which I have and will be using in my build.
An early modification was the injector elbow on the tender, drilled out to 8.6mm to increase water flow.
 20200906_142440 by Trev Read, on Flickr
 20200906_144202 by Trev Read, on Flickr
I know its nice to see other peoples builds on here and I'll post some more pic and bits soon.
Trev.
I started my build in November 2019, I've always enjoyed steam especially Sentinel waggons.
I spent many hours firing waggons to and from rallies.
Helped a good friend with his Aveling & Porter roller, which was steamed to most rallies.
So there's a bit about me.....
My road loco build.
Early assembly of the smoke box.
 20200501_160847 by Trev Read, on Flickr
Start of building rear wheel.
 20200801_121113 by Trev Read, on Flickr
It very useful having built a hoisting gantry for my old Land Rover (that's another story...)
 20200811_141213 by Trev Read, on Flickr
Oozing of JB weld....
 20200811_141232 by Trev Read, on Flickr
Prepping rivet bolts.
 20200816_130930 by Trev Read, on Flickr
Front wheel lining, my first attempt at using a Beugler lining toll.
 20210718_194936 by Trev Read, on Flickr
I have been listing some of the modification and improvements other builders have done.
Some of which I have and will be using in my build.
An early modification was the injector elbow on the tender, drilled out to 8.6mm to increase water flow.
 20200906_142440 by Trev Read, on Flickr
 20200906_144202 by Trev Read, on Flickr
I know its nice to see other peoples builds on here and I'll post some more pic and bits soon.
Trev.

trev crane- Number of posts : 35
Location : Essex, The workshop
Registration date : 2019-09-30
Rosss likes this post
 Re: EVELYN my Road Loco build
Great update and photos - keep the updates coming. Just rebuilding my 3” Burrell but hope to go up in size soon 
Cliffboy- Number of posts : 1
Location : Kent
Registration date : 2021-08-10
trev crane and GregD like this post
 Re: EVELYN my Road Loco build
So this goes back to the first few kits, front wheels, smoke box etc.
Start of a my build, clean & building front wheels.
 20191207_134930 by Trev Read, on Flickr
Patio/brick cleaner as recommended by users on here, thanks all.
 20191207_141426 by Trev Read, on Flickr
Perch bracket & axle test assembly.
 20191222_140741 by Trev Read, on Flickr
Perch bracket shown the grease nipple fitted, again following other builders advice from this wonderful forum.
 20200102_063156 by Trev Read, on Flickr
Smoke box & chimney assembly.
 20200202_114212 by Trev Read, on Flickr
Couldn't resist....
 20200202_124135 by Trev Read, on Flickr
This was taken in February 2020, first items painted Crimson.
 20200215_164158 by Trev Read, on Flickr
More to come soon.
Thanks and enjoy.
Start of a my build, clean & building front wheels.
 20191207_134930 by Trev Read, on Flickr
Patio/brick cleaner as recommended by users on here, thanks all.
 20191207_141426 by Trev Read, on Flickr
Perch bracket & axle test assembly.
 20191222_140741 by Trev Read, on Flickr
Perch bracket shown the grease nipple fitted, again following other builders advice from this wonderful forum.
 20200102_063156 by Trev Read, on Flickr
Smoke box & chimney assembly.
 20200202_114212 by Trev Read, on Flickr
Couldn't resist....
 20200202_124135 by Trev Read, on Flickr
This was taken in February 2020, first items painted Crimson.
 20200215_164158 by Trev Read, on Flickr
More to come soon.
Thanks and enjoy.

trev crane- Number of posts : 35
Location : Essex, The workshop
Registration date : 2019-09-30
tef 20 likes this post
 More of EVELYN being built.
Here's some more pic's of EVELYN.
Painting & Beugler lining....
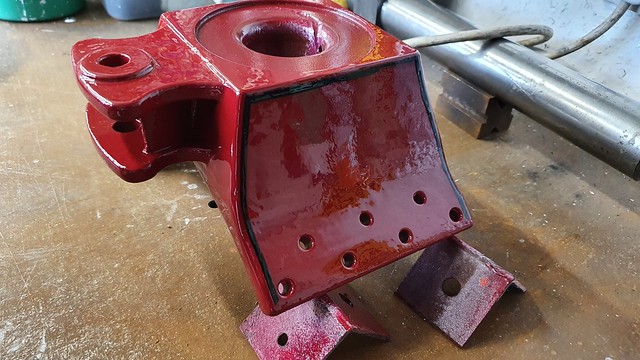 20210712_114959 by Trev Read, on Flickr
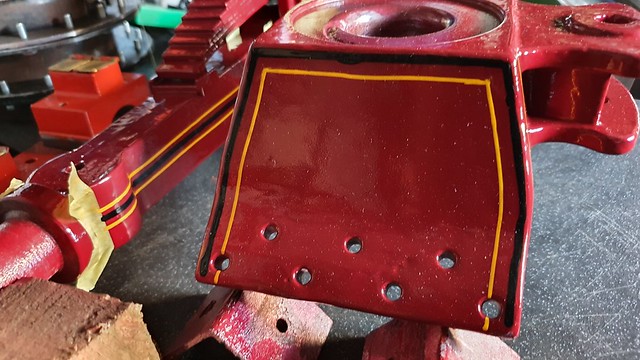 20210718_195041 by Trev Read, on Flickr
Tender taking shape, I'm using the Cromapol as sealant.
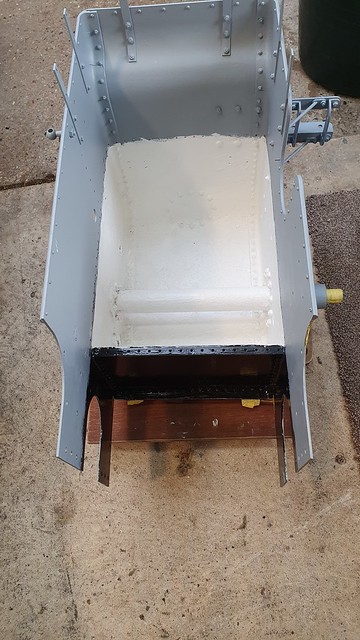 20201114_103118 by Trev Read, on Flickr
Tender & Horn plates.
 20201129_120946 by Trev Read, on Flickr
Belly tank.
Everyone's favourite rivet's......
 20210522_163417 by Trev Read, on Flickr
 20210522_163356 by Trev Read, on Flickr
 20210621_080910 by Trev Read, on Flickr
 20210801_134718 by Trev Read, on Flickr
More to come in the coming weeks.
Enjoy.
Trev.
Painting & Beugler lining....
 20210712_114959 by Trev Read, on Flickr
 20210718_195041 by Trev Read, on Flickr
Tender taking shape, I'm using the Cromapol as sealant.
 20201114_103118 by Trev Read, on Flickr
Tender & Horn plates.
 20201129_120946 by Trev Read, on Flickr
Belly tank.
Everyone's favourite rivet's......
 20210522_163417 by Trev Read, on Flickr
 20210522_163356 by Trev Read, on Flickr
 20210621_080910 by Trev Read, on Flickr
 20210801_134718 by Trev Read, on Flickr
More to come in the coming weeks.
Enjoy.
Trev.

trev crane- Number of posts : 35
Location : Essex, The workshop
Registration date : 2019-09-30
tef 20 and Rosss like this post
 Re: EVELYN my Road Loco build
Great photos !
Did you trial fit your belly tank before painting it ? I am thinking that I should build it in bare metal and then make sure it fits to the hornplates and to the bracket under the boiler, before painting - I am very interested to know what others have done.
Did you trial fit your belly tank before painting it ? I am thinking that I should build it in bare metal and then make sure it fits to the hornplates and to the bracket under the boiler, before painting - I am very interested to know what others have done.
milford59- Number of posts : 307
Location : Milford on Sea
Registration date : 2019-05-19
 Re: EVELYN my Road Loco build
milford59 wrote:Great photos !
Did you trial fit your belly tank before painting it ? I am thinking that I should build it in bare metal and then make sure it fits to the hornplates and to the bracket under the boiler, before painting - I am very interested to know what others have done.
Hi Milford59,
I had built, primed, under coated and first top coat of Crimson.
Plus I'd started to seal the inside with Cromapol, before I could do a test fit, as I didn't think it would be too much of an issue.
I found the fitting to the hone plates and boiler not too bad some small adjustments required.
The one thing I found was getting the steering parts to fit, this did require a lot more adjustment than getting the tank too fit the boiler/horn plates.
Plus with the steering getting the steering shaft & worm to mesh correctly with it's wheel and the steering shaft to turn in it's bearings.
In short a coat of primer and or under coat I think would be OK, but expect to have to 'retouch' around the bolts and any scratches and the like.
I have already touched up my tank and it's now had 2 coats of crimson.
I haven't as yet resealed the inside, but that will be done before it's finally fitted.
I'll post some pics of the belly tank and steering hopefully later this week.
Trev.

trev crane- Number of posts : 35
Location : Essex, The workshop
Registration date : 2019-09-30
Rosss likes this post
 Re: EVELYN my Road Loco build
Thanks very much for that info Trev.
milford59- Number of posts : 307
Location : Milford on Sea
Registration date : 2019-05-19
 Re: EVELYN my Road Loco build
Sorry forgot to upload pics of the belly tank and steering.
So here they are.
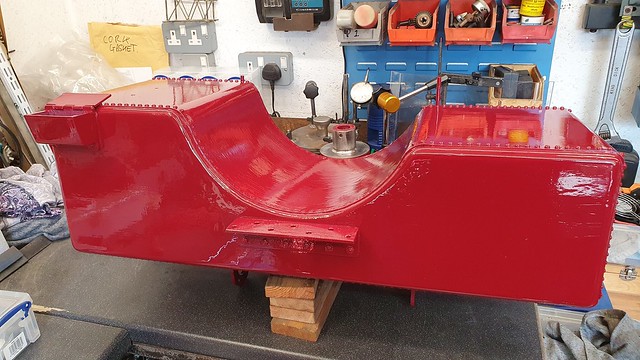 20210802_100739 by Trev Read, on Flickr
 20210926_133833 by Trev Read, on Flickr
 20210905_163152 by Trev Read, on Flickr
My own design for the ash pan damper positioner.
 20210905_163108 by Trev Read, on Flickr
Closed
 20210905_163219 by Trev Read, on Flickr
Open.
 20210905_163114 by Trev Read, on Flickr
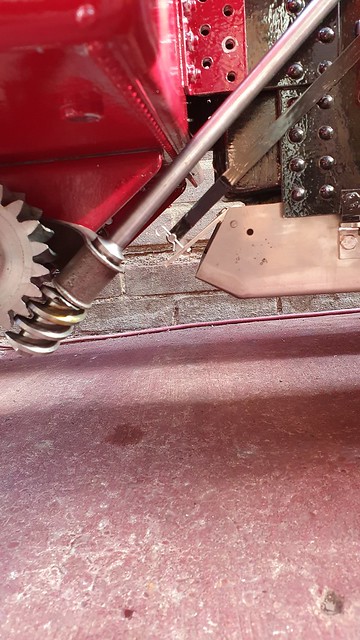 20210905_163208 by Trev Read, on Flickr
I've received the cylinder block and the weighshaft bracket, so that will be the next pictures.
Trev.
So here they are.
 20210802_100739 by Trev Read, on Flickr
 20210926_133833 by Trev Read, on Flickr
 20210905_163152 by Trev Read, on Flickr
My own design for the ash pan damper positioner.
 20210905_163108 by Trev Read, on Flickr
Closed
 20210905_163219 by Trev Read, on Flickr
Open.
 20210905_163114 by Trev Read, on Flickr
 20210905_163208 by Trev Read, on Flickr
I've received the cylinder block and the weighshaft bracket, so that will be the next pictures.
Trev.

trev crane- Number of posts : 35
Location : Essex, The workshop
Registration date : 2019-09-30
tef 20, milford59 and Rosss like this post
 More of EVELYN being built.
Hi,
Well it's been too long since my last update, sorry.
The cylinder block arrived.
 20211106_131608 by Trev Read, on Flickr
Starting to install lots of studs.
 20211112_120641 by Trev Read, on Flickr
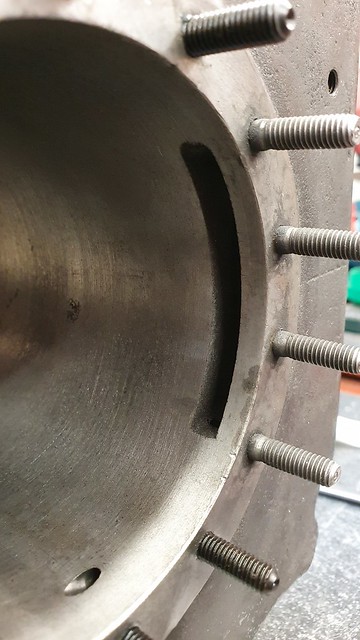
This is the front of the LP cylinder bore, I found that the steam port is partially covered by the cylinder end plate.
Not sure if this would effect the engine when it's running.
 20211112_120658 by Trev Read, on Flickr
So I removed about 4 to 5mm from the end plate on both LP & HP sides.
 20211112_120653 by Trev Read, on Flickr
 20211112_120649 by Trev Read, on Flickr
Has anyone else found this? or am I being too 'picky'
Building up the rear end of the cylinder and cover plate.
Excuse the boots...
 20211107_105454 by Trev Read, on Flickr
HP valve fitted.
 20211106_162214 by Trev Read, on Flickr
LP valve fitted.
 20211106_162222 by Trev Read, on Flickr
Regulator during the lapping in process.
 20211106_162202 by Trev Read, on Flickr
Weighshaft on the boiler.
 20211030_145441 by Trev Read, on Flickr
And cylinder block on the boiler.
 20211113_150133 by Trev Read, on Flickr
 20211113_150144 by Trev Read, on Flickr
Yet to be bolted down.
The 2 crossheads were on backorder/to follow, so I didn't want to fix the cylinder block to the boiler until these arrived as setting the position of the weighshaft bracket needs the crossheads in place.
That's it for this update, hopefully the next one won't be soo long.
Trev
Well it's been too long since my last update, sorry.
The cylinder block arrived.
 20211106_131608 by Trev Read, on Flickr
Starting to install lots of studs.
 20211112_120641 by Trev Read, on Flickr
This is the front of the LP cylinder bore, I found that the steam port is partially covered by the cylinder end plate.
Not sure if this would effect the engine when it's running.
 20211112_120658 by Trev Read, on Flickr
So I removed about 4 to 5mm from the end plate on both LP & HP sides.
 20211112_120653 by Trev Read, on Flickr
 20211112_120649 by Trev Read, on Flickr
Has anyone else found this? or am I being too 'picky'
Building up the rear end of the cylinder and cover plate.
Excuse the boots...
 20211107_105454 by Trev Read, on Flickr
HP valve fitted.
 20211106_162214 by Trev Read, on Flickr
LP valve fitted.
 20211106_162222 by Trev Read, on Flickr
Regulator during the lapping in process.
 20211106_162202 by Trev Read, on Flickr
Weighshaft on the boiler.
 20211030_145441 by Trev Read, on Flickr
And cylinder block on the boiler.
 20211113_150133 by Trev Read, on Flickr
 20211113_150144 by Trev Read, on Flickr
Yet to be bolted down.
The 2 crossheads were on backorder/to follow, so I didn't want to fix the cylinder block to the boiler until these arrived as setting the position of the weighshaft bracket needs the crossheads in place.
That's it for this update, hopefully the next one won't be soo long.
Trev

trev crane- Number of posts : 35
Location : Essex, The workshop
Registration date : 2019-09-30
milford59, Abbo1, Rosss and rgreenwood like this post
 Been too long for this update...
Hi Fellow DCC builders,
The crankshaft arrived.
 20211125_062331 by Trev Read, on Flickr
Test fitting the bearings.
 20211128_112549 by Trev Read, on Flickr
 20211128_121651 by Trev Read, on Flickr
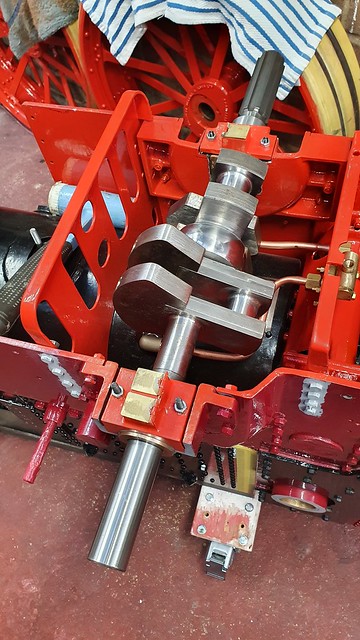
Test fit of the crank & lapping in the bearings.
This took most of a weekend before I was happy with the the bearing/crank fit.
 20211128_145453 by Trev Read, on Flickr
Lapping in the big end bearing.
This was started by mounting the crank in a vice, but later moved to my lathe.
 20211203_112607 by Trev Read, on Flickr
Crank mounted in my lathe, with the valve eccentrics installed after each one had been lapping in.
 20211227_153535 by Trev Read, on Flickr
I did the same with the big end bearings, but no pictures.
There is more to come....
Trev.
The crankshaft arrived.
 20211125_062331 by Trev Read, on Flickr
Test fitting the bearings.
 20211128_112549 by Trev Read, on Flickr
 20211128_121651 by Trev Read, on Flickr
Test fit of the crank & lapping in the bearings.
This took most of a weekend before I was happy with the the bearing/crank fit.
 20211128_145453 by Trev Read, on Flickr
Lapping in the big end bearing.
This was started by mounting the crank in a vice, but later moved to my lathe.
 20211203_112607 by Trev Read, on Flickr
Crank mounted in my lathe, with the valve eccentrics installed after each one had been lapping in.
 20211227_153535 by Trev Read, on Flickr
I did the same with the big end bearings, but no pictures.
There is more to come....
Trev.

trev crane- Number of posts : 35
Location : Essex, The workshop
Registration date : 2019-09-30
 More Evelyn build...
Here's some more of my build.
Finally bolted down the cylinder block.
 20211227_130235 by Trev Read, on Flickr
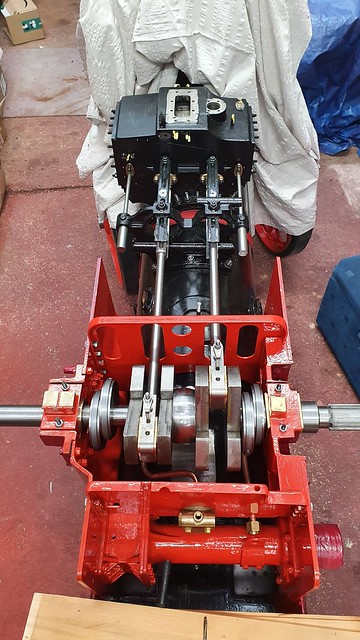
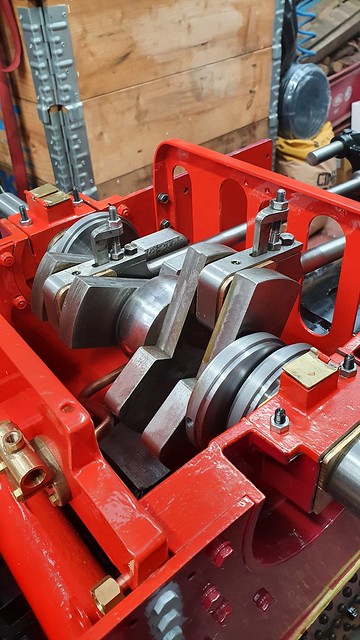
Test fitted the connecting rods & big ends.
 20211228_142729 by Trev Read, on Flickr
 20211228_142750 by Trev Read, on Flickr
I was still awaiting the back ordered crossheads.
 20211228_142755 by Trev Read, on Flickr
But the valve gear arrived, so fettling & test installing the valve gear.
 20211230_124114 by Trev Read, on Flickr
 20211230_143330 by Trev Read, on Flickr
 20211230_143356 by Trev Read, on Flickr
I did have an issue with the LP eccentric hitting the water pump drive bearing boss, only by 2mm.
But I'll go into more detail later when I get the water pump & drive Kit.
 20211230_151150 by Trev Read, on Flickr
 20211230_151159 by Trev Read, on Flickr
More build later.
Trev.
Finally bolted down the cylinder block.
 20211227_130235 by Trev Read, on Flickr
Test fitted the connecting rods & big ends.
 20211228_142729 by Trev Read, on Flickr
 20211228_142750 by Trev Read, on Flickr
I was still awaiting the back ordered crossheads.
 20211228_142755 by Trev Read, on Flickr
But the valve gear arrived, so fettling & test installing the valve gear.
 20211230_124114 by Trev Read, on Flickr
 20211230_143330 by Trev Read, on Flickr
 20211230_143356 by Trev Read, on Flickr
I did have an issue with the LP eccentric hitting the water pump drive bearing boss, only by 2mm.
But I'll go into more detail later when I get the water pump & drive Kit.
 20211230_151150 by Trev Read, on Flickr
 20211230_151159 by Trev Read, on Flickr
More build later.
Trev.

trev crane- Number of posts : 35
Location : Essex, The workshop
Registration date : 2019-09-30
 More Evelyn build...
Hi all,
Here's another instalment of my DCC build.
So I have now discovered why the eccentric was hitting the water pump drive shaft housing.
See the topic I posted regarding 'Fly Wheel Issue'
So continuing with the motion fitting.
The crossheads arrived, having been on back order.
 20220129_125545 by Trev Read, on Flickr
 20220129_160612 by Trev Read, on Flickr
And refitted the valve gear to check all the alignments.
 20220129_163316 by Trev Read, on Flickr
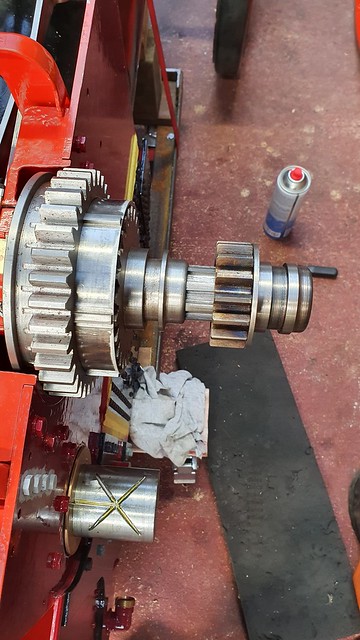
The next kit was the final drive & gears.
Lots of fettling...
3rd & 1st gears
 20220130_140543 by Trev Read, on Flickr
All 3 road gears.
 20220130_140538 by Trev Read, on Flickr
 20220130_140550 by Trev Read, on Flickr
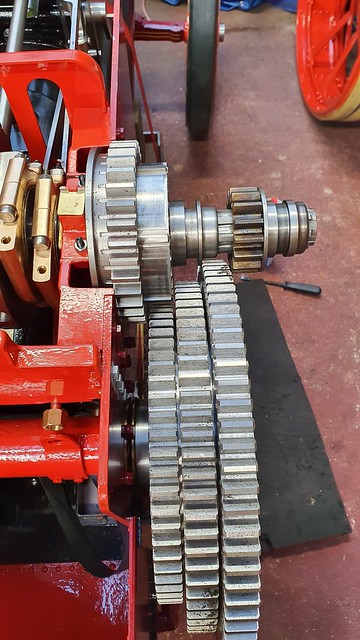
Assembled the second shaft & gears, test fitted.
 20220130_140732 by Trev Read, on Flickr
 20220130_140818 by Trev Read, on Flickr
Since these pictures were taken I have reset the position of the crankshaft, due to the issue with the clearance of the flywheel & rear wheel.
This has improved the mesh of the gears, which was a bit too close during this initial fitting.
Assembling the rear axle diff.
 20220227_112422 by Trev Read, on Flickr
Test fitting.
 20220227_112433 by Trev Read, on Flickr
 20220227_145823 by Trev Read, on Flickr
 20220227_145852 by Trev Read, on Flickr
I think that will do for this instalment.
Trev.
Here's another instalment of my DCC build.
So I have now discovered why the eccentric was hitting the water pump drive shaft housing.
See the topic I posted regarding 'Fly Wheel Issue'
So continuing with the motion fitting.
The crossheads arrived, having been on back order.
 20220129_125545 by Trev Read, on Flickr
 20220129_160612 by Trev Read, on Flickr
And refitted the valve gear to check all the alignments.
 20220129_163316 by Trev Read, on Flickr
The next kit was the final drive & gears.
Lots of fettling...
3rd & 1st gears
 20220130_140543 by Trev Read, on Flickr
All 3 road gears.
 20220130_140538 by Trev Read, on Flickr
 20220130_140550 by Trev Read, on Flickr
Assembled the second shaft & gears, test fitted.
 20220130_140732 by Trev Read, on Flickr
 20220130_140818 by Trev Read, on Flickr
Since these pictures were taken I have reset the position of the crankshaft, due to the issue with the clearance of the flywheel & rear wheel.
This has improved the mesh of the gears, which was a bit too close during this initial fitting.
Assembling the rear axle diff.
 20220227_112422 by Trev Read, on Flickr
Test fitting.
 20220227_112433 by Trev Read, on Flickr
 20220227_145823 by Trev Read, on Flickr
 20220227_145852 by Trev Read, on Flickr
I think that will do for this instalment.
Trev.

trev crane- Number of posts : 35
Location : Essex, The workshop
Registration date : 2019-09-30
milford59 likes this post
 More of EVELYN being built.
Here's the next instalment...
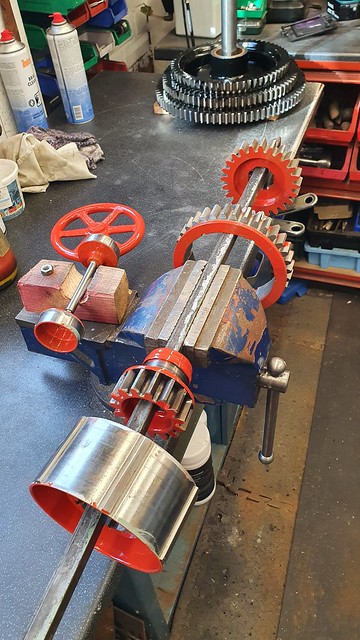
Painting bits.
 20220319_150218 by Trev Read, on Flickr
 20220319_150225 by Trev Read, on Flickr
I was wondering the easiest way of spraying the eccentrics, came up with screwing them to a plank of wood. It also protects the mating surfaces.
 20220418_140518 by Trev Read, on Flickr
Starting on getting the tender finished.
 20220326_153245 by Trev Read, on Flickr
 20220423_160649 by Trev Read, on Flickr
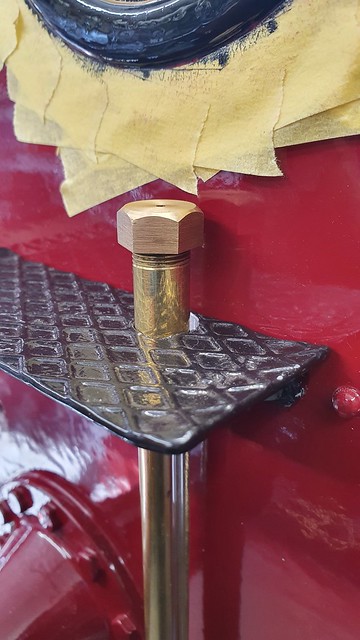
I still haven't lined it out yet.
But I did install a water gauge on it. The gauge came from RDG tools.(8" Level Gauge Ref: 1882 £17.92)
 20220403_131034 by Trev Read, on Flickr
 20220403_131039 by Trev Read, on Flickr
 20220403_131043 by Trev Read, on Flickr
 20220403_131408 by Trev Read, on Flickr
Next the water pump, this was before I found the issue with the fly wheel & rear wheel.
 20220416_162142 by Trev Read, on Flickr
 20220416_162150 by Trev Read, on Flickr
 20220416_162233 by Trev Read, on Flickr
For some reason I haven't got any pictures of assembling or installing the water pump it's self.
That will do for the time.
Happy building everyone.
Trev.
Painting bits.
 20220319_150218 by Trev Read, on Flickr
 20220319_150225 by Trev Read, on Flickr
I was wondering the easiest way of spraying the eccentrics, came up with screwing them to a plank of wood. It also protects the mating surfaces.
 20220418_140518 by Trev Read, on Flickr
Starting on getting the tender finished.
 20220326_153245 by Trev Read, on Flickr
 20220423_160649 by Trev Read, on Flickr
I still haven't lined it out yet.
But I did install a water gauge on it. The gauge came from RDG tools.(8" Level Gauge Ref: 1882 £17.92)
 20220403_131034 by Trev Read, on Flickr
 20220403_131039 by Trev Read, on Flickr
 20220403_131043 by Trev Read, on Flickr
 20220403_131408 by Trev Read, on Flickr
Next the water pump, this was before I found the issue with the fly wheel & rear wheel.
 20220416_162142 by Trev Read, on Flickr
 20220416_162150 by Trev Read, on Flickr
 20220416_162233 by Trev Read, on Flickr
For some reason I haven't got any pictures of assembling or installing the water pump it's self.
That will do for the time.
Happy building everyone.
Trev.

trev crane- Number of posts : 35
Location : Essex, The workshop
Registration date : 2019-09-30
 Re: EVELYN my Road Loco build
Hi Trev
Sorry to be the bearer of bad news but the water level is approximately 60mm above the manstand floor.
That is to say that the belly tank top is 60mm higher.
That puts the water level approximately at the bottom of the horseshoe beeding.
I think if you wish to get maximum water onboard you will need to put an extension breather into the vent hole in the top of your sight glass top.
Whilst you are at it you might want to consider putting a breather in the manstand floor to stop the tender from air locking.
I drilled an M6 brass bolt and soldered a small bore copper pipe into the head then drilled a hole in the corner of the manstand floor against the bunker divider to fit it into.
Hopefully that all makes sense.
Simon C

Simon C- Number of posts : 305
Location : Derby
Registration date : 2017-07-07
trev crane likes this post
 Re: EVELYN my Road Loco build
Hi,
Thanks for the spoiler Simon...
I saw your reply yesterday, I didn't consider the belly tank being a bit higher that the tender.
Had a bit of a think overnight.

Here are my thoughts:
1, Remove & plug the hole in the tender.
2, Modify the level gauge to allow for the higher water level.
3, Make some kind of valve that seals when the water level is above the top of it.
4, Fit a longer vent pipe to the top of the level gauge.
I'll see what option will work may work best.
Thank goodness for this forum.
Trev.
Thanks for the spoiler Simon...
I saw your reply yesterday, I didn't consider the belly tank being a bit higher that the tender.
Had a bit of a think overnight.
Here are my thoughts:
1, Remove & plug the hole in the tender.
2, Modify the level gauge to allow for the higher water level.
3, Make some kind of valve that seals when the water level is above the top of it.
4, Fit a longer vent pipe to the top of the level gauge.
I'll see what option will work may work best.
Thank goodness for this forum.
Trev.

trev crane- Number of posts : 35
Location : Essex, The workshop
Registration date : 2019-09-30
 Tender water gauge.
Hi All,
Here's my solution to my tender water level vent being lower than the belly tank water level.
 20220714_095636 by Trev Read, on Flickr
Drilled and fitted a 1/8" BSP fitting in the top cap.
 20220714_094347 by Trev Read, on Flickr
 20220714_094501 by Trev Read, on Flickr
I have already fitted a vent pipe to the tender next to the water pump pipes.
So shouldn't have any issues with airlocks or getting water into the tender.
Thanks to Simon for the heads up on this.
Trev.
Here's my solution to my tender water level vent being lower than the belly tank water level.
 20220714_095636 by Trev Read, on Flickr
Drilled and fitted a 1/8" BSP fitting in the top cap.
 20220714_094347 by Trev Read, on Flickr
 20220714_094501 by Trev Read, on Flickr
I have already fitted a vent pipe to the tender next to the water pump pipes.
So shouldn't have any issues with airlocks or getting water into the tender.
Thanks to Simon for the heads up on this.
Trev.

trev crane- Number of posts : 35
Location : Essex, The workshop
Registration date : 2019-09-30
 More of EVELYN being built.
Hi All,
It's been far too long since the last post, sorry.
So I there has been much progress and painting.
Tender has been lined.
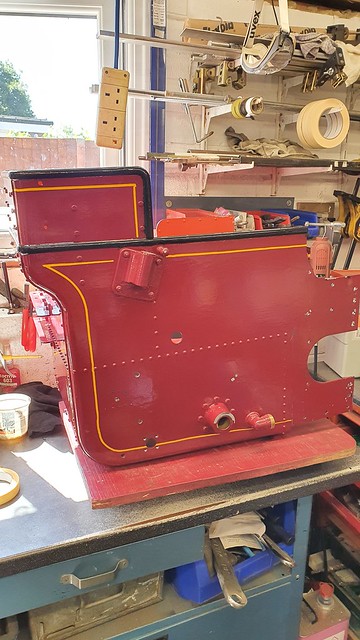 20220710_113357 by Trev Read, on Flickr
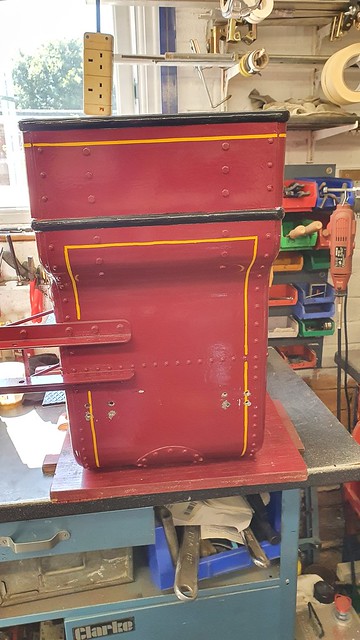 20220710_113412 by Trev Read, on Flickr
Thinking about this now, I should have put a black line on the outside of the yellow one.
May be something I'll do...
Ready to fit to the engine.
 20220714_161205 by Trev Read, on Flickr
The chain hoist comes in very useful.
 20220714_161718 by Trev Read, on Flickr
Cladding drying after spraying.
 20220730_155130 by Trev Read, on Flickr
Starting to line the belly tank.
 20220731_134210 by Trev Read, on Flickr
Tool box as well.
 20220731_134025 by Trev Read, on Flickr
Looking good I think. Now you can see why I want to add a black line to the tender.
 20220807_090419 by Trev Read, on Flickr
 20220807_173722 by Trev Read, on Flickr
There's more to come, done go away.
Trev.
It's been far too long since the last post, sorry.
So I there has been much progress and painting.
Tender has been lined.
 20220710_113357 by Trev Read, on Flickr
 20220710_113412 by Trev Read, on Flickr
Thinking about this now, I should have put a black line on the outside of the yellow one.
May be something I'll do...
Ready to fit to the engine.
 20220714_161205 by Trev Read, on Flickr
The chain hoist comes in very useful.
 20220714_161718 by Trev Read, on Flickr
Cladding drying after spraying.
 20220730_155130 by Trev Read, on Flickr
Starting to line the belly tank.
 20220731_134210 by Trev Read, on Flickr
Tool box as well.
 20220731_134025 by Trev Read, on Flickr
Looking good I think. Now you can see why I want to add a black line to the tender.
 20220807_090419 by Trev Read, on Flickr
 20220807_173722 by Trev Read, on Flickr
There's more to come, done go away.
Trev.

trev crane- Number of posts : 35
Location : Essex, The workshop
Registration date : 2019-09-30
speedy likes this post
 More Evelyn build...
Hi Again,
The winch kit arrived...
And when unpacked:
 20220802_185222 by Trev Read, on Flickr
A call to STW and email to Lynn, had a replacement arrive a week later.
Can't knock the service from STW, great support.
Winch drive.
 20220810_203024 by Trev Read, on Flickr
Fly wheel done, just waiting lining. This wont be done until it's on the engine.
So it can be rotated easily.
 20220814_191842 by Trev Read, on Flickr
Fitting the blast pipe.
 20220910_141223 by Trev Read, on Flickr
I had issue with the position of this in the chimney, it wasn't centered.
I my be being too pedantic about it and it may not make much of a difference, but I had to get it centered correctly.
 20220910_141348 by Trev Read, on Flickr
Ended up making a 5mm spacer to go in gap in the last joint.
Crank shaft was put in & started to fit cladding.
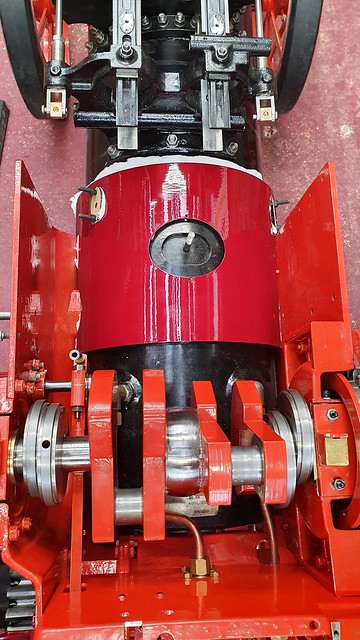 20220918_104851 by Trev Read, on Flickr
 20220919_140757 by Trev Read, on Flickr
Road gears were installed after painting and more cladding.
 20220919_140817 by Trev Read, on Flickr
Cladding on, just needs to be lined.
 20220919_145348 by Trev Read, on Flickr
 20220919_145241 by Trev Read, on Flickr
Enjoy and Happy building.
Trev.
The winch kit arrived...
And when unpacked:
 20220802_185222 by Trev Read, on Flickr
A call to STW and email to Lynn, had a replacement arrive a week later.
Can't knock the service from STW, great support.
Winch drive.
 20220810_203024 by Trev Read, on Flickr
Fly wheel done, just waiting lining. This wont be done until it's on the engine.
So it can be rotated easily.
 20220814_191842 by Trev Read, on Flickr
Fitting the blast pipe.
 20220910_141223 by Trev Read, on Flickr
I had issue with the position of this in the chimney, it wasn't centered.
I my be being too pedantic about it and it may not make much of a difference, but I had to get it centered correctly.
 20220910_141348 by Trev Read, on Flickr
Ended up making a 5mm spacer to go in gap in the last joint.
Crank shaft was put in & started to fit cladding.
 20220918_104851 by Trev Read, on Flickr
 20220919_140757 by Trev Read, on Flickr
Road gears were installed after painting and more cladding.
 20220919_140817 by Trev Read, on Flickr
Cladding on, just needs to be lined.
 20220919_145348 by Trev Read, on Flickr
 20220919_145241 by Trev Read, on Flickr
Enjoy and Happy building.
Trev.

trev crane- Number of posts : 35
Location : Essex, The workshop
Registration date : 2019-09-30
milford59 likes this post
 More Evelyn build.
Hi All,
Here's more of my road loco Evelyn build.
So next thing was getting the crank gears installed again.
 20220919_145531 by Trev Read, on Flickr
 20220919_145550 by Trev Read, on Flickr
And started to fit the connecting rods.
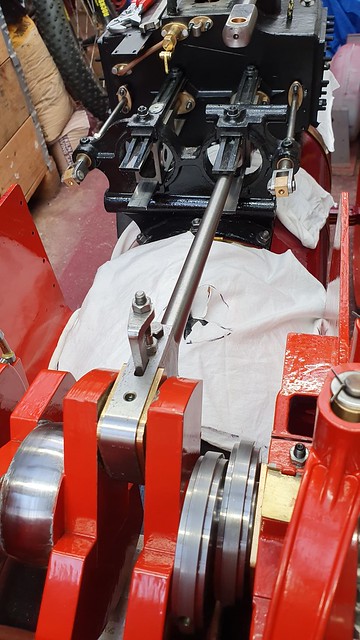 20220924_124845 by Trev Read, on Flickr
Can anyone spot the beginners error!!!!
 20220924_124845 by Trev Read, on Flickr
That's better...
Started to get some lining done, first the boiler cladding
 20221001_152632 by Trev Read, on Flickr
And then the rear wheels.
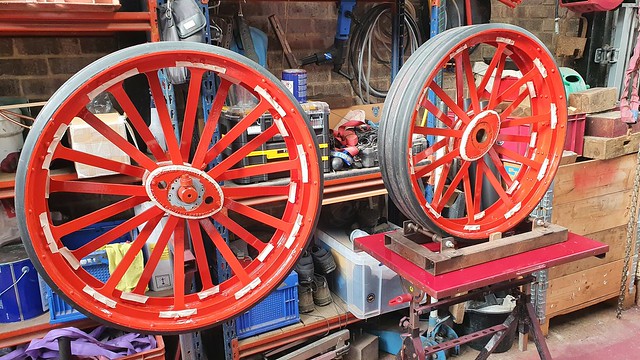 20220924_155845 by Trev Read, on Flickr
 20220925_095445 by Trev Read, on Flickr
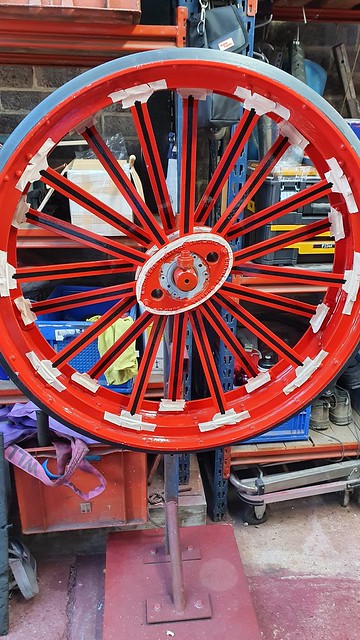 20220925_103515 by Trev Read, on Flickr
 20220925_103530 by Trev Read, on Flickr
 20221002_114243 by Trev Read, on Flickr
Back to the boiler cladding.
 20221002_114232 by Trev Read, on Flickr
Starting to look like an engine.
 20221008_134112 by Trev Read, on Flickr
Got all the motion & regulator fitted.
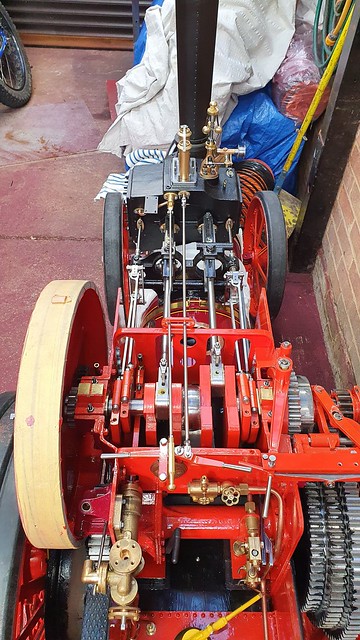 20221009_142808 by Trev Read, on Flickr
That will do for now, next instalment will be fitting the belly tank.
Trev.
Here's more of my road loco Evelyn build.
So next thing was getting the crank gears installed again.
 20220919_145531 by Trev Read, on Flickr
 20220919_145550 by Trev Read, on Flickr
And started to fit the connecting rods.
 20220924_124845 by Trev Read, on Flickr
Can anyone spot the beginners error!!!!
 20220924_124845 by Trev Read, on Flickr
That's better...
Started to get some lining done, first the boiler cladding
 20221001_152632 by Trev Read, on Flickr
And then the rear wheels.
 20220924_155845 by Trev Read, on Flickr
 20220925_095445 by Trev Read, on Flickr
 20220925_103515 by Trev Read, on Flickr
 20220925_103530 by Trev Read, on Flickr
 20221002_114243 by Trev Read, on Flickr
Back to the boiler cladding.
 20221002_114232 by Trev Read, on Flickr
Starting to look like an engine.
 20221008_134112 by Trev Read, on Flickr
Got all the motion & regulator fitted.
 20221009_142808 by Trev Read, on Flickr
That will do for now, next instalment will be fitting the belly tank.
Trev.

trev crane- Number of posts : 35
Location : Essex, The workshop
Registration date : 2019-09-30
tef 20 and milford59 like this post
 More Evelyn build...
Hi All,
Hope everyone got what they wanted for Christmas...
Here's another instalment of my road loco build.
So fitting the belly tank started with lifting the engine to put wheel ramps under the rear & axle stands for the front.
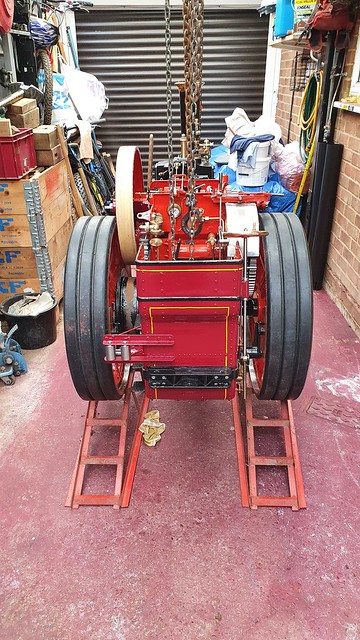 20221014_104933 by Trev Read, on Flickr
 20221014_104950 by Trev Read, on Flickr
This made it much easier to get the belly tank under the boiler and lifted/jacked into place.
 20221014_110618 by Trev Read, on Flickr
 20221014_110626 by Trev Read, on Flickr
 20221014_114120 by Trev Read, on Flickr
Fixing bolts installed.
 20221014_114125 by Trev Read, on Flickr
 20221014_114131 by Trev Read, on Flickr
 20221014_114137 by Trev Read, on Flickr
The outside bolt were left out ready for the steering restrictor chains.
Steering gears installed.
 20221014_130205 by Trev Read, on Flickr
Steering chains.
 20221014_142736 by Trev Read, on Flickr
Steering shaft.
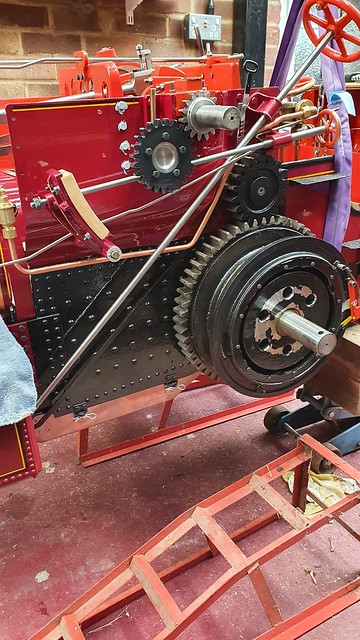 20221014_142806 by Trev Read, on Flickr
Belly & tender tank balance pipe.
 20221014_142756 by Trev Read, on Flickr
Back on the ground again.
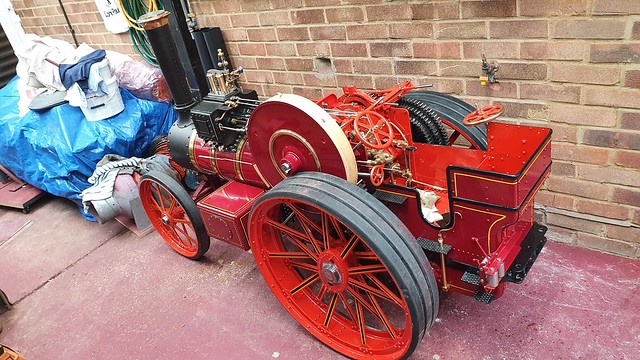 20221014_151514 by Trev Read, on Flickr
 20221014_151532 by Trev Read, on Flickr
Just make the engine look so much more complete with the belly tank fitted.
Around this point I had Evelyn running on compressed air, quite a few leaks were sorted out.
https://www.youtube.com/shorts/579J4RYDHtY?feature=share
Happy building all.
Trev.
Hope everyone got what they wanted for Christmas...
Here's another instalment of my road loco build.
So fitting the belly tank started with lifting the engine to put wheel ramps under the rear & axle stands for the front.
 20221014_104933 by Trev Read, on Flickr
 20221014_104950 by Trev Read, on Flickr
This made it much easier to get the belly tank under the boiler and lifted/jacked into place.
 20221014_110618 by Trev Read, on Flickr
 20221014_110626 by Trev Read, on Flickr
 20221014_114120 by Trev Read, on Flickr
Fixing bolts installed.
 20221014_114125 by Trev Read, on Flickr
 20221014_114131 by Trev Read, on Flickr
 20221014_114137 by Trev Read, on Flickr
The outside bolt were left out ready for the steering restrictor chains.
Steering gears installed.
 20221014_130205 by Trev Read, on Flickr
Steering chains.
 20221014_142736 by Trev Read, on Flickr
Steering shaft.
 20221014_142806 by Trev Read, on Flickr
Belly & tender tank balance pipe.
 20221014_142756 by Trev Read, on Flickr
Back on the ground again.
 20221014_151514 by Trev Read, on Flickr
 20221014_151532 by Trev Read, on Flickr
Just make the engine look so much more complete with the belly tank fitted.
Around this point I had Evelyn running on compressed air, quite a few leaks were sorted out.
https://www.youtube.com/shorts/579J4RYDHtY?feature=share
Happy building all.
Trev.

trev crane- Number of posts : 35
Location : Essex, The workshop
Registration date : 2019-09-30
tef 20 likes this post
 Re: EVELYN my Road Loco build
Cracking job looks fantastic ,the paint work is a credit to you . I am waiting for my 2" kit to start in January then hopefully a 4" next
Dickinson- Number of posts : 6
Age : 72
Location : South wirral
Registration date : 2022-12-04
trev crane likes this post
 More Evelyn build...
Hi all,
It's too cold in the workshop, only just above freezing.
So here an up date on progress.
My last kit arrived.
 20221111_165700 by Trev Read, on Flickr
Installed all the oilers and wicks, the wicks were a pain to get in to the oilers.
 20221105_155017 by Trev Read, on Flickr
I had the rear wheels off to install secondary non-return valves in both boiler water feed pipes.
Injector side.
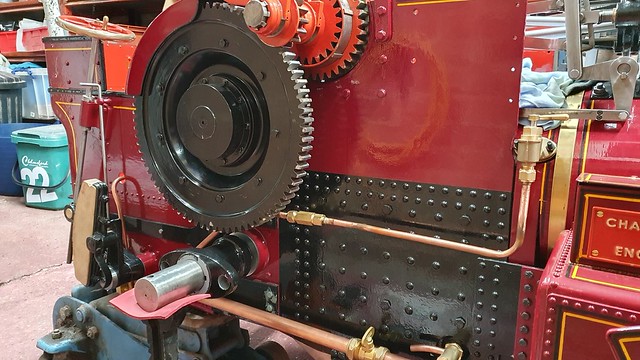 20221223_162520 by Trev Read, on Flickr
I haven't got a picture of the pump side pipe work, so just take my word for it....
Reverser installed, it's got to come off again for the mounting plate to be painted (once the weather improves).
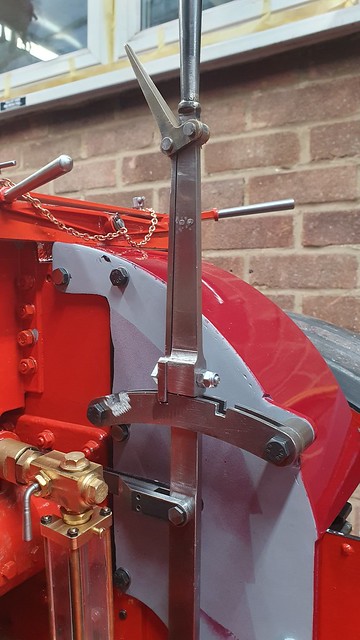 20221219_144519 by Trev Read, on Flickr
And I cut the quadrant slots as well.
Forward
 20221219_144529 by Trev Read, on Flickr
Reverse
 20221219_144535 by Trev Read, on Flickr
I have since this was taken cut 2 more forward cut offs & 1 extra for reverse.
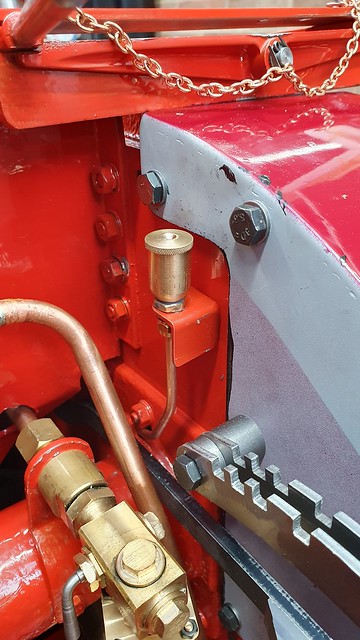 20221229_130336 by Trev Read, on Flickr
You can also see I have relocated the second shaft oilers for better access.
 20221229_130345 by Trev Read, on Flickr
Installed the cylinder drain pipes.
 20221226_154523 by Trev Read, on Flickr
Just need to trim a bit off to level them.
Test fitting the motion guards
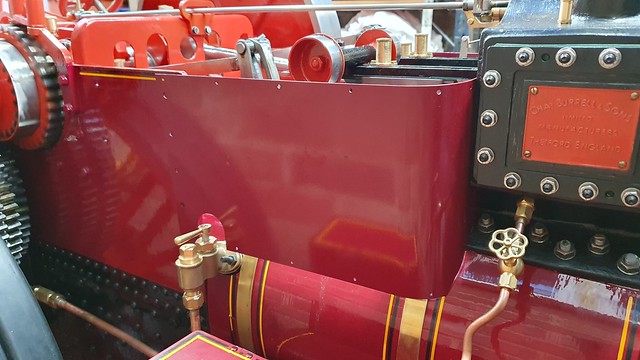 20221229_145225 by Trev Read, on Flickr
This was a good moment, getting the name plats on.
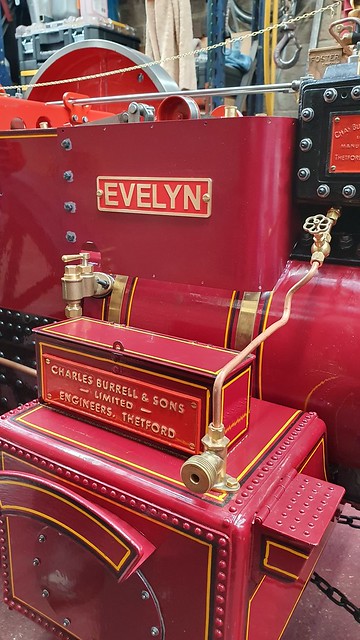 20230101_133411 by Trev Read, on Flickr
I had it made by David at Nameplates.wix.com
Very good service,
And the other side.
 20221229_145233 by Trev Read, on Flickr
And started on the roof.
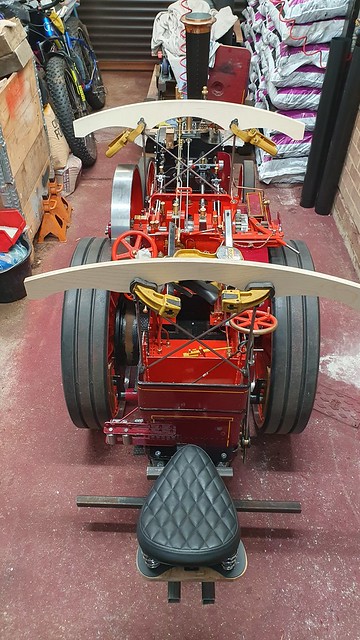 20230114_162332 by Trev Read, on Flickr
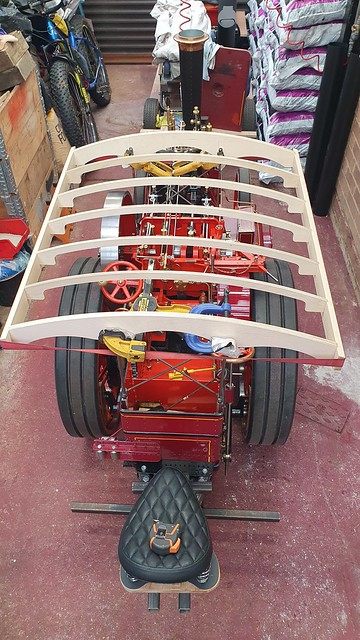 20230115_105235 by Trev Read, on Flickr
I'm going to be modifying the rear of the roof to allow easier driving, I want to keep the roof on as much as possible.
It will still be removable if required.
That it for now, happy building all.
It's too cold in the workshop, only just above freezing.
So here an up date on progress.
My last kit arrived.
 20221111_165700 by Trev Read, on Flickr
Installed all the oilers and wicks, the wicks were a pain to get in to the oilers.
 20221105_155017 by Trev Read, on Flickr
I had the rear wheels off to install secondary non-return valves in both boiler water feed pipes.
Injector side.
 20221223_162520 by Trev Read, on Flickr
I haven't got a picture of the pump side pipe work, so just take my word for it....
Reverser installed, it's got to come off again for the mounting plate to be painted (once the weather improves).
 20221219_144519 by Trev Read, on Flickr
And I cut the quadrant slots as well.
Forward
 20221219_144529 by Trev Read, on Flickr
Reverse
 20221219_144535 by Trev Read, on Flickr
I have since this was taken cut 2 more forward cut offs & 1 extra for reverse.
 20221229_130336 by Trev Read, on Flickr
You can also see I have relocated the second shaft oilers for better access.
 20221229_130345 by Trev Read, on Flickr
Installed the cylinder drain pipes.
 20221226_154523 by Trev Read, on Flickr
Just need to trim a bit off to level them.
Test fitting the motion guards
 20221229_145225 by Trev Read, on Flickr
This was a good moment, getting the name plats on.
 20230101_133411 by Trev Read, on Flickr
I had it made by David at Nameplates.wix.com
Very good service,
And the other side.
 20221229_145233 by Trev Read, on Flickr
And started on the roof.
 20230114_162332 by Trev Read, on Flickr
 20230115_105235 by Trev Read, on Flickr
I'm going to be modifying the rear of the roof to allow easier driving, I want to keep the roof on as much as possible.
It will still be removable if required.
That it for now, happy building all.

trev crane- Number of posts : 35
Location : Essex, The workshop
Registration date : 2019-09-30
LiveSteam and milford59 like this post
 Finished (nearly)
Hi,
Some of the last finishing jobs & first steaming.
I made a test rig for the safety valves.
 20221231_123503 by Trev Read, on Flickr]
 20221231_123741 by Trev Read, on Flickr
I haven't got a pressure test unit at home so took the bit to work to test.
 20230111_131635 by Trev Read, on Flickr
The mounting hole on the right hand side motion plate weren't in the correct place, so had to re-drill.
I'll fill them and repaint.
 20230101_133331 by Trev Read, on Flickr
Lots of filing to get the star to fit correctly.
 20230114_131504 by Trev Read, on Flickr
Starting to hash together some kind of removable section of the rear roof.
 20230128_134751 by Trev Read, on Flickr
Made a new rear support for the roof.
 20230116_161008 by Trev Read, on Flickr
Removable section cut out no going back now...
 20230128_142949 by Trev Read, on Flickr
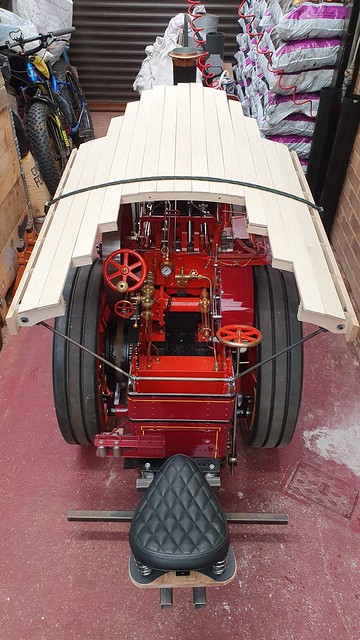
Mocked up to see how it will look & work. Still got to cut the roof strips to length.
 20230128_143259 by Trev Read, on Flickr
Added some bracing to the roof to help stiffen it.
 20230219_103600 by Trev Read, on Flickr
Roof stripped down ready for epoxy gluing.
 20230219_112032 by Trev Read, on Flickr
Epoxy finished and now setting.
 20230219_120727 by Trev Read, on Flickr
I'll be epoxying the rest of the roof when I get to that point.
FIRST STEAMING...
 20230209_092505 by Trev Read, on Flickr
And yes it rained...
 20230209_092452 by Trev Read, on Flickr
Happy owner

 IMG-20230209-WA0001 by Trev Read, on Flickr
I'm looking forward to many happy hours with my engine at rallies.
Some of the last finishing jobs & first steaming.
I made a test rig for the safety valves.
 20221231_123503 by Trev Read, on Flickr]
 20221231_123741 by Trev Read, on Flickr
I haven't got a pressure test unit at home so took the bit to work to test.
 20230111_131635 by Trev Read, on Flickr
The mounting hole on the right hand side motion plate weren't in the correct place, so had to re-drill.
I'll fill them and repaint.
 20230101_133331 by Trev Read, on Flickr
Lots of filing to get the star to fit correctly.
 20230114_131504 by Trev Read, on Flickr
Starting to hash together some kind of removable section of the rear roof.
 20230128_134751 by Trev Read, on Flickr
Made a new rear support for the roof.
 20230116_161008 by Trev Read, on Flickr
Removable section cut out no going back now...
 20230128_142949 by Trev Read, on Flickr
Mocked up to see how it will look & work. Still got to cut the roof strips to length.
 20230128_143259 by Trev Read, on Flickr
Added some bracing to the roof to help stiffen it.
 20230219_103600 by Trev Read, on Flickr
Roof stripped down ready for epoxy gluing.
 20230219_112032 by Trev Read, on Flickr
Epoxy finished and now setting.
 20230219_120727 by Trev Read, on Flickr
I'll be epoxying the rest of the roof when I get to that point.
FIRST STEAMING...
 20230209_092505 by Trev Read, on Flickr
And yes it rained...
 20230209_092452 by Trev Read, on Flickr
Happy owner
 IMG-20230209-WA0001 by Trev Read, on Flickr
I'm looking forward to many happy hours with my engine at rallies.

trev crane- Number of posts : 35
Location : Essex, The workshop
Registration date : 2019-09-30
LiveSteam and milford59 like this post
 Final installment of my Evelyn DCC bui;ld
Hi All,
This will be the last post of my DCC road Loco build.
There will be more Evelyn exploits & posts.
So the last parts of the build:
Got the roof planks positioned, measured and ready for epoxying.
 20230409_111055 by Trev Read, on Flickr
The board across the front is to align all the planks to get them level.
 20230409_111109 by Trev Read, on Flickr
First part done, I'm using WEST System Epoxy.
 20230409_123330 by Trev Read, on Flickr
 20230409_123432 by Trev Read, on Flickr
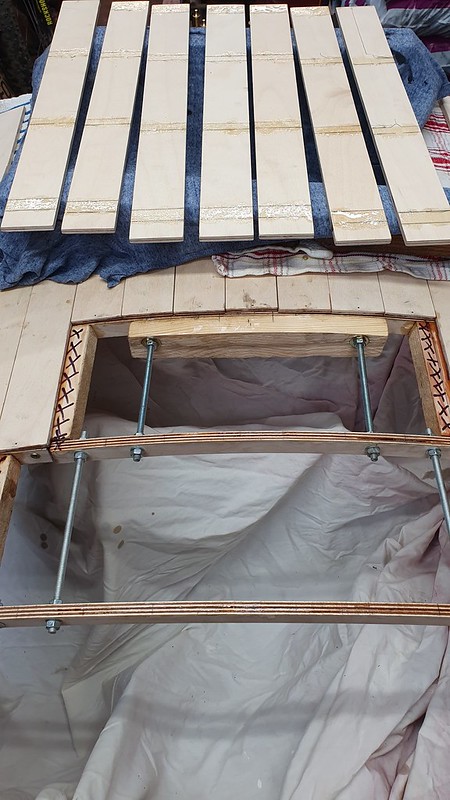
And then the removable section. Wetted with epoxy before a second coat can be applied.
 20230410_112740 by Trev Read, on Flickr
 20230410_112748 by Trev Read, on Flickr
And I have sorted out the issue with the R/H motion guard.
 20230101_133336 by Trev Read, on Flickr
A bit of TIG welding, just need a few coats of paint to finish. (no one will ever know...)
 20230402_123206 by Trev Read, on Flickr
And a clip of Good Fridays steam up, before the boiler test later this month.
 GX010014 by Trev Read, on Flickr
Well that's more or less it, I may post on this thread when Evelyn has her date with the boiler inspector.
Hoping to see and catch up with other STW engine owners at rallies soon.
Regards to all
Trev & Evelyn
This will be the last post of my DCC road Loco build.
There will be more Evelyn exploits & posts.
So the last parts of the build:
Got the roof planks positioned, measured and ready for epoxying.
 20230409_111055 by Trev Read, on Flickr
The board across the front is to align all the planks to get them level.
 20230409_111109 by Trev Read, on Flickr
First part done, I'm using WEST System Epoxy.
 20230409_123330 by Trev Read, on Flickr
 20230409_123432 by Trev Read, on Flickr
And then the removable section. Wetted with epoxy before a second coat can be applied.
 20230410_112740 by Trev Read, on Flickr
 20230410_112748 by Trev Read, on Flickr
And I have sorted out the issue with the R/H motion guard.
 20230101_133336 by Trev Read, on Flickr
A bit of TIG welding, just need a few coats of paint to finish. (no one will ever know...)
 20230402_123206 by Trev Read, on Flickr
And a clip of Good Fridays steam up, before the boiler test later this month.
 GX010014 by Trev Read, on Flickr
Well that's more or less it, I may post on this thread when Evelyn has her date with the boiler inspector.
Hoping to see and catch up with other STW engine owners at rallies soon.
Regards to all
Trev & Evelyn

trev crane- Number of posts : 35
Location : Essex, The workshop
Registration date : 2019-09-30
LiveSteam likes this post
 Similar topics
» Anyone want to build a 2" road loco?
» DCC road loco
» STW 2" road loco
» Road Loco Tender Kit
» What will it be? (next showmans/road loco kit)
» DCC road loco
» STW 2" road loco
» Road Loco Tender Kit
» What will it be? (next showmans/road loco kit)
Page 1 of 1
Permissions in this forum:
You cannot reply to topics in this forum