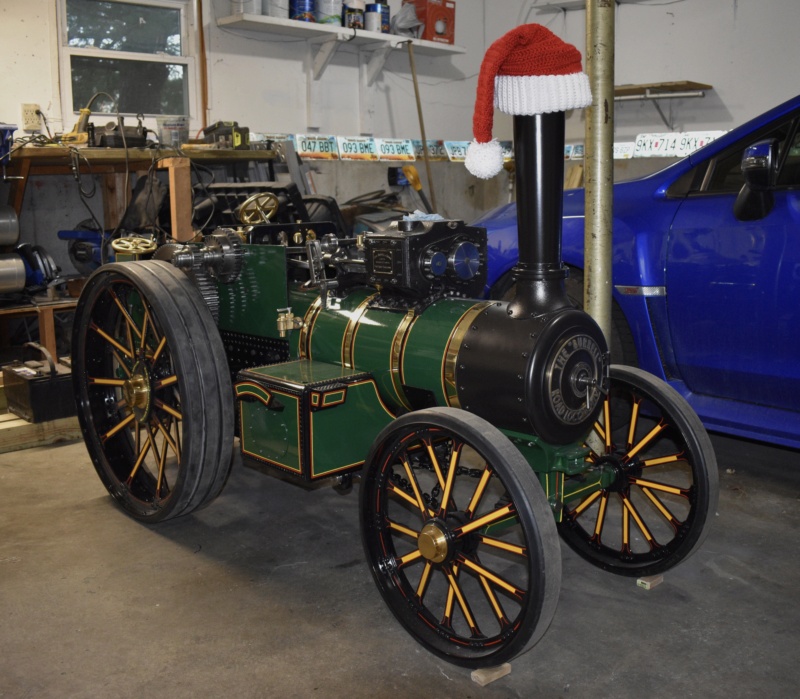
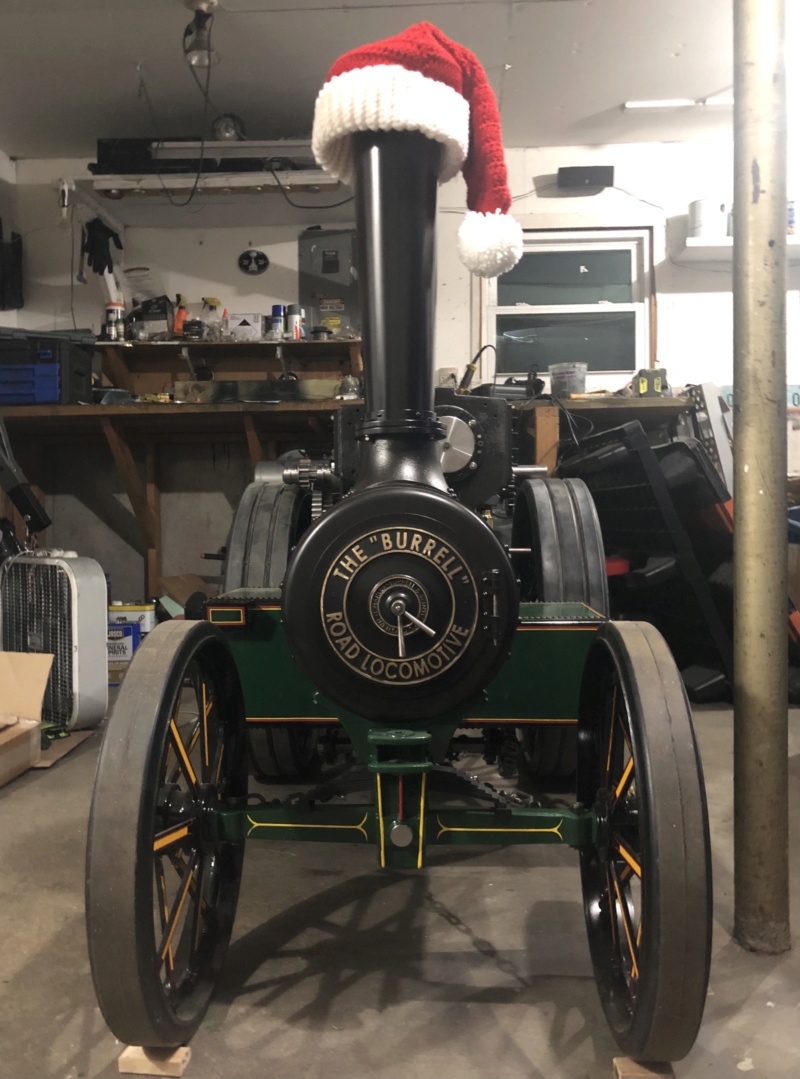
4” Road Loco ‘Rachel’
+8
JayBee
BurrellSimplicity
Flasback
Mark the spark
lynnr
Steve Traill
Simon C
bazzer
12 posters
Page 4 of 5
Page 4 of 5 •  1, 2, 3, 4, 5
Midwest Steam- Number of posts : 136
Location : MO, USA
Registration date : 2018-09-19

Midwest Steam- Number of posts : 136
Location : MO, USA
Registration date : 2018-09-19
Will@STW likes this post
 Re: 4” Road Loco ‘Rachel’
That is looking very impressive indeed !!
milford59- Number of posts : 307
Location : Milford on Sea
Registration date : 2019-05-19
 Re: 4” Road Loco ‘Rachel’
I appreciate the kind words, apologies for taking so long to reply.
While it might not look it it’s been a busy couple of weeks. Finished assembling and painting the ashpan, it’s currently on the engine. Lapped the crankshaft in the bearings and also installed, it turns by hand and should wear in over time. Fitted the brakes and will be painting those parts along with the roller brackets in the next couple of days. Painted the cylinder block recently, really looking forward to throwing my back out putting it on the engine...alright it’s not that heavy but it’s a workout . Test fitted the water gauge but took it back off to avoid breaking the glass as the build progresses. That’s about it for now, hopefully next update I’ll have the cylinder block on and the connecting rods attached.

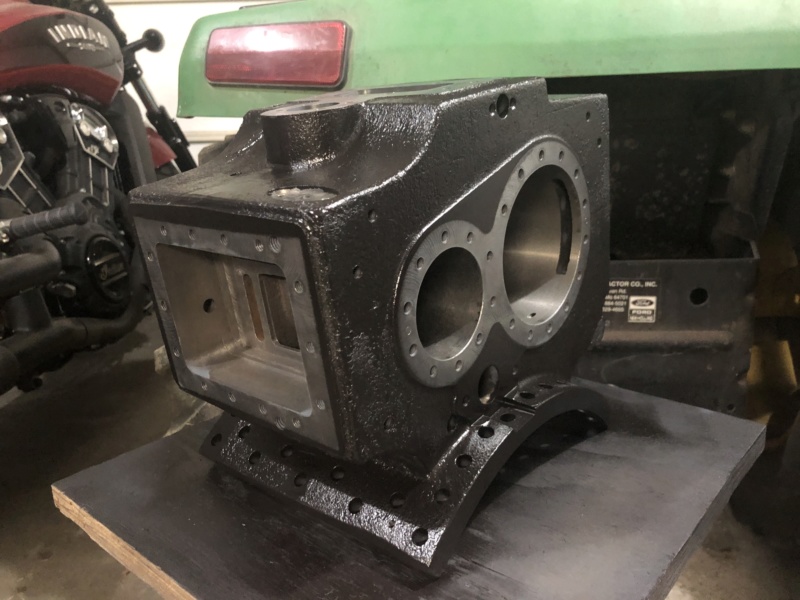

While it might not look it it’s been a busy couple of weeks. Finished assembling and painting the ashpan, it’s currently on the engine. Lapped the crankshaft in the bearings and also installed, it turns by hand and should wear in over time. Fitted the brakes and will be painting those parts along with the roller brackets in the next couple of days. Painted the cylinder block recently, really looking forward to throwing my back out putting it on the engine...alright it’s not that heavy but it’s a workout
 . Test fitted the water gauge but took it back off to avoid breaking the glass as the build progresses. That’s about it for now, hopefully next update I’ll have the cylinder block on and the connecting rods attached.


Midwest Steam- Number of posts : 136
Location : MO, USA
Registration date : 2018-09-19
LiveSteam and Will@STW like this post
 Re: 4” Road Loco ‘Rachel’
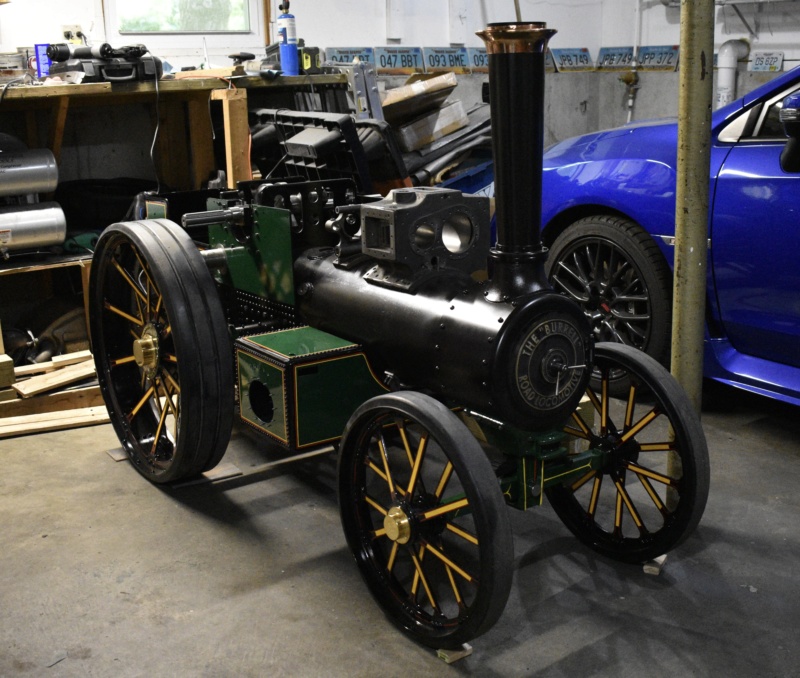
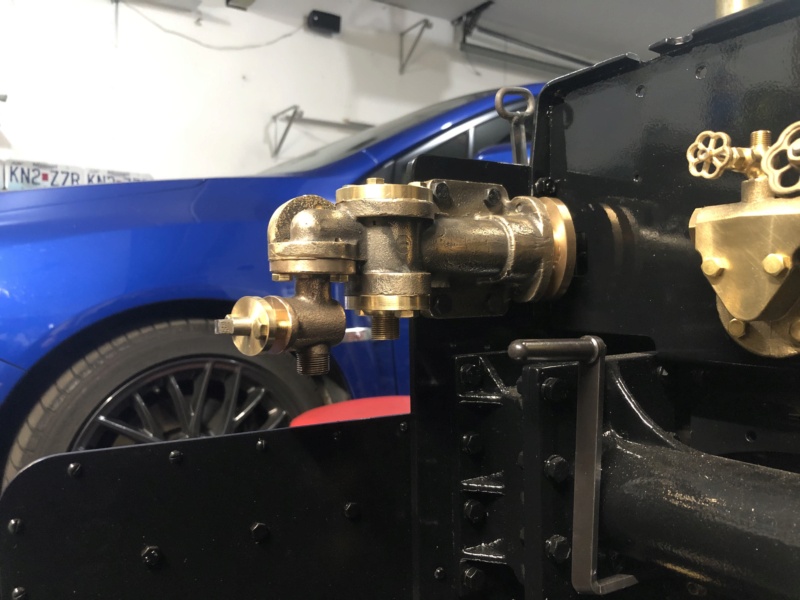
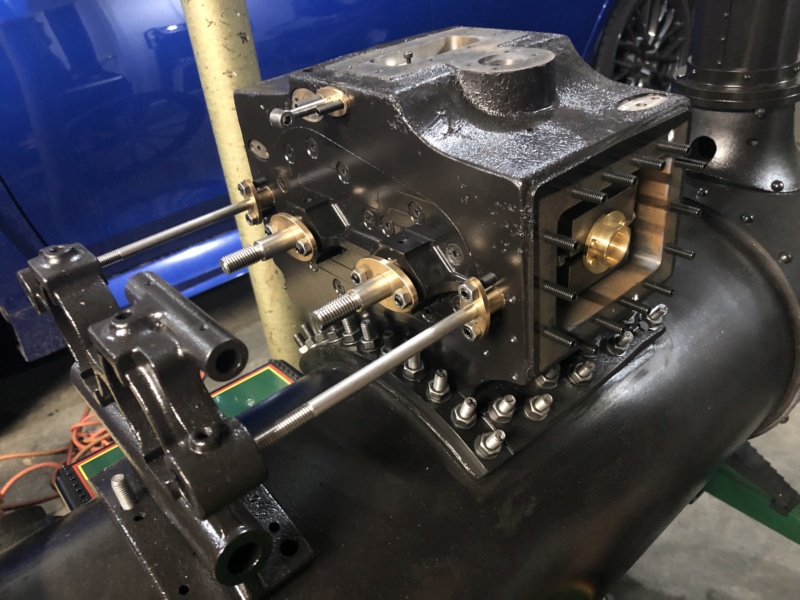
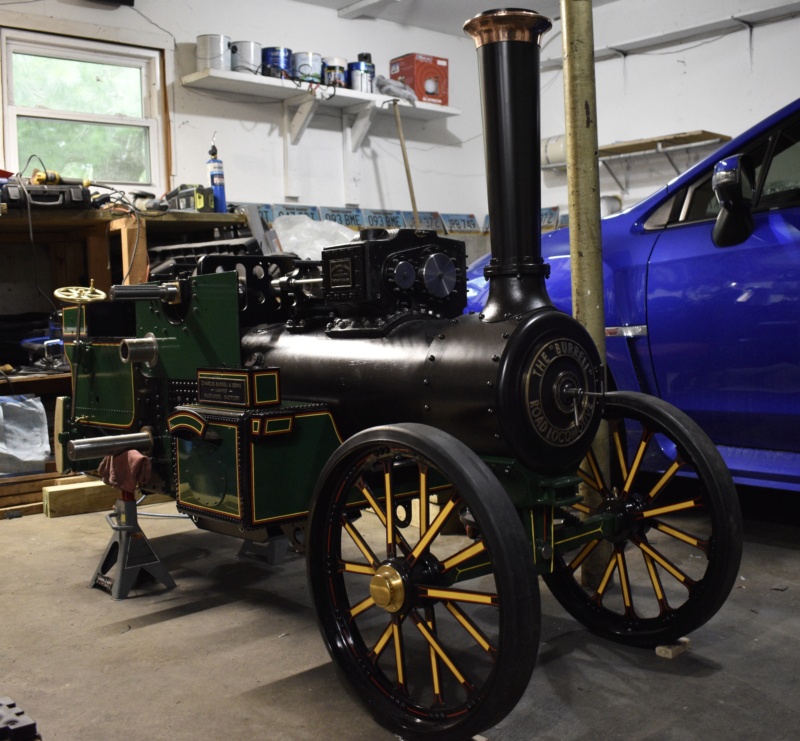
Hope everyone is doing well, done a few things to the engine this past month. Painted the cylinder block and installed it on the boiler, left the studs a bit long for a while until I knew the block wasn’t gonna be taken off. Assembled and tested the water pump, it works quite well and doesn’t leak so I can call that a success. Next was the valves, the LH side was giving me all sorts of trouble but with some guidance from Will it’s been sorted.
Once the valves were installed the pistons were next along with packing the glands. The fun part was to follow...fitting the weighshaft bracket. It probably too the better part of the day along with several lengthy breaks but it’s fitted and the valves with the alignment tool fit, at least to the best of my abilities. Its a bit tight but nothing too excessive, should be alright when the expansion links are installed and it’s been steamed a few times.
That’s about it for this time, I’ll leave the last few of the most recent photos of the engine. The slidebars, crossheads and connecting rods are only on temporarily. Looks like I’ll have to add some shims to the crankshaft. I’ll have to get around to fitting And painting the cladding before adding the rest of the running gear.


Midwest Steam- Number of posts : 136
Location : MO, USA
Registration date : 2018-09-19
 Re: 4” Road Loco ‘Rachel’
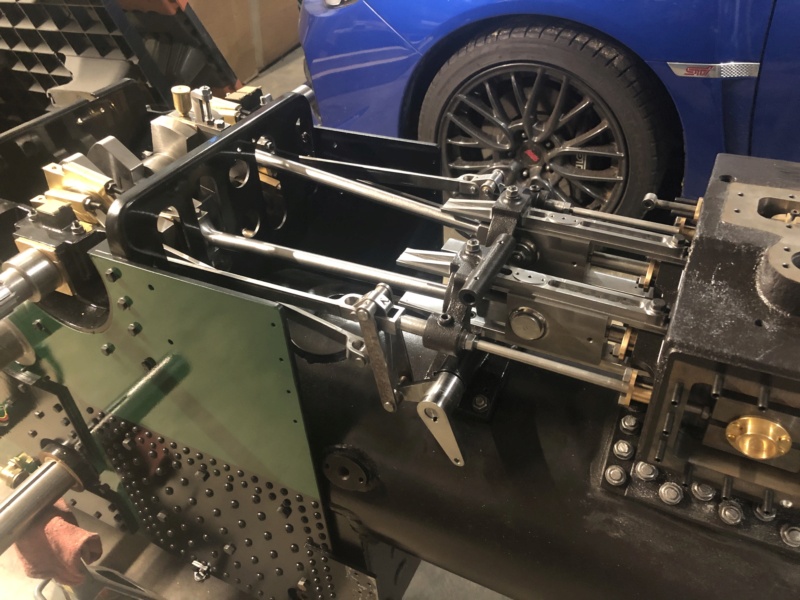
Getting a little ahead of myself, fitting the running gear before the cladding...still waiting on the replacement to arrive before I can start fitting and painting the cladding. In the meantime it seems like a good idea to make adjustments to the running gear now instead of putting it off till later. Once the cladding is painted everything should go together fairly smoothly, at least in a perfect world!



Midwest Steam- Number of posts : 136
Location : MO, USA
Registration date : 2018-09-19
 Re: 4” Road Loco ‘Rachel’
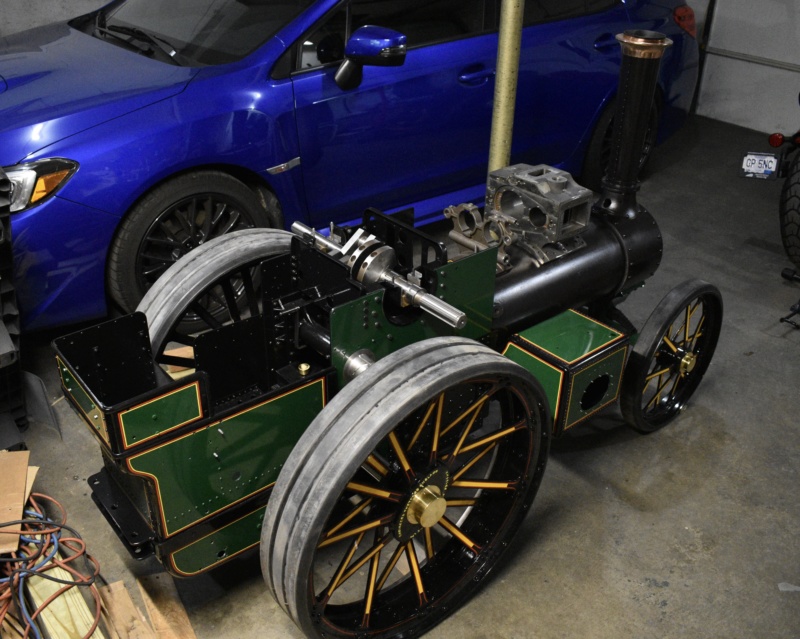
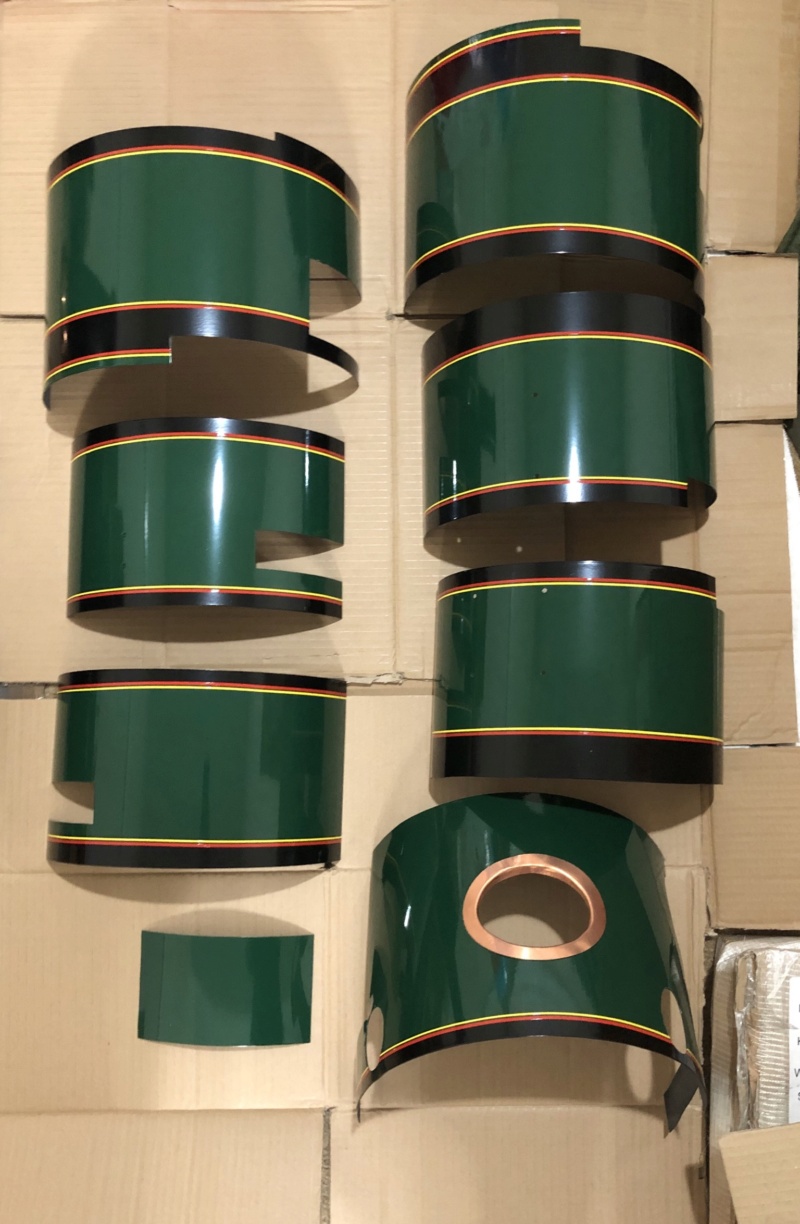
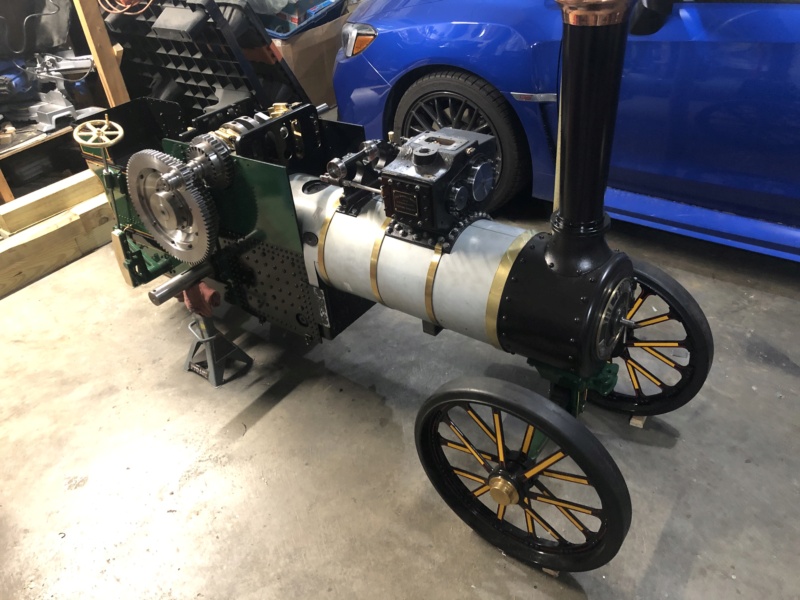
Good news, the cladding has arrived safe and sound and has been placed on the engine. Did some trimming to get a good fit and still have a little more to do but it’s nearly ready for paint. Also test fitted the gears on the crankshaft and on the 2nd shaft as well as assemble the final drive/differential a few weeks ago.


Midwest Steam- Number of posts : 136
Location : MO, USA
Registration date : 2018-09-19
Will@STW likes this post
 Re: 4” Road Loco ‘Rachel’
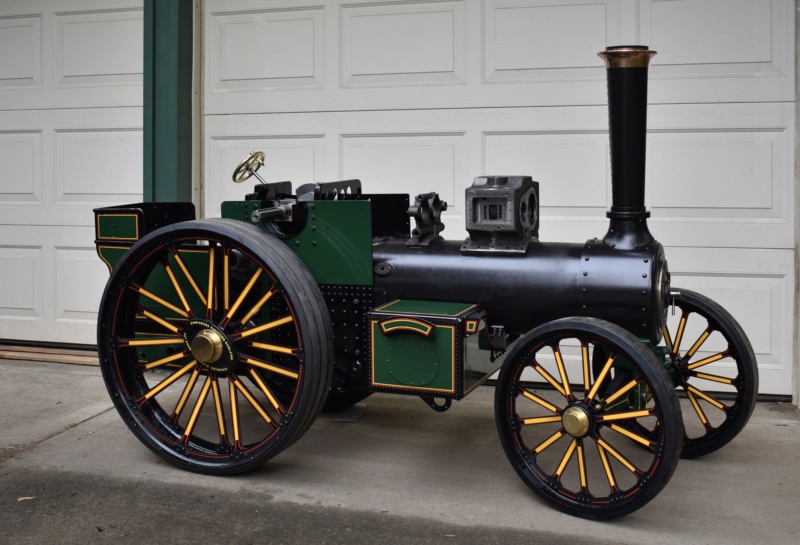
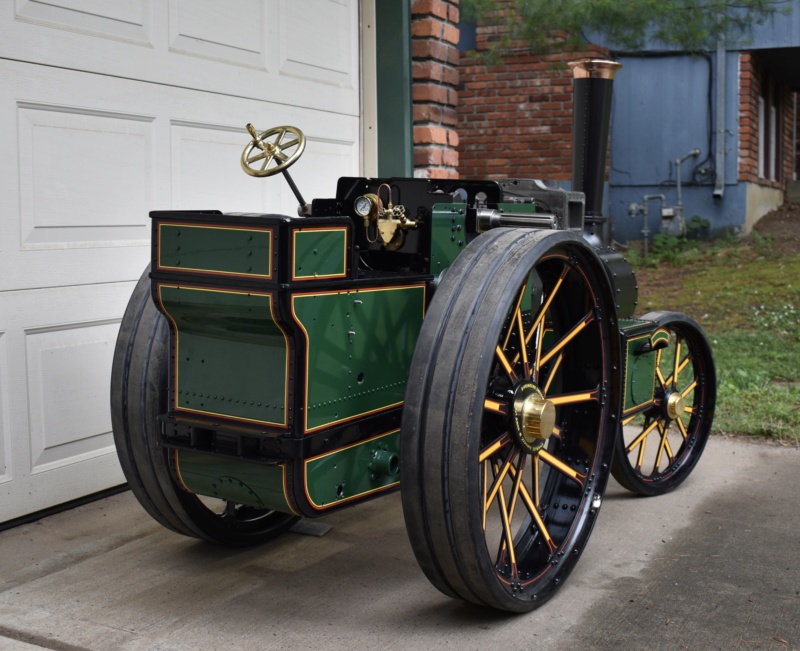
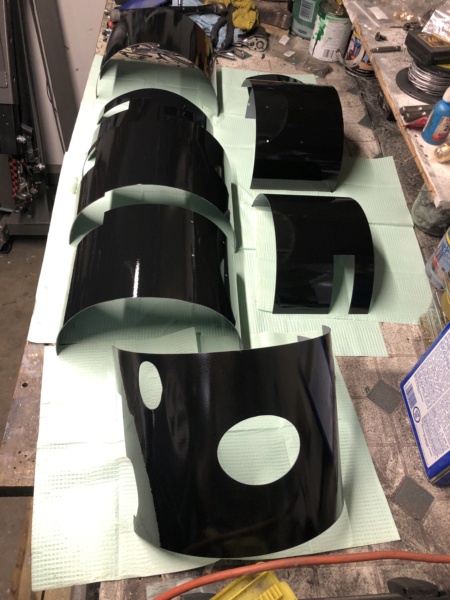
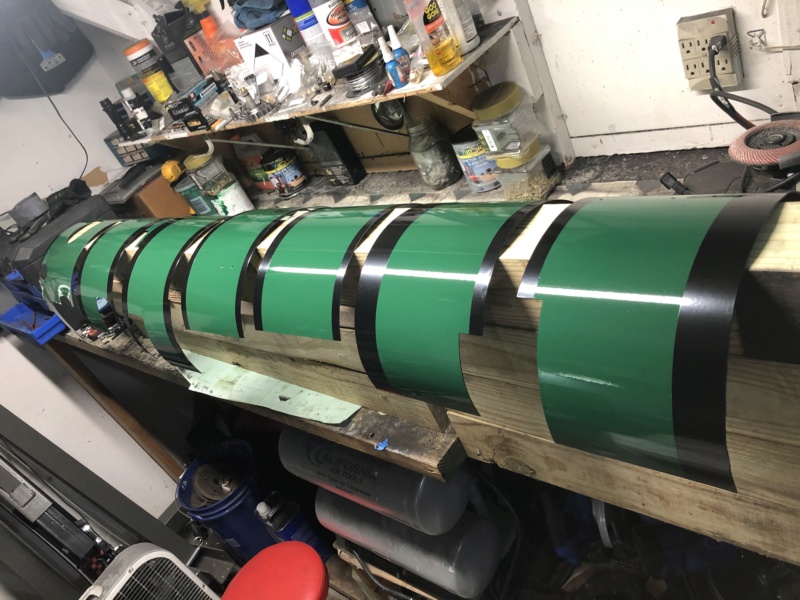
The cladding has been painted...well mostly, Everything except the lining and clear coat has been done. I’ve been giving the paint a few days between coats to dry plus I’ve had a few problems with the gloss black and took a few attempts to get it right. Gonna give it a long time to cure before moving on to the next step, so everything is inside in the basement to be protected from the colder temps of the garage. I’m sure a normal person would’ve painted the green then follow up with the black stripe, this way seemed easier to mask off and paint with an HVLP spray gun.





Midwest Steam- Number of posts : 136
Location : MO, USA
Registration date : 2018-09-19
Will@STW, milford59 and GeorgeTB like this post

Midwest Steam- Number of posts : 136
Location : MO, USA
Registration date : 2018-09-19
bazzer, Will@STW, milford59 and GeorgeTB like this post
 Re: 4” Road Loco ‘Rachel’
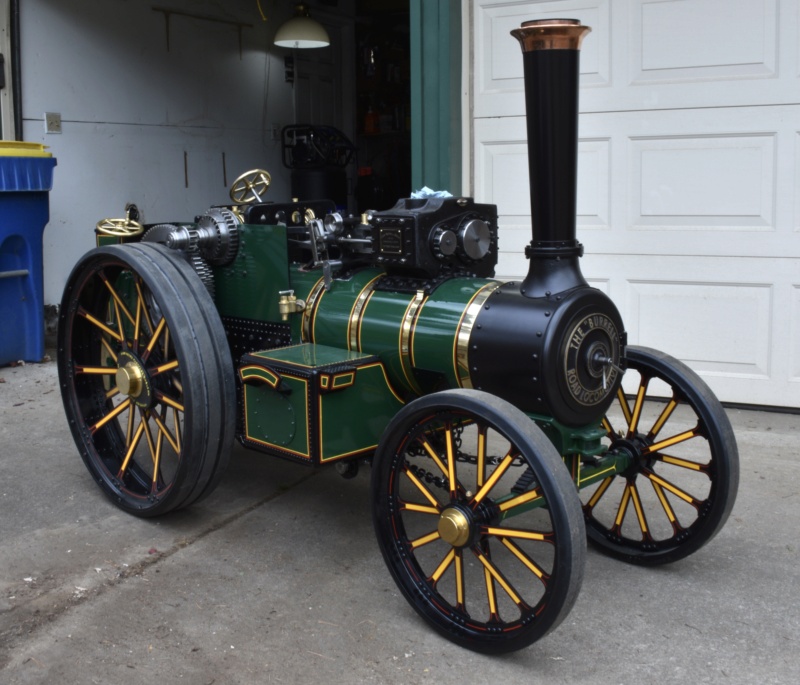
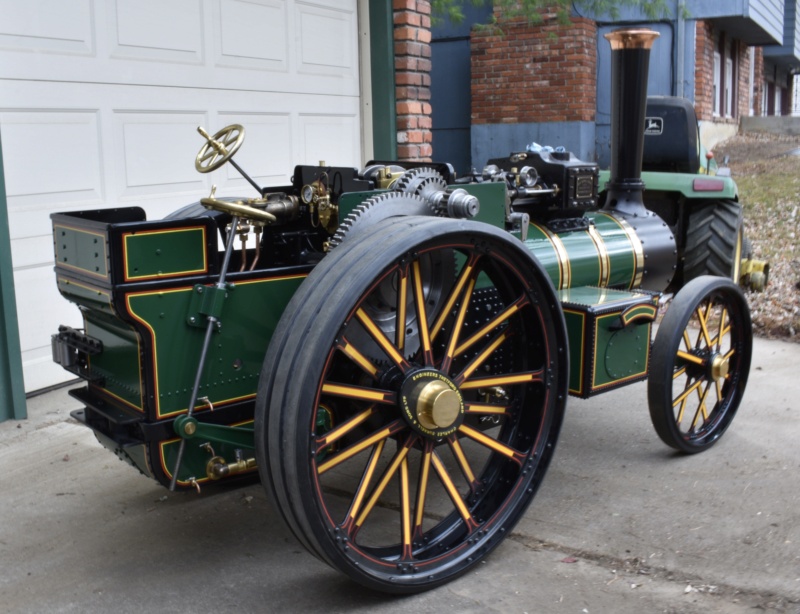
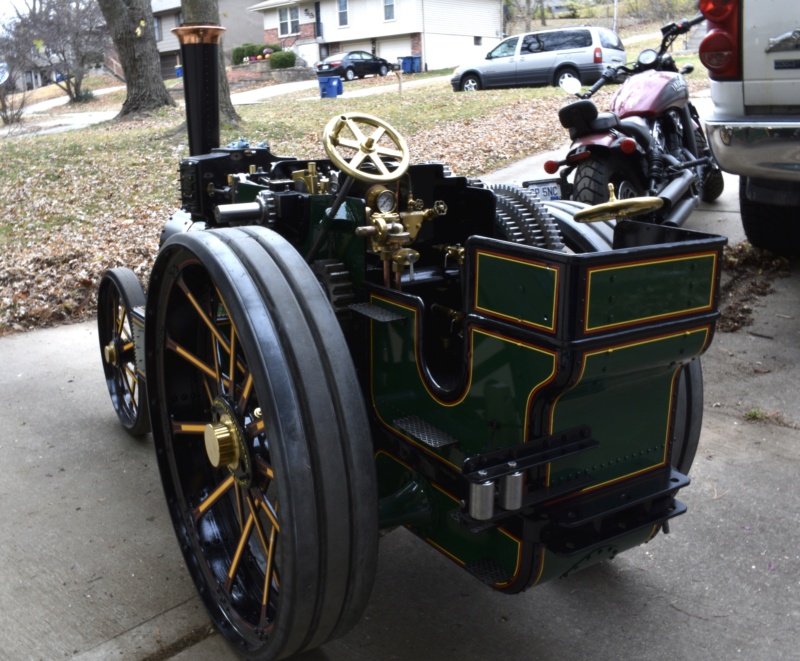
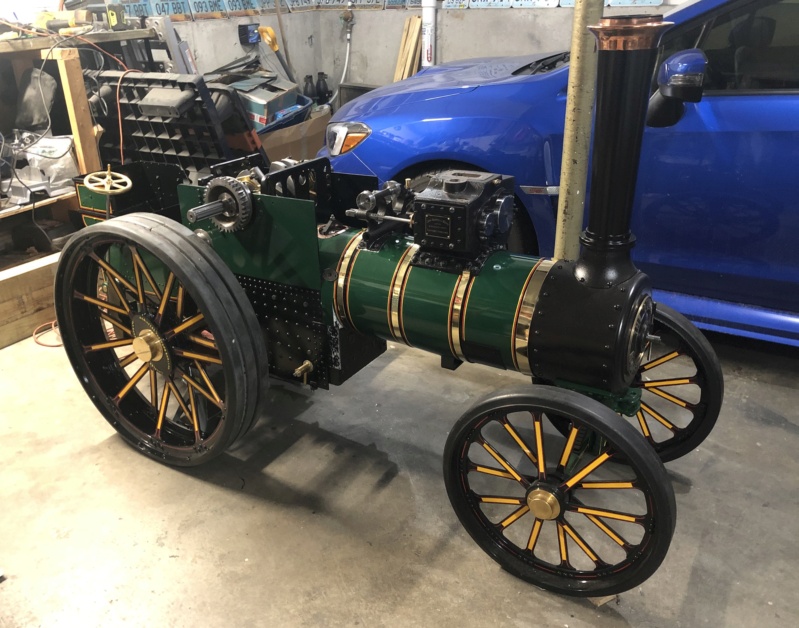
It’s been almost a month, what have I accomplished...well not very much. One of the pieces of cladding didn’t turn out very well and I have no idea what caused it, so that took time to fix. In fact I had to strip the paint off and restart just to make sure it was done right. Today was the big day, putting all the cladding back on and doing so by myself. It can be done but it would be so much easier with some help or at least an extra pair of hands. Job done, and put one of the rear wheels on for show. Gonna wrestle the belly tank back on and call it a day. Thinking tomorrow will be putting the motion back on and doing the steering.



Midwest Steam- Number of posts : 136
Location : MO, USA
Registration date : 2018-09-19

Midwest Steam- Number of posts : 136
Location : MO, USA
Registration date : 2018-09-19
Will@STW likes this post

Midwest Steam- Number of posts : 136
Location : MO, USA
Registration date : 2018-09-19
Will@STW likes this post
 Re: 4” Road Loco ‘Rachel’
Nice work 
Nah a bit of patina on it will only improve it
Midwest Steam wrote: Almost thinking it’ll be a shame to run the engine and get the paintwork all oily
Nah a bit of patina on it will only improve it
LiveSteam- Number of posts : 777
Location : Hampshire
Registration date : 2013-09-08
 Re: 4” Road Loco ‘Rachel’
No way! Gonna put it in a glass case like Snow White!LiveSteam wrote:Nice work Midwest Steam wrote: Almost thinking it’ll be a shame to run the engine and get the paintwork all oily
Nah a bit of patina on it will only improve it
 Wouldn’t be a proper Road Loco if it wasn’t a little oily and dirty.
Midwest Steam- Number of posts : 136
Location : MO, USA
Registration date : 2018-09-19
LiveSteam likes this post
 Re: 4” Road Loco ‘Rachel’
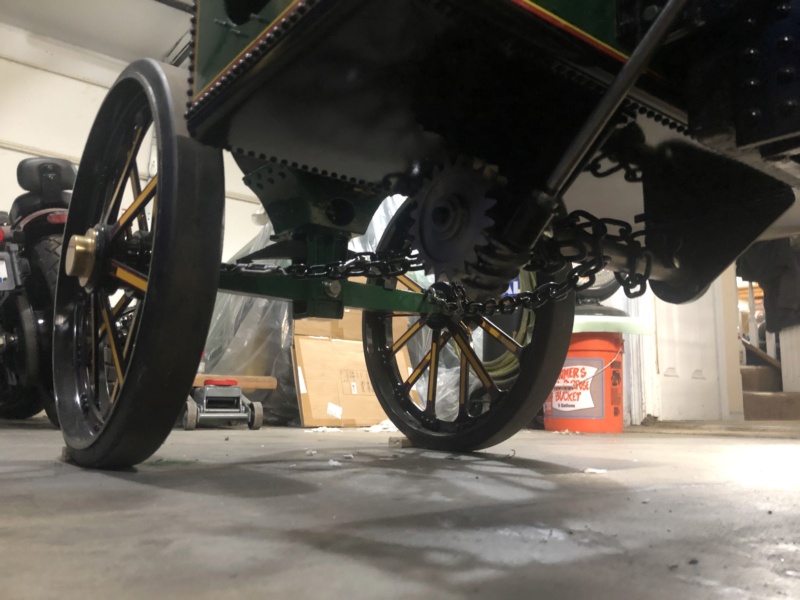
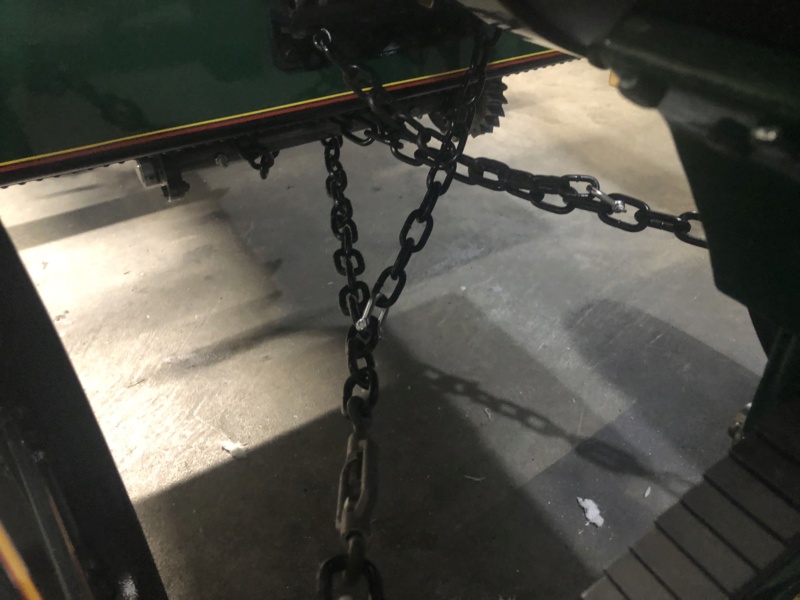
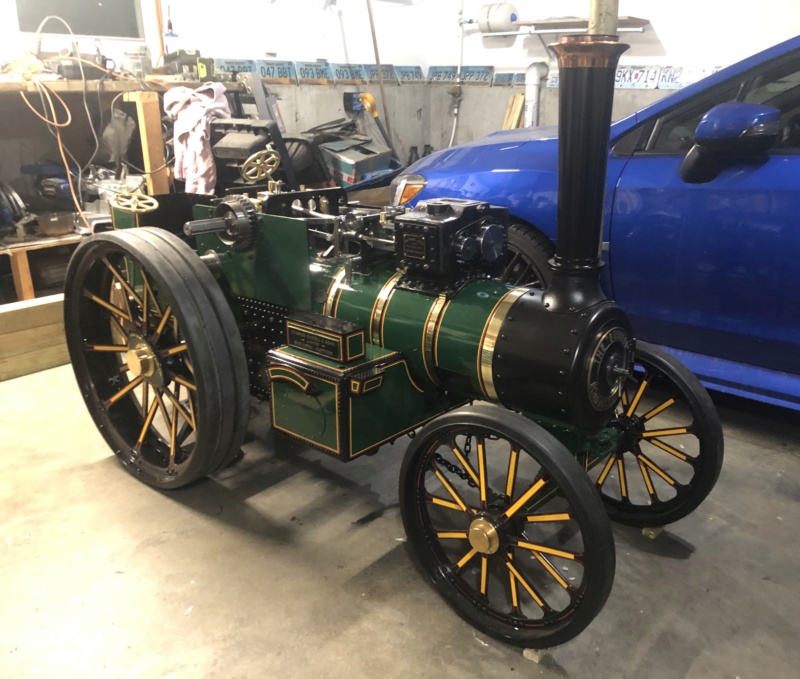
That’s the steering done, took most of the day to get everything lined up and working as it should. Once the bushings on the steering were run it a bit and was able to add the steering chains. Once on I had to test it out by turning the wheels left and right a couple (dozen) times. Unfortunately I’m out of kits for the time being, there’s plenty of small things to do but there won’t be any big updates until around springtime. I’m absolutely delighted with how much progress was made this year, I’m also glad that most of the more challenging bits are safely on the engine.


Midwest Steam- Number of posts : 136
Location : MO, USA
Registration date : 2018-09-19
Will@STW likes this post
 Re: 4” Road Loco ‘Rachel’
Hi
Looking very nice indeed. Just a thought through experience. Are the eyes on the chain adjusters welded closed. Reason being, the eyes will over time start to spread open. Especially if you are on rough ground.
Looking very nice indeed. Just a thought through experience. Are the eyes on the chain adjusters welded closed. Reason being, the eyes will over time start to spread open. Especially if you are on rough ground.
lynnr- Number of posts : 3242
Age : 55
Location : Highland, 4inch showman
Registration date : 2010-08-06
 Re: 4” Road Loco ‘Rachel’
Had a look at all the eyes and they are all welded shut from the factory. I could imagine how terrifying it must be to have an engine go out of control.lynnr wrote:Hi
Looking very nice indeed. Just a thought through experience. Are the eyes on the chain adjusters welded closed. Reason being, the eyes will over time start to spread open. Especially if you are on rough ground.

Midwest Steam- Number of posts : 136
Location : MO, USA
Registration date : 2018-09-19
lynnr likes this post
 Re: 4” Road Loco ‘Rachel’
Been there done that! only takes one good pothole and the link opens up, that's why they are all welded now. If you want to do much road work think about fitting a spring in the chain. You need about 8mm of play and that makes the steering a dream when trundling along at anything over 10mph. Without it you can get a 'wobble on' which can be scary and requires immediate loss of speed!

Steve Traill- Number of posts : 800
Age : 67
Location : Illogan Redruth Cornwall
Registration date : 2008-06-29
 Re: 4” Road Loco ‘Rachel’
Your engine is looking great and I appreciate all the excellent photos that you post - it’s a good reference for people who are in the middle of building - thanks !
milford59- Number of posts : 307
Location : Milford on Sea
Registration date : 2019-05-19
 Re: 4” Road Loco ‘Rachel’
Brilliant tip about the springs, can’t be very fun loosing control at any speed!Steve Traill wrote:Been there done that! only takes one good pothole and the link opens up, that's why they are all welded now. If you want to do much road work think about fitting a spring in the chain. You need about 8mm of play and that makes the steering a dream when trundling along at anything over 10mph. Without it you can get a 'wobble on' which can be scary and requires immediate loss of speed!
Thanks! When I was looking into getting an engine my go to was the forum to see the builds take place, even during the build I’ve turned to the builds as reference. Glad I could give back to the communitymilford59 wrote:Your engine is looking great and I appreciate all the excellent photos that you post - it’s a good reference for people who are in the middle of building - thanks !

Midwest Steam- Number of posts : 136
Location : MO, USA
Registration date : 2018-09-19

Midwest Steam- Number of posts : 136
Location : MO, USA
Registration date : 2018-09-19
parador and LiveSteam like this post

Midwest Steam- Number of posts : 136
Location : MO, USA
Registration date : 2018-09-19
lynnr and LiveSteam like this post
 Re: 4” Road Loco ‘Rachel’
Hello everyone,
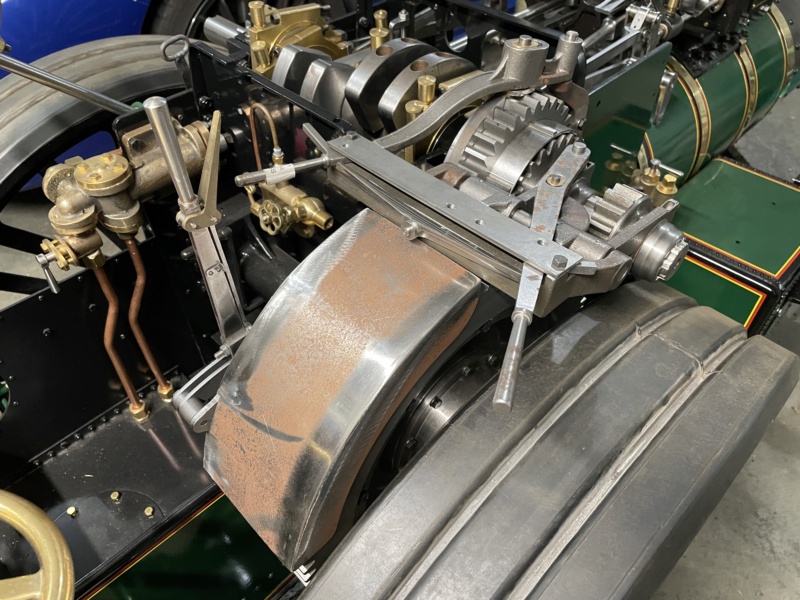
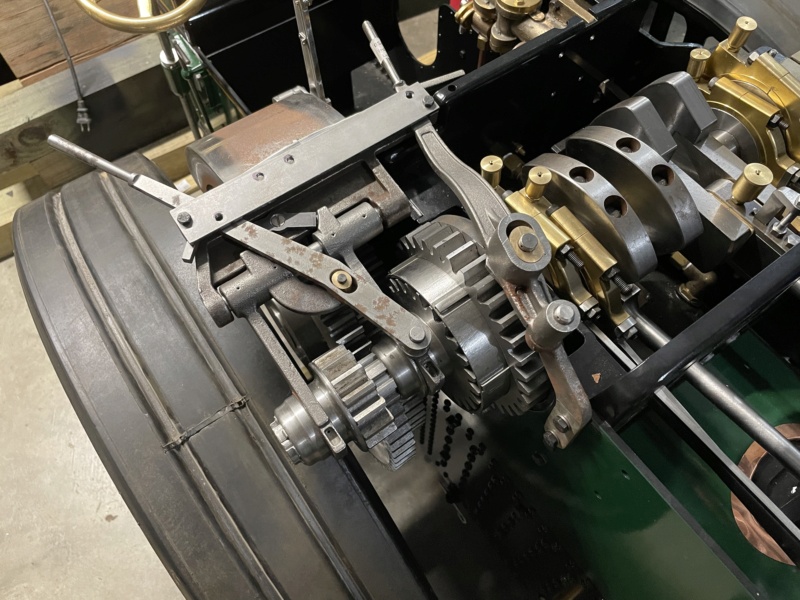
After an extended absence I have returned, unfortunately with winter fast approaching there won’t be a lot of progress being made. There will be a few things I can do but things like painting will have to wait for warmer weather. Today I was able to, mostly, fit the gear change mechanism. There’s some more fettling required but it’s a good start.

After an extended absence I have returned, unfortunately with winter fast approaching there won’t be a lot of progress being made. There will be a few things I can do but things like painting will have to wait for warmer weather. Today I was able to, mostly, fit the gear change mechanism. There’s some more fettling required but it’s a good start.


Midwest Steam- Number of posts : 136
Location : MO, USA
Registration date : 2018-09-19
Mutleybob likes this post
 Re: 4” Road Loco ‘Rachel’
Hello STW owners, builders and enthusiasts.
I’ll start this post by apologizing for an extended absence. Life has been quite challenging over the last couple of years, we can all agree with that. Between working as well as beginning other hobbies and studies my motivation to work on the engine was very little. Finally getting things settled down and beginning to do some more work on the engine, only smaller jobs but it all adds up in the end. Not sure how much I’ll be able to finish before I stop for winter, work commitments have taken priority unfortunately and free time has been spent resting up. Enough with the complaining, on with the update.
The gear selectors and gear guard has been fitted and the gears are operating as intended. It has taken several months to get to that point but only because I didn’t work on it as often or as long as I’d like. The reversing lever was also fitted with the reach rod (not pictured) and adjusted so it doesn’t contact the cladding and mess up the paintwork! Done the differential and winch, took some time to get a good fit with the drum to rotate freely and some adjustments for the locking mechanism. I’m satisfied with the end result and it’s ready for paint after a test fit on the axle. Some other small things done is the governor, the lubricator and the whistle. After I finished the lubricator it didn’t want to operate very well, the ram kept getting stuck. The solution was to put some oil in the lubricator and let it soak for 20 minutes and it started working just fine.


Midwest Steam- Number of posts : 136
Location : MO, USA
Registration date : 2018-09-19
LiveSteam likes this post
 Re: 4” Road Loco ‘Rachel’
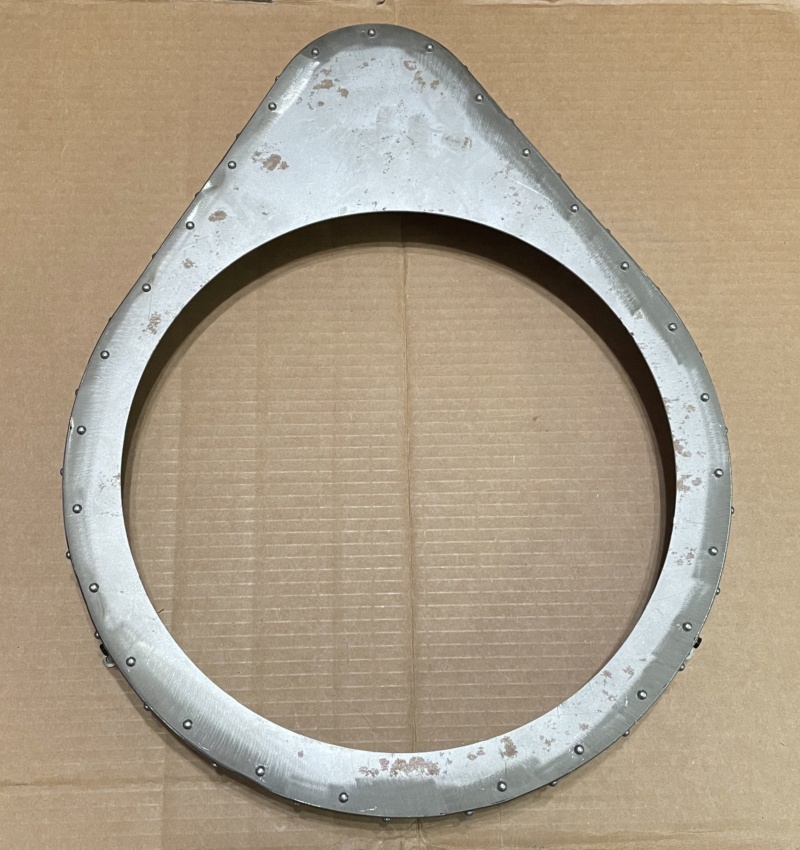
Time for an update…there really isn’t one. Done a few small things here and there but nothing major, lost a lot of motivation but slowly getting back into the build. Finished the differential and winch, it’s getting real heavy now and ready for paint. Also put the water lifter and the starting valve together ready to be installed on the block. Test fitted the flywheel brake to make sure everything will work as it should, it’s also ready for paint. Last thing done was the gear guard, pretty simple to put together and will be test fitted with the differential before paint. That’s about all for now, waiting for warmer weather before painting.




Midwest Steam- Number of posts : 136
Location : MO, USA
Registration date : 2018-09-19
Mark the spark likes this post
Page 4 of 5 •  1, 2, 3, 4, 5
 Similar topics
» New Batch 4" DCC Road Loco
» MrStationHouse 4" Road Loco
» Kevs road loco
» Big Shaun`s DDC Road Loco
» 2'' Road loco/showmans
» MrStationHouse 4" Road Loco
» Kevs road loco
» Big Shaun`s DDC Road Loco
» 2'' Road loco/showmans
Page 4 of 5
Permissions in this forum:
You cannot reply to topics in this forum|
|
|

