
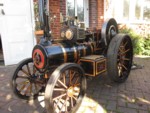
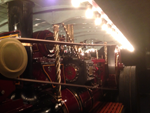
Road Loco - 'Blackbeard'
Page 10 of 17 •  1 ... 6 ... 9, 10, 11 ... 13 ... 17
 ![]()
Re: Road Loco - 'Blackbeard'
![]() Flasback Fri 15 Mar 2013, 8:32 pm
Flasback Fri 15 Mar 2013, 8:32 pm
Chetwode Arms
Street Lane
Lower Whitley
Cheshire
Wa4 4EN
if not you are.........
Flasback- Number of posts : 191
Location : Cheshire
Registration date : 2011-01-30
Re: Road Loco - 'Blackbeard'
![]() bjwlancashire Sat 16 Mar 2013, 2:49 pm
bjwlancashire Sat 16 Mar 2013, 2:49 pm
Cheers
Brian

bjwlancashire- Number of posts : 938
Location : Mellor, Lancashire
Registration date : 2010-09-07
Re: Road Loco - 'Blackbeard'
![]() Steam Traction World Sun 17 Mar 2013, 2:58 pm
Steam Traction World Sun 17 Mar 2013, 2:58 pm
You'll be pleased to know that the big machine was repaired at the end of last week so as soon as we've machined the boilers that are scheduled on next the replacement blocks will be on as the next priority.
Dean
Steam Traction World- Admin
- Number of posts : 946
Location : Daventry UK
Registration date : 2008-06-18 -

Re: Road Loco - 'Blackbeard'
![]() bjwlancashire Sun 17 Mar 2013, 4:19 pm
bjwlancashire Sun 17 Mar 2013, 4:19 pm
Thanks for the update, that is excellent news, just make sure you keep putting 50p in the meter so it can keep running.
Brian
bjwlancashire- Number of posts : 938
Location : Mellor, Lancashire
Registration date : 2010-09-07

Robfishman- Number of posts : 1061
Age : 49
Location : Chandlers Ford Hants 4" showmans & 4" Roller
Registration date : 2010-11-26 -
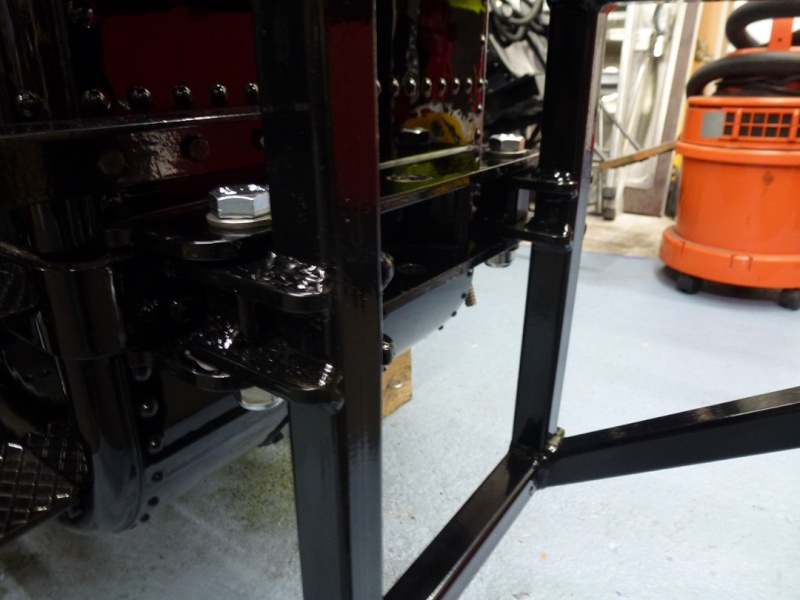
Roof and seat frame progress
![]() bjwlancashire Mon 25 Mar 2013, 4:20 pm
bjwlancashire Mon 25 Mar 2013, 4:20 pm
However, A little more progress on the roof as the insert for the cutout is currently being made - the frame was made using an additional cross member STW provided for me to cut up. A 6mm square piece of wood was also glued/pinned to the back edge of the roof cross brace that forms one side of the opening to form a ledge for the ends of the planks to sit on once they are fixed to the frame.
Roof has a now had a coat of black bitumen paint on it too, another one to go.


I have also been working on the seat frame modifications I felt were necessary, the photos show the part prior to weldiing. There is an extra mounting bracket with a square tube spacer to prevent the seat from tipping sideways and give a more robust fix into the drawbar.
Additonally there is an additional steel angle to be welded over the part that hangs over the tender back. This will spread the load to the tender sides to prevent the flex that is evident in the tender rear panel when you put load onto the existing seat frame design, especially if your going to have a two seater unit. The step between the provided mounting face and the extended angle above it will ensure all surfaces are touching at the same time. I will also make pads from cork sheet with holes cut in to clear the rivets.
The other piece you can see is the pivot for the extended regulator. The piece in the photo needs turning down at the end before welding but you can see the idea - more to follow.


Last edited by bjwlancashire on Thu 31 Oct 2013, 6:28 pm; edited 1 time in total
bjwlancashire- Number of posts : 938
Location : Mellor, Lancashire
Registration date : 2010-09-07
Re: Road Loco - 'Blackbeard'
![]() ejparrott Mon 25 Mar 2013, 5:03 pm
ejparrott Mon 25 Mar 2013, 5:03 pm
Super work sir!
ejparrott- Number of posts : 118
Location : Rugby
Registration date : 2012-09-27
Re: Road Loco - 'Blackbeard'
![]() Tony King Mon 25 Mar 2013, 7:12 pm
Tony King Mon 25 Mar 2013, 7:12 pm
Regards,
Tony
Tony King- Number of posts : 856
Age : 68
Location : scotland
Registration date : 2008-10-31
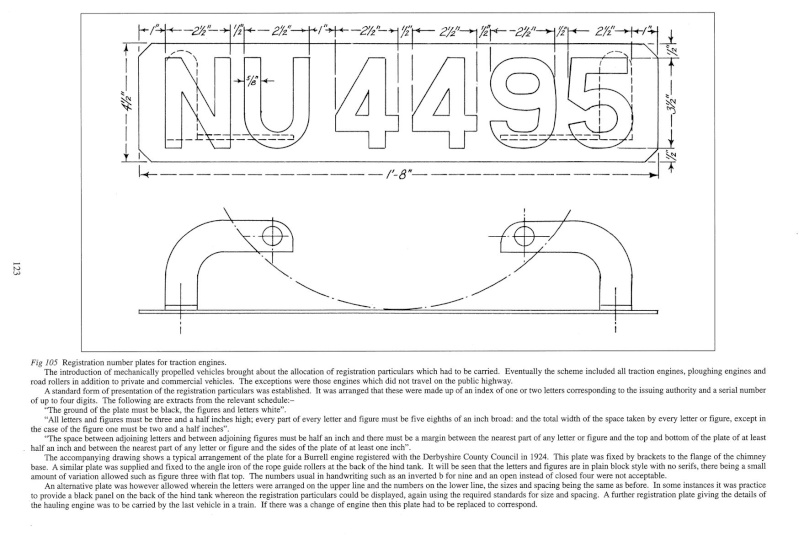
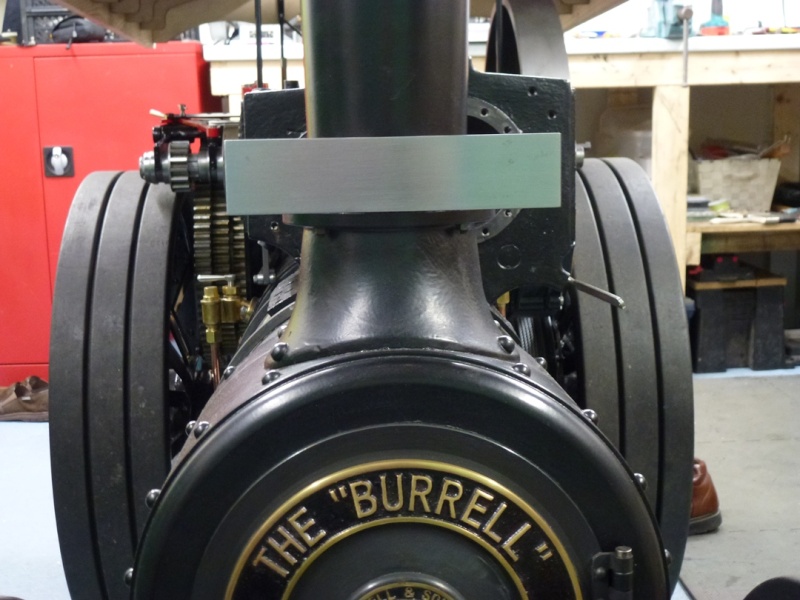
Fornt Number Plate Bracket
![]() bjwlancashire Wed 03 Apr 2013, 8:13 pm
bjwlancashire Wed 03 Apr 2013, 8:13 pm
bjwlancashire- Number of posts : 938
Location : Mellor, Lancashire
Registration date : 2010-09-07
Re: Road Loco - 'Blackbeard'
![]() bjwlancashire Thu 04 Apr 2013, 9:32 pm
bjwlancashire Thu 04 Apr 2013, 9:32 pm


bjwlancashire- Number of posts : 938
Location : Mellor, Lancashire
Registration date : 2010-09-07
Re: Road Loco - 'Blackbeard'
![]() highpressure Thu 04 Apr 2013, 9:45 pm
highpressure Thu 04 Apr 2013, 9:45 pm
Cheers Kev.
highpressure- Number of posts : 1096
Age : 57
Location : West Sussex, 4" DCC Road Loco
Registration date : 2008-06-18 -
Re: Road Loco - 'Blackbeard'
![]() bjwlancashire Thu 04 Apr 2013, 11:56 pm
bjwlancashire Thu 04 Apr 2013, 11:56 pm
I will PM you the company details. The plate will be the scale width, have the correct size letters but will be higher due to processing restrictions. I will have to trim the height above and below the characters to finish it off.
Brian
bjwlancashire- Number of posts : 938
Location : Mellor, Lancashire
Registration date : 2010-09-07
sonick45- Number of posts : 511
Location : Barton-Le-Clay (Beds)
Registration date : 2009-01-26
Re: Road Loco - 'Blackbeard'
![]() bjwlancashire Fri 05 Apr 2013, 12:06 am
bjwlancashire Fri 05 Apr 2013, 12:06 am
sonick45 wrote:Brilliant job.
I had to raise the bar just to match the paint job!!!!!
bjwlancashire- Number of posts : 938
Location : Mellor, Lancashire
Registration date : 2010-09-07
Re: Road Loco - 'Blackbeard'
![]() Tim Watson Fri 05 Apr 2013, 1:13 am
Tim Watson Fri 05 Apr 2013, 1:13 am
I'd appreciate the company details, as I lost the contact or the firm that did my previous plates on 'Madeline'.
Tim

Tim Watson- Number of posts : 585
Location : Herts
Registration date : 2008-07-02
Re: Road Loco - 'Blackbeard'
![]() bjwlancashire Fri 05 Apr 2013, 9:43 am
bjwlancashire Fri 05 Apr 2013, 9:43 am
I just PMed you too.
Just to confirm for Kev and any others interested too I had to stress it was for a model and that I already have a legal plate for it but they did it. It will need the height reducing once it is made as there is a minimum amount of material needed to hold the plate for processing but the width will be correct.
My plate is goiong to be 6 3/4" wide based on scaling down the drawing and the company has 30mm high characters which match the scaled drawing - after scanning the page I then reduced it to get the drawing the actual size of the plate at 1/3 full size which ended up being 70% on my scanner/coppier. This is how I got to the 30mm high characters and I was also able to cut out the brackets from the page too and overlay them onto a piece of angle to mark them out. No machines here, just sawing and filing and the pillar drill for the fixing holes, the old fashioned way.
Good look to all who try this.
Brian
bjwlancashire- Number of posts : 938
Location : Mellor, Lancashire
Registration date : 2010-09-07
Seat Frame
![]() bjwlancashire Sun 07 Apr 2013, 8:36 pm
bjwlancashire Sun 07 Apr 2013, 8:36 pm
Need to make the extra regulaltor handle and connect it to the STW one using a double ended shackle (like the shackles that connect locomotive brake rods for those that can't picture it) that will then connect to the regulator rod and the extended regulator rod. The extended regulator will not have any stops on it as the main regulator has them. The extended regulator will be free to move without stops so that any movement of the top of the seat frame will not affect the regulator.


bjwlancashire- Number of posts : 938
Location : Mellor, Lancashire
Registration date : 2010-09-07
Re: Road Loco - 'Blackbeard'
![]() highpressure Tue 09 Apr 2013, 5:41 pm
highpressure Tue 09 Apr 2013, 5:41 pm
Where STW doing anything about this for the Showmans owners or where they left to fend for themselves?
highpressure- Number of posts : 1096
Age : 57
Location : West Sussex, 4" DCC Road Loco
Registration date : 2008-06-18 -
Re: Road Loco - 'Blackbeard'
![]() Brian M Tue 09 Apr 2013, 7:06 pm
Brian M Tue 09 Apr 2013, 7:06 pm
I will see what our latest AMTEC member does
As far as I am aware, no mods have been made by STW for the roading of the showman.
Regards,
Brian
Brian M- Number of posts : 261
Location : Cheshire
Registration date : 2011-01-30
Re: Road Loco - 'Blackbeard'
![]() Tim Watson Tue 09 Apr 2013, 11:41 pm
Tim Watson Tue 09 Apr 2013, 11:41 pm
Your frIend has the right idea. Prototypically, the brake wheel should in fact be the same diameter as the steering wheel and on Frederick it is - the rotating handle on the larger diameter wheel makes this easy to use and the rear wheel brake works very well indeed. I spent a lot of time trimming the wood blocks so that they bite evenly and then attached brake lining material to give grip.
I think that that the steering rod could be a least an inch longer, which would take the wheel further away from the flywheel and bring it back a little. Quite a good idea to put a longer steering knob on it as well, as this would not be very visually intrusive.
Steve Trail and I have discussed the remote regulator ideas a few times over some Cornish wine / beer, as well as with Steve B at GDSF. I think STW will wisely wait and see what people do with their engines before making mods.
Will you be at the SAC do at Old Warden?
Tim
Tim Watson- Number of posts : 585
Location : Herts
Registration date : 2008-07-02
Number Plates
![]() bjwlancashire Fri 26 Apr 2013, 10:04 am
bjwlancashire Fri 26 Apr 2013, 10:04 am

bjwlancashire- Number of posts : 938
Location : Mellor, Lancashire
Registration date : 2010-09-07
Re: Road Loco - 'Blackbeard'
![]() Tony King Fri 26 Apr 2013, 11:49 am
Tony King Fri 26 Apr 2013, 11:49 am
I like it!!
Regards,
Tony
Tony King- Number of posts : 856
Age : 68
Location : scotland
Registration date : 2008-10-31
Number plates
![]() Steve Traill Fri 26 Apr 2013, 7:29 pm
Steve Traill Fri 26 Apr 2013, 7:29 pm
The borders were used more on the classic cars at a later date

Steve Traill- Number of posts : 800
Age : 67
Location : Illogan Redruth Cornwall
Registration date : 2008-06-29
Re: Road Loco - 'Blackbeard'
![]() Robfishman Fri 26 Apr 2013, 10:34 pm
Robfishman Fri 26 Apr 2013, 10:34 pm
Robfishman- Number of posts : 1061
Age : 49
Location : Chandlers Ford Hants 4" showmans & 4" Roller
Registration date : 2010-11-26 -
ejparrott- Number of posts : 118
Location : Rugby
Registration date : 2012-09-27
Page 10 of 17 • 1 ... 6 ... 9, 10, 11 ... 13 ... 17 ![]()
» STW 2" road loco
» What will it be? (next showmans/road loco kit)
» Andy's 4"dcc road loco
» Mikes Road loco
|
|
|