
Lining the 2" Burrell
3 posters
Page 1 of 1

Lining the 2" Burrell
![]() JDA Wed 05 Nov 2008, 12:29 pm
JDA Wed 05 Nov 2008, 12:29 pm
I am about to start lining my 2" Burrell. I have read Julia's various articles on lining and note that she had a problem in scaling down the line widths for her 4" machine. The scaling problem is obviously worse on the 2" Machine. Has anyone produced lines which look in scale rather than to scale and if so what line widths look OK. I have a Beugler liner and various lining tapes, all I lack is the courage to start. Is it normal practice to finish the paint with a cutting compound and wax after lining, or rely on the sprayed finish.
JDA
JDA
JDA- Number of posts : 12
Age : 87
Location : Leatherhead 2" burrell
Registration date : 2008-06-22
Re: Lining the 2" Burrell
![]() TonyT Thu 06 Nov 2008, 9:01 pm
TonyT Thu 06 Nov 2008, 9:01 pm
Hi John
In my possession I have the diagrams to line a Burrell road loco from the Road Locomotive Society,they show the exact width of the lining for a Burrell engine.If you would like copy to scale down to size,send me a personal message with your email and I shall send you a copy.This applies to any 2" builder or 4" builder who would like a copy.
The paperwork also suggests that you go over the lining with clear varnish to protect it from cleaning and crap!
I tried to follow the plans but went by eye in the end!
cheer's Tony
Last edited by TonyT on Thu 06 Nov 2008, 9:06 pm; edited 1 time in total (Reason for editing : Adding more info)

TonyT- Number of posts : 134
Age : 56
Location : Truro,Cornwall. (2" Burrell)
Registration date : 2008-06-17
Lining
![]() northburrell Fri 09 Jan 2009, 5:28 pm
northburrell Fri 09 Jan 2009, 5:28 pm
Hi All
Lining....... well i'm busy lining out my model after stopping making it for a fair few months now.. My boiler is ordered and i hope to start construction again and keep my web site updated as I go.. just not had the time..
Lining is a black art really there are so many ways to go about it.. I'm an artist so i have gone for the lining brush and by hand option just like the full size.. My burrell will be maroon with the standard black red and yellow lining..
I have started on the tender and horn plates as there the most amount of work.. In order to get good lining it's important to use straight edges as a guide. For this I use masking lining tape that can be obtained from art shops. it comes in different width's and makes masking straight lines and curves very easy.. dont think it's cheating masking the line, pinstripers who do cars and steam also mask a line to follow.....
Here's how i went about my lining.. I used humbrol enamal paint as it's thick covers well and gives a little drying time to tweak lines if needed.
Sprayed the tender (no top coat though traction engine's with top coat look too shiny to me)
Researched the lining from photo's and other models..
Tender lining: Masked up the outer edges of the thick black line with some1/8th masking tape using two lengths so that you paint in between the masking tape lines,making sure of good corners and curves and make sure edges are stuck down to stop bleeding also make sure the line is even in thickness and try and use one piece of mask to do one part of the line cutting the mask at 90Deg corners only..
Paint the black between the masking tape you just laid ( you dont have to be too carefull as the tape makes the crisp edge).. Dont wait for the paint to dry before removing the mask as you will be able to correct any bleeding or mistakes when the paint is wet, if you let it dry you will have no chance of sorting it out....Wait for paint to dry over night.
You should have nice crisp edges that are a little raised due to the mask. dont worry about the slight raise as it will act as a brush guide for adding the red lines.
open up your red paint, you will need a number 1 and number 0 lining brush from an art shop, they have long bristles that make painting lines allot easyier than a normal brush, they hold more paint so you can do a good part of the line before re-loading the brush with paint..
you'll need a steady hand for this part really and some practice.. load the brush and have a practice on some paper you will find that as you have a straight edge that you have masked painted on the model (black line) that it is allot easyier to get your hand and eye to follow the line with the brush. draw a line on the paper and try and follow that line with the brush keeping the line even thickness, this should be fairly easy as the bush number size will be the thickness of the painted nine. of coarse if you push the brush too hard it will just leave a blob.. dont just use the tip of the brush try and make it as flat as you can using the side of long bristles as much as you can this helps get straight even lines.
Start at one end resting your hand on the model and use your finger to run down any straight edges of the model were doable, this will also help to guide the brush. (avoid running you fingers over rivets unless you want a bumpy line) The paint and the brush will hit the little raise at the edges of the black paint and help it from moving and spilling over the black.. dont worry if you do make any mistakes as it can be sorted out with some white spirit and a brush to remove any unwanted paint..
You could of coarse re mask up the black line and then paint upto the masked edge with the red..
For the yellow line again you need a guide line, mask up one edge of were the yellow line would go make sure you have it all laid out correct and that the distance from the red/black line is even all round and curves are nice. Then open up your yellow and using the number 0 brush do the same as the red line letting the brush, your eye and your hand follow the line that is masked. again dont worry about making mistakes as with a little white spirit the line can be removed or tweaked back into place with a brush, with enamel it also drys very slow so it will give you plenty of time to get it right..
remove masking tape correct any mistakes then leave to dry. Now you should have some pretty good looking lining.. mind not to stick your hand on wet lines as this tends to make them not lines anymore!!
I must stress this is a very long process and painting the lines takes allot of time and skill so the more practice you get the better..
I have not painted and lined my rear wheels after making them. I have done it a bit backwards! I have sprayed and lined them before making the wheels.. this is due to the small amount of space between the spokes for getting good lines.. I have only done about two spokes at the moment but hope to get back into it over the next week or so..rivet bolts will be touched in after the wheels are made...
As for clear coating i'm not going to bother, the enamel paint is very strong and sticks very well.. full size engine's would never have had clear coat.. if you do clear coat your engine then i would recomend using a mat finish clear not gloss...
I'm not too sure if this will help anyone with there lining as there are so many ways that it can be done..
If you have any questions please ask..
I will upload a photo when i get back home tonight of what i have done so far..
Thanks all
Jo
www.Burrellbuilder.com
not done much to my site but will put a post up once it's updated again..
Last edited by northburrell on Mon 12 Jan 2009, 1:14 pm; edited 2 times in total
northburrell- Number of posts : 197
Location : edinburgh
Registration date : 2008-10-15
Lining the 2" Burrell
![]() JDA Sat 10 Jan 2009, 1:47 pm
JDA Sat 10 Jan 2009, 1:47 pm
Thank you for taking the time to post such a detailed account of the lining process, I still have not had the courage to start my lining yet, anyway it is too cold in my garage at the moment. Well that'smy excuse anyway. Look forward to seeing the photo's.
JDA
JDA
JDA- Number of posts : 12
Age : 87
Location : Leatherhead 2" burrell
Registration date : 2008-06-22
Re: Lining the 2" Burrell
![]() northburrell Mon 12 Jan 2009, 12:55 pm
northburrell Mon 12 Jan 2009, 12:55 pm
That's ok I hope it helps a little..with some pictures it will all make sence...I forgot to upload the pictures over the weekend but I will get them upload tonight if i can..
I missed out one part of your question. If your clear coating your model I would def not cut compound/ wax after lining as you risk removing the paint and the lining.. this could also leave cutting paste residue on the surface, if you dont clean it off and you decide to clear coat the model you may get some nasty paint bubbling or the clear wont stick. It will have to be done all over again ( i'm pretty sure you wont want that) If your not going to clear your model and want to get a bit more shine on it then a little polish and wax wont hurt but be vary carefull, polish will remove paint and lining if you rub too hard..
If you do clear it over the lining just whipe the parts over with something that will remove the grease that your hands might have left and wont remove the lining or base paint. so no thinners or white spirit.. soaps also might leave some residue on the paint. this is not a problem for me as i'm not going to clear my model.. just be carfull with what you use.. I would recomend buying some micro fibre towels from halfords, these are really good for whiping over the model and wont scratch your paint work.. also can be used to polish your modle after it built.
The other thing is do a test piece of metal sprayed with all the diffrent paints, base colour and some lining in enamal and then clear it over the top, this will test to see if you clear is going to react with the paint used for lining.. it might not but it's worth the time to do a test piece to check or it could be a nasty rub down and start over...
Thanks
Jo
northburrell- Number of posts : 197
Location : edinburgh
Registration date : 2008-10-15
Re: Lining the 2" Burrell
![]() northburrell Thu 29 Jan 2009, 2:00 am
northburrell Thu 29 Jan 2009, 2:00 am
hi Everyone.
Finally got chance to take some shots..
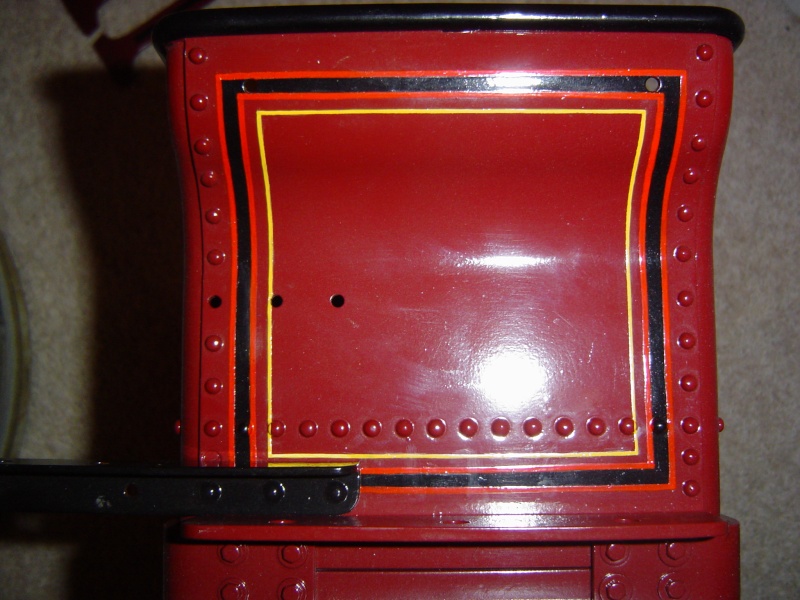
The camera's not great and the paint colour looks nothing like what it is in the picture's due to the flash and lighting but you get the idea..All hand done using masking and art lining brush.. Using straight edges to guide my fingers.
Rear of tender fully lined.
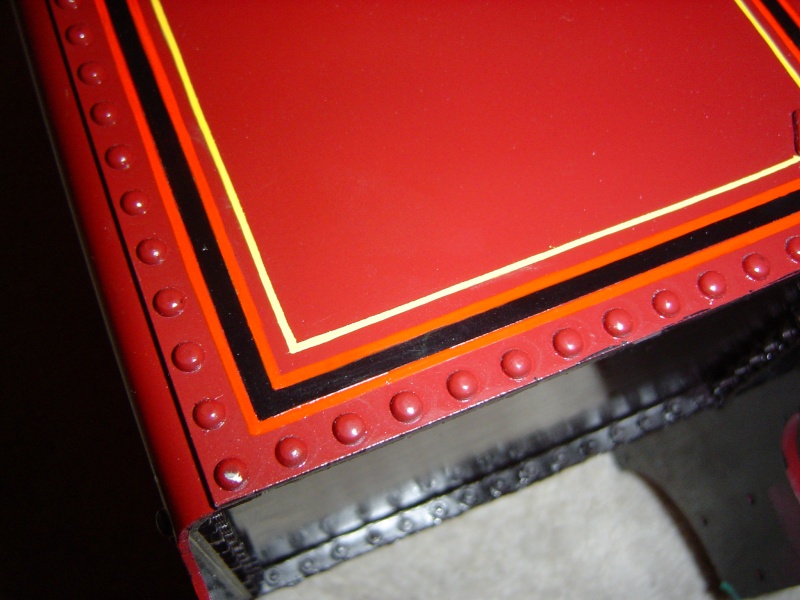
bottom of tender, this is the first part it did you will never see it but i still made a good job of it.
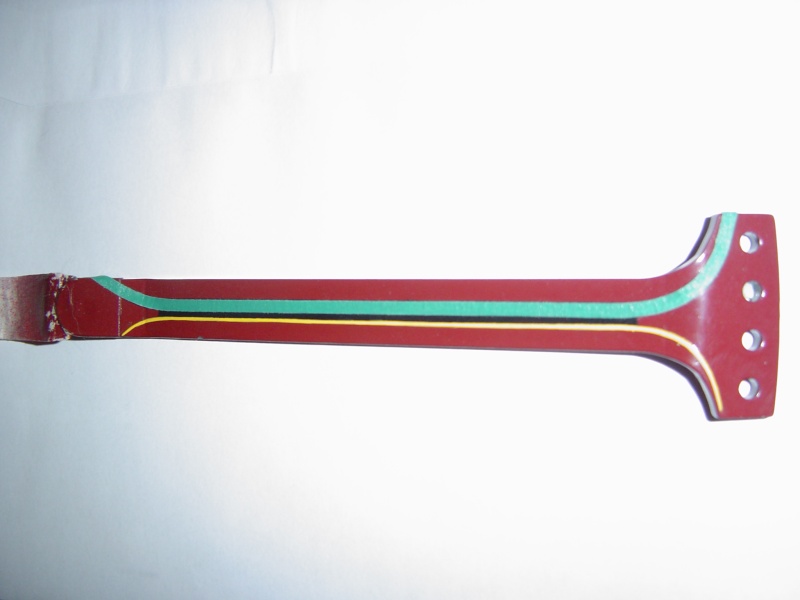
Tender masked to be lined yellow.
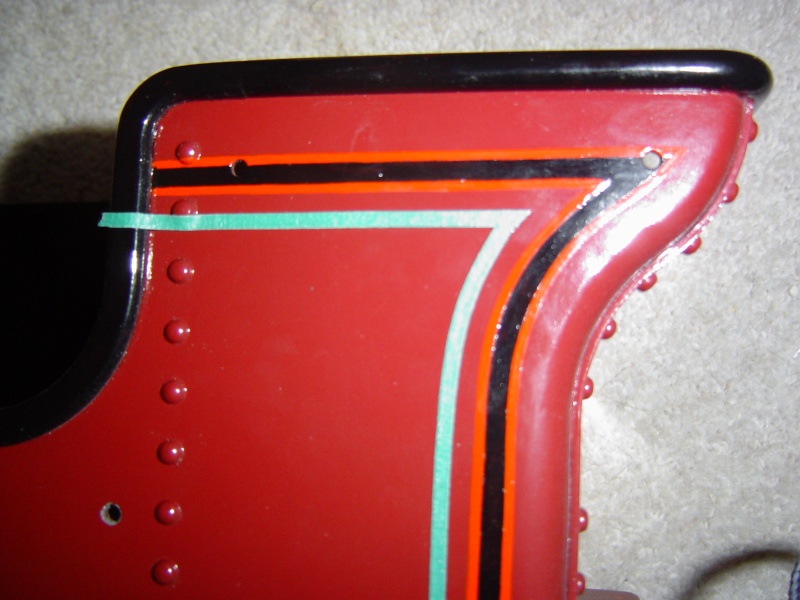
Half lined and half masked to be lined
Thanks speak soon
If you have any questions please ask.
Finally got chance to take some shots..
The camera's not great and the paint colour looks nothing like what it is in the picture's due to the flash and lighting but you get the idea..All hand done using masking and art lining brush.. Using straight edges to guide my fingers.
Rear of tender fully lined.
bottom of tender, this is the first part it did you will never see it but i still made a good job of it.
Tender masked to be lined yellow.
Half lined and half masked to be lined
Thanks speak soon
If you have any questions please ask.
northburrell- Number of posts : 197
Location : edinburgh
Registration date : 2008-10-15
Re: Lining the 2" Burrell
![]() TonyT Thu 29 Jan 2009, 10:05 pm
TonyT Thu 29 Jan 2009, 10:05 pm
Looking good Jon,cant wait to see more.
I know what you mean about the lining being a dark art,lots of practice on old cat food tins!
I'm playing with my flywheel at the moment,which is taking a lot of cleaning up and probably a bit of body filler to fill all the casting blows and imperfections
Anyhow,looking foward to the next kit (Friday hopefully)
cheer's Tony
TonyT- Number of posts : 134
Age : 56
Location : Truro,Cornwall. (2" Burrell)
Registration date : 2008-06-17
Page 1 of 1
Permissions in this forum:
You cannot reply to topics in this forum|
|
|