
Road Loco - 'Blackbeard'
Page 5 of 17 •  1, 2, 3, 4, 5, 6 ... 11 ... 17
 ![]()
Re: Road Loco - 'Blackbeard'
![]() lynnr Tue 08 Jan 2013, 10:07 pm
lynnr Tue 08 Jan 2013, 10:07 pm
Think min age is 7.
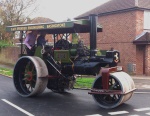
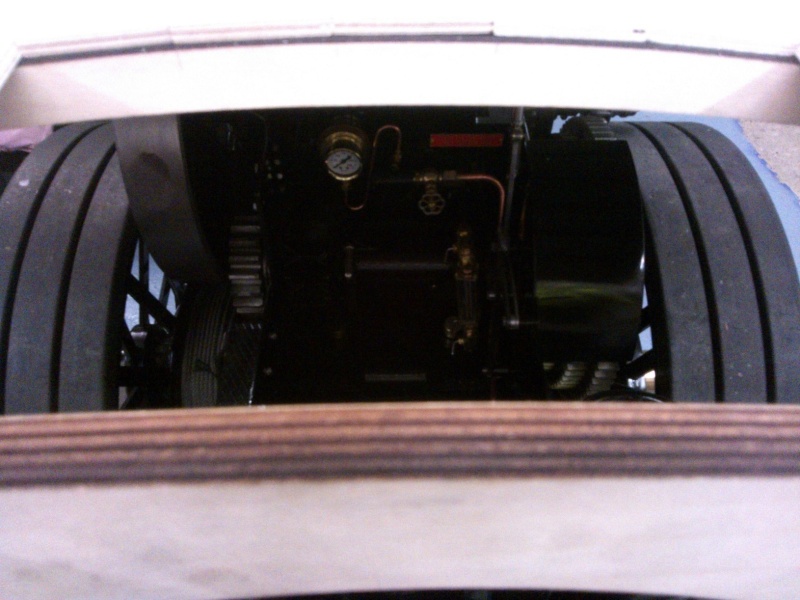
Noticed from the first picture. Interesting hatch in the back wall. Previous owners used the garage for a dog house?

lynnr- Number of posts : 3242
Age : 55
Location : Highland, 4inch showman
Registration date : 2010-08-06
Re: Road Loco - 'Blackbeard'
![]() Robfishman Tue 08 Jan 2013, 10:12 pm
Robfishman Tue 08 Jan 2013, 10:12 pm
Robfishman- Number of posts : 1061
Age : 49
Location : Chandlers Ford Hants 4" showmans & 4" Roller
Registration date : 2010-11-26 -

Some detail updates
![]() bjwlancashire Tue 08 Jan 2013, 10:32 pm
bjwlancashire Tue 08 Jan 2013, 10:32 pm
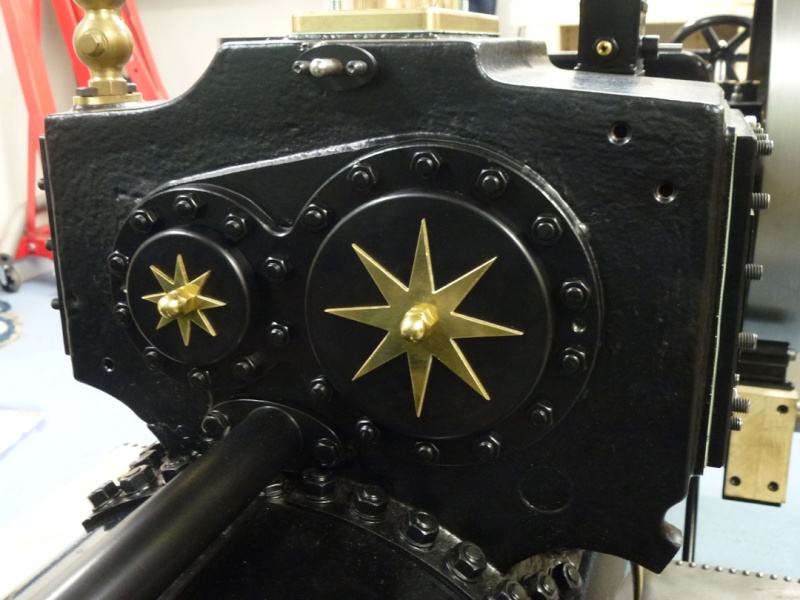
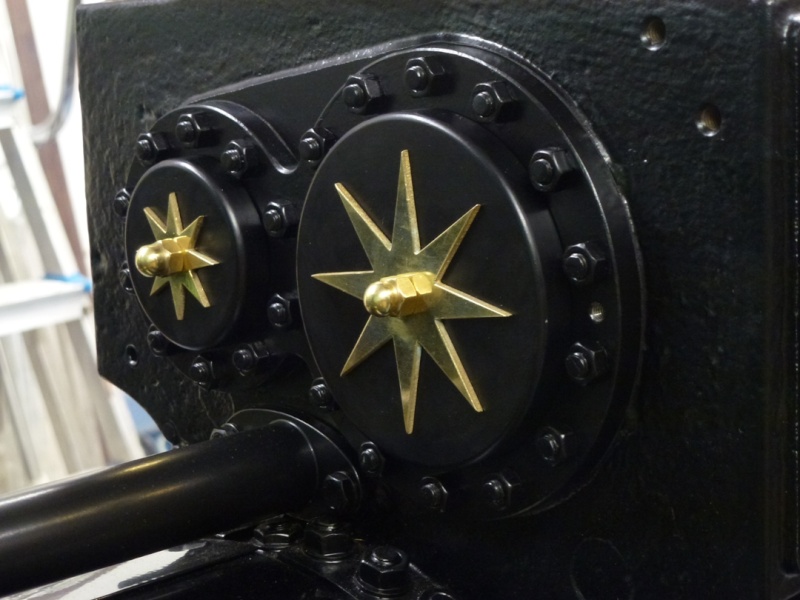
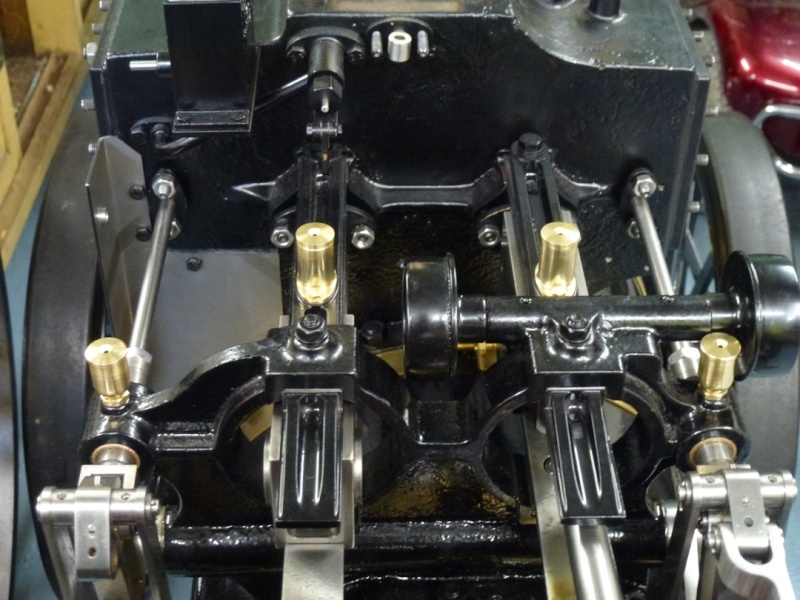
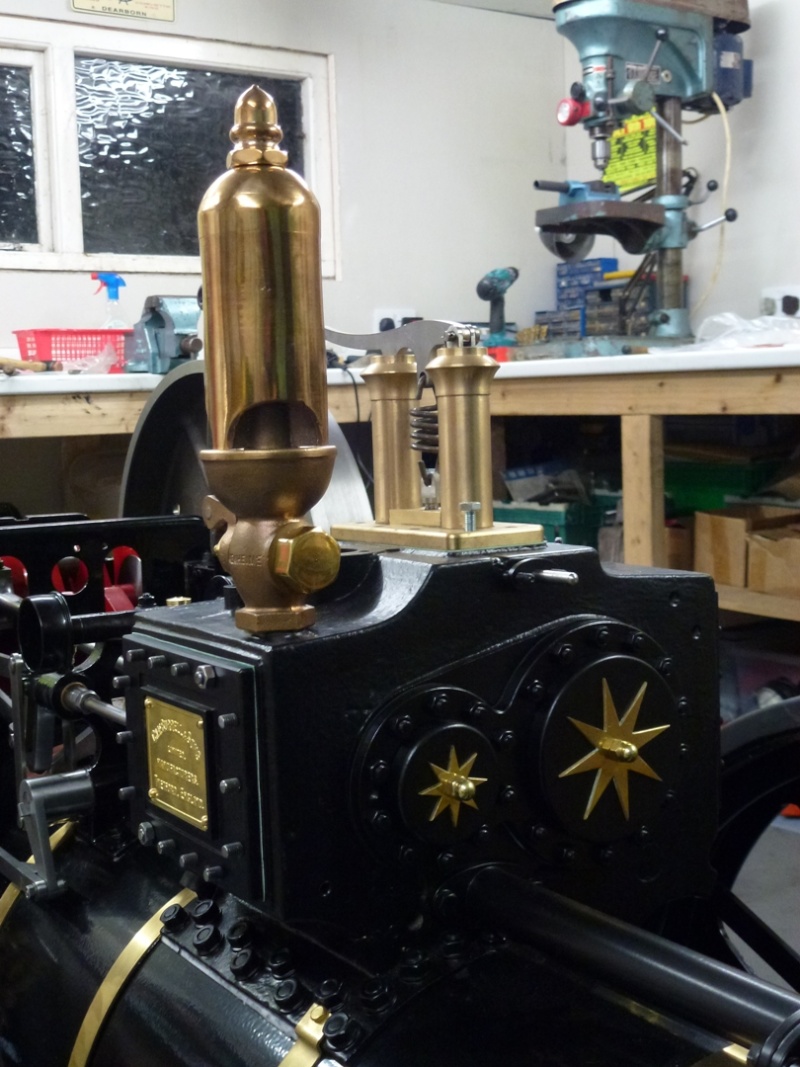
Finished cylinder end cover detail, I will also be painting the nuts on the valve chest covers once the valves are set and covers finally fitted. I did buy some dome nuts for the covers but once I put them on I did not like the look with all the black around them.
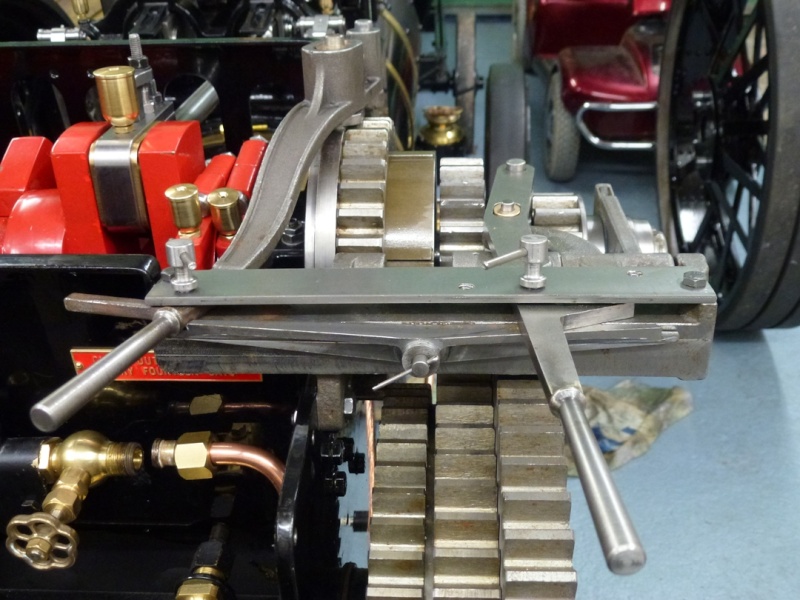
Valve gear has been going back on since the move, a nice emery clothed finish, no bling here. Also, when I drilled the oil holes I drilled a small hole right through the bearing then a larger hole to create a reservoir for more oil.
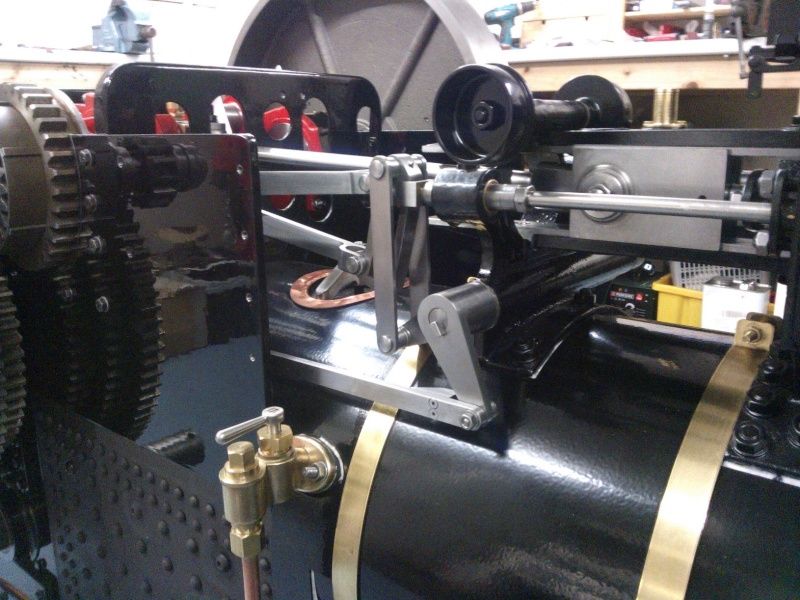
Reach rod and reversing lever are done too, just need to set the position of the cutouts for the reverser. The reversing lever was particularly pleasing once it was finished although a whole weekend as spent on it, a satisfying bit of detail - although I hate painting I love the details. I also filed down the lever so it was the same width as the quadrant as per the full size engine rather than overhanging it - more pictures of this after I get home as they are not all with me.


bjwlancashire- Number of posts : 938
Location : Mellor, Lancashire
Registration date : 2010-09-07
Re: Road Loco - 'Blackbeard'
![]() bjwlancashire Tue 08 Jan 2013, 10:34 pm
bjwlancashire Tue 08 Jan 2013, 10:34 pm
Robfishman wrote:Like the new workshop, very nice. Sounds like you will be pleased to get back to work on the build.
Since those pictures were taken the garage is full again and looking worked in/untidy which ever way you look at it. Good to be busy again and there is a door from the living room to the garage so I am in there as soon as any reality TV shows come on or anything where you vote for celebrities, any DIY or house makeover programmes etc.... In fact I went in for two hours on Christmas Day to avoid Emmerdale/Paul O'Grady.
Lynn, the hatch was indeed for a dog apparently but it is now blocked off.
Cheers
Brian
bjwlancashire- Number of posts : 938
Location : Mellor, Lancashire
Registration date : 2010-09-07
Roof and Belly Tank
![]() bjwlancashire Tue 08 Jan 2013, 11:05 pm
bjwlancashire Tue 08 Jan 2013, 11:05 pm
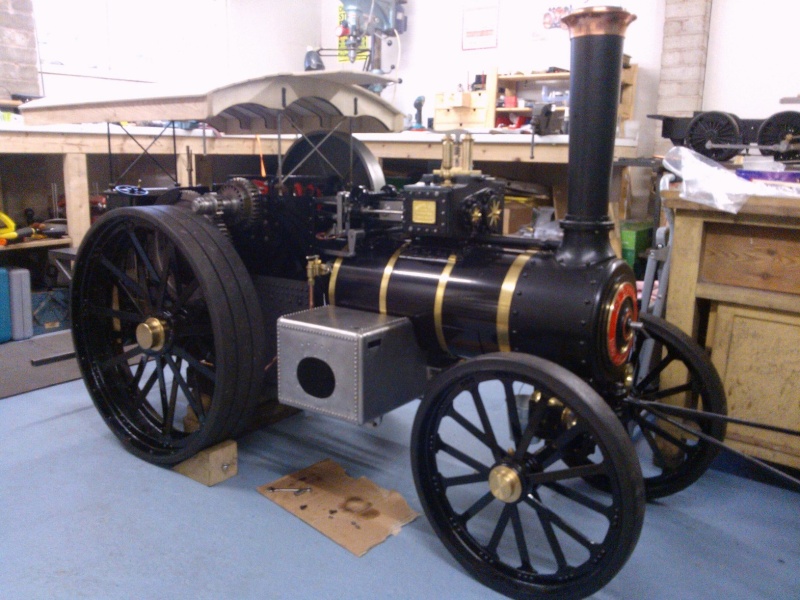
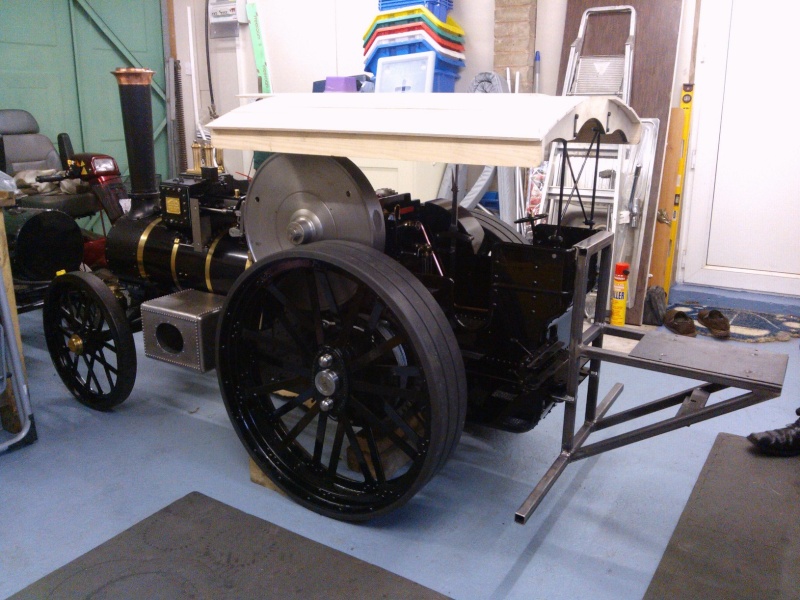
I got the roof together just before Christmas, well the framework anyway - I used the dining table to keep the framework square as the bench was full!!!!! The slots in the sides are machind so have small radii in the corners and I found that this stopped the cross members from being flush with the top of the side pieces. I had the perfect width of wood chisel so some carefull working of the slots had the corners square and all cross members level with the tops of the side rails.
I used some small ratchet straps to put some tension in the assembly to hold the part together while the recommended Gorilla Glue set. One word of warning about the Gorilla Glue, you need to wet the surfaces to be glued - what happens to wood when it is wet???? As you can imagine the perfect snug fits suddenly became very difficult to assemble and I had applied glue to every slot/cross member end so you can imagine the fight I had to get the parts back together, including careful use of a hide hammer and a block of wood for protection of the surfaces.
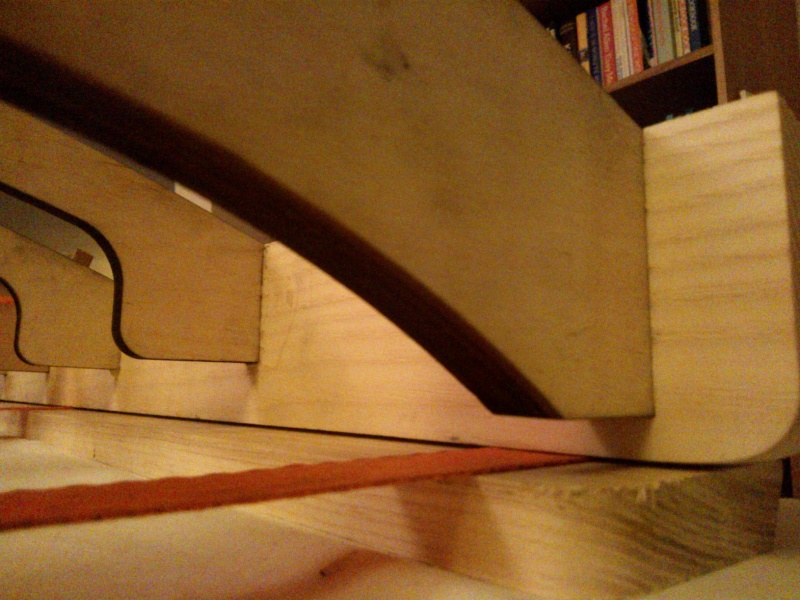
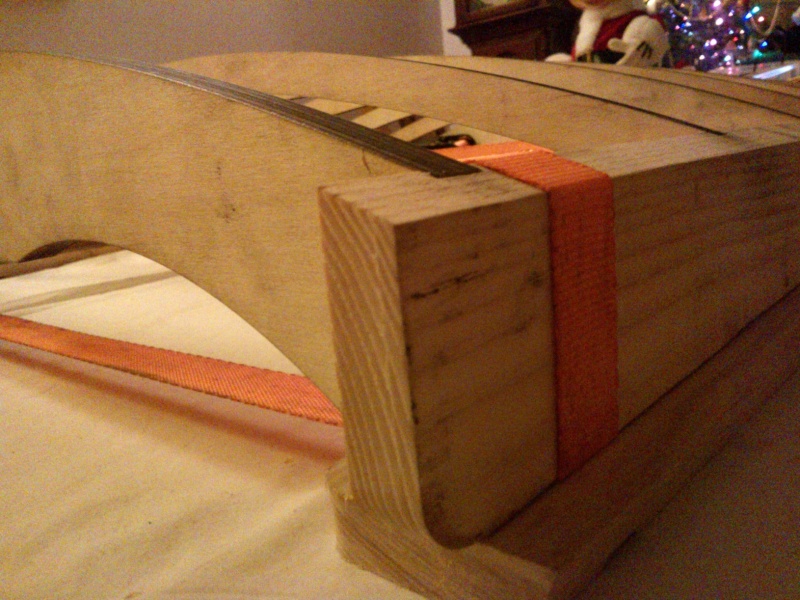
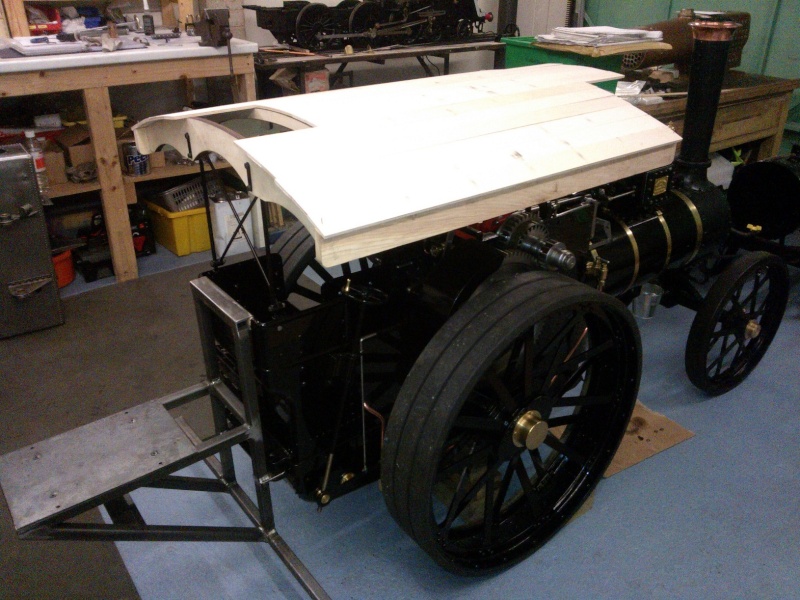
The planks were laid on temporarily to see how it looked and also to test my theory regarding a small cutout to aid driving with the roof on to keep the looks of the engine which is quite stunning with the half roof.
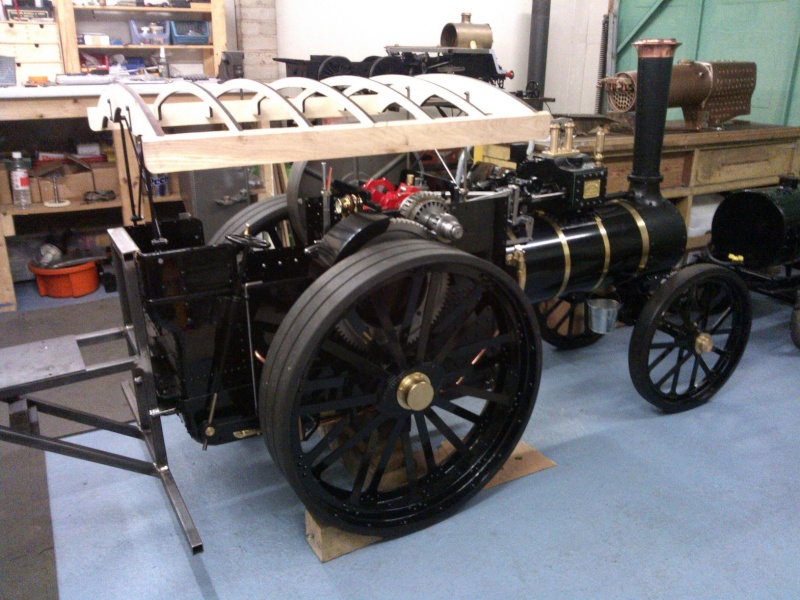
Also, I finally got round to putting the belly tank end panels on and adjusted the mounting holes of the angle brackets so I could get it to fit properly. It was fowloing on the second cleading band from the hornplates on the RH side so I could only mount it one hole out of position. It is now with Sonic45 for a liberal coating of Craftmaster gloss black.
Last weekend I finished off all the motion oilers and then made the wicks for each one. I will post some pictures of these once I am back home. I also finally fitted the tender water level taps I had purchased from LSM, as per Sonic45s suggestion.
bjwlancashire- Number of posts : 938
Location : Mellor, Lancashire
Registration date : 2010-09-07
Re: Road Loco - 'Blackbeard'
![]() lynnr Wed 09 Jan 2013, 7:26 am
lynnr Wed 09 Jan 2013, 7:26 am
Unfortunately I can not see the pictures.
I also found the belly tank tight but I trimmed the cleading as it was lap joint so I changed it to butt joint and the tank fitted easily.
1 1/2 hours later. Can see the pictures now. Looking great.
Last edited by lynnr on Wed 09 Jan 2013, 8:56 am; edited 1 time in total
lynnr- Number of posts : 3242
Age : 55
Location : Highland, 4inch showman
Registration date : 2010-08-06
Re: Road Loco - 'Blackbeard'
![]() Tony King Wed 09 Jan 2013, 8:22 am
Tony King Wed 09 Jan 2013, 8:22 am
Regards,
Tony
Tony King- Number of posts : 856
Age : 68
Location : scotland
Registration date : 2008-10-31
Re: Road Loco - 'Blackbeard'
![]() highpressure Wed 09 Jan 2013, 5:20 pm
highpressure Wed 09 Jan 2013, 5:20 pm
highpressure- Number of posts : 1096
Age : 57
Location : West Sussex, 4" DCC Road Loco
Registration date : 2008-06-18 -
Re: Road Loco - 'Blackbeard'
![]() Rickster Wed 09 Jan 2013, 6:26 pm
Rickster Wed 09 Jan 2013, 6:26 pm
Has anyone heard of the date for the grand STW weekend yet ?
Cheers
Rick
Rickster- Number of posts : 267
Location : canterbury, Kent
Registration date : 2010-02-19
Stealth engines
![]() Tim Watson Thu 10 Jan 2013, 7:36 am
Tim Watson Thu 10 Jan 2013, 7:36 am
I like the looks of stealthy plain black engines: unlined engined always seem much bigger than when they are covered with lines! I fully agree with your decision to use plain nuts on the cylinder covers; looks more restrained.
Call in, if your nearby: would love to talk over the remote regulator linkage with you.
Tim

Tim Watson- Number of posts : 585
Location : Herts
Registration date : 2008-07-02
Re: Road Loco - 'Blackbeard'
![]() bjwlancashire Thu 10 Jan 2013, 1:00 pm
bjwlancashire Thu 10 Jan 2013, 1:00 pm
Tim Watson wrote:Brian:
Call in, if your nearby: would love to talk over the remote regulator linkage with you.
Tim
I am plannig a trip to Basildon which would have been next week but I may defer to the following week. I would love to pay a visit and see Fredrick in the flesh so to speak. I will contact you as soon as the dates are finailsed.
The remote regulator may provide a safer way of driving with the roof on. I have briefly driven Clive Hearsey's engine and clive addmitted himself that his tender is slightly shroter than ours and his canopy also finished just shy of the tender rear edge so blackbeard is more of a reach.
Regards
Brian
Last edited by bjwlancashire on Thu 10 Jan 2013, 1:30 pm; edited 1 time in total
bjwlancashire- Number of posts : 938
Location : Mellor, Lancashire
Registration date : 2010-09-07
Oilers and Wicks
![]() bjwlancashire Thu 10 Jan 2013, 1:15 pm
bjwlancashire Thu 10 Jan 2013, 1:15 pm
Big end bearing wick
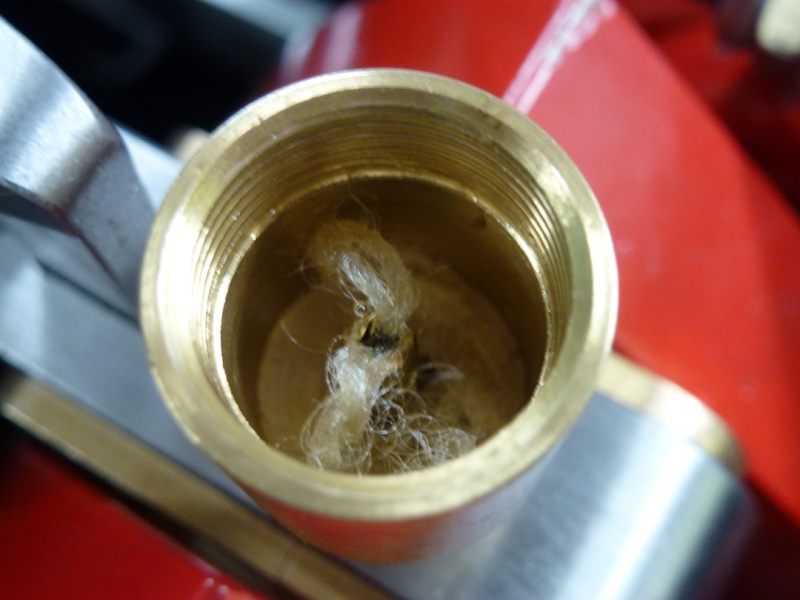
Slide bar oiler, same as eccentric oiler in terms of cup and wick size
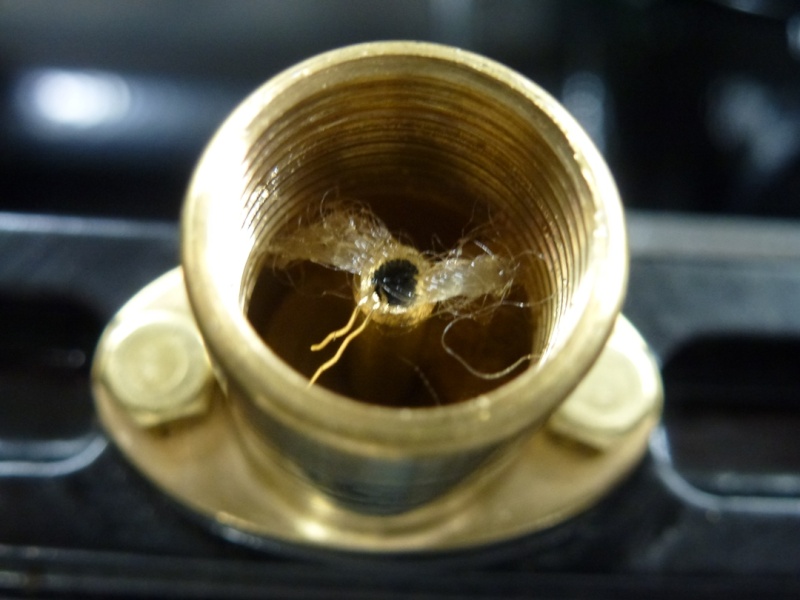
Crankshaft bearing LH side, these used the wire that came with the oiler kit from Seddon & Black.

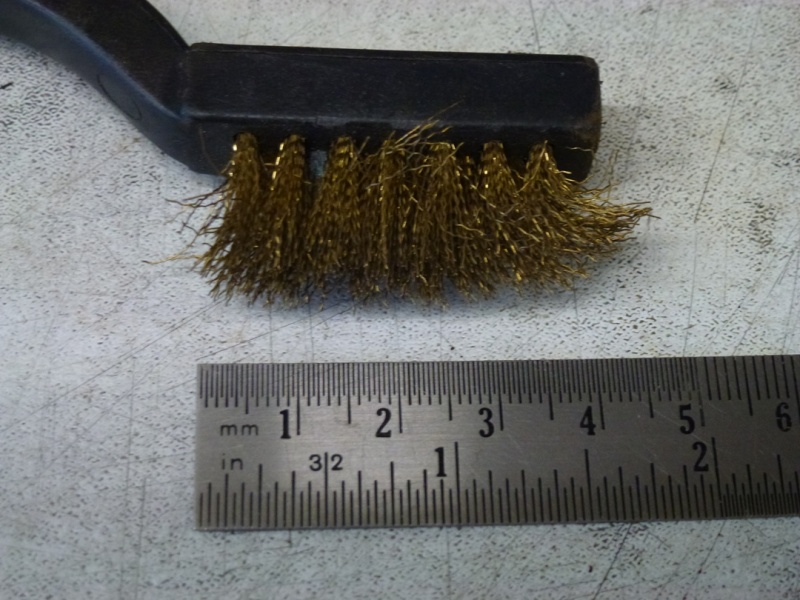
This is the source of the fine wire for the smaller oilers
bjwlancashire- Number of posts : 938
Location : Mellor, Lancashire
Registration date : 2010-09-07
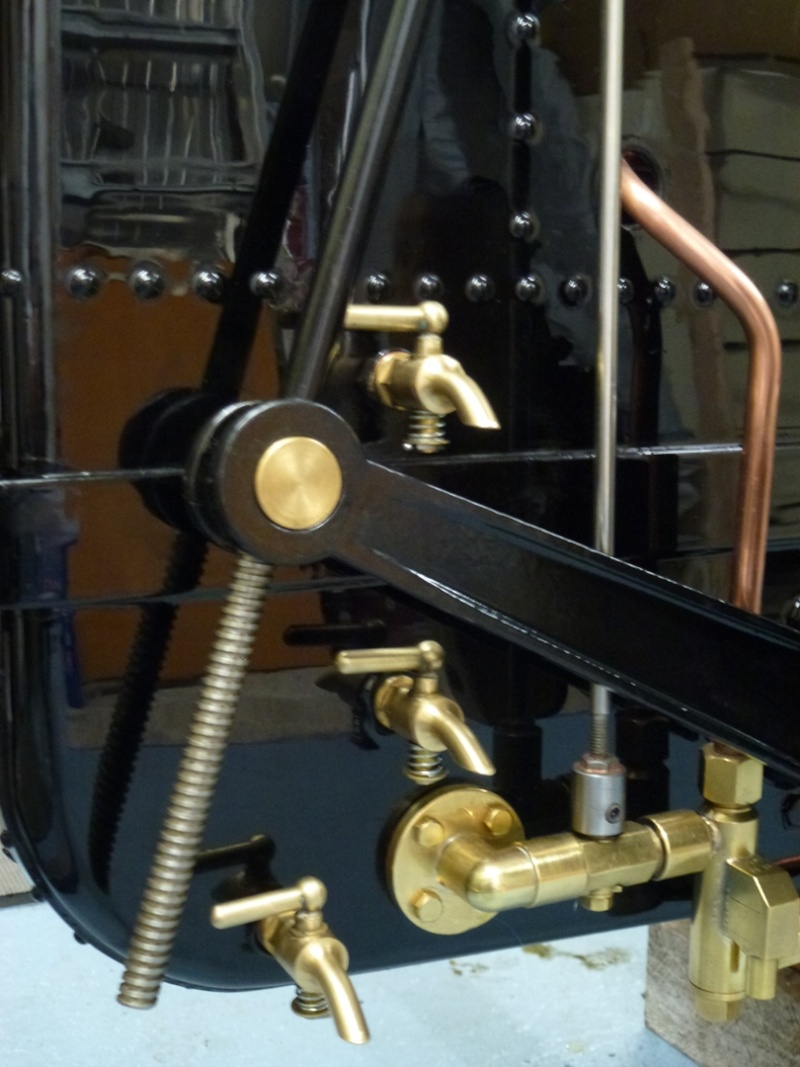
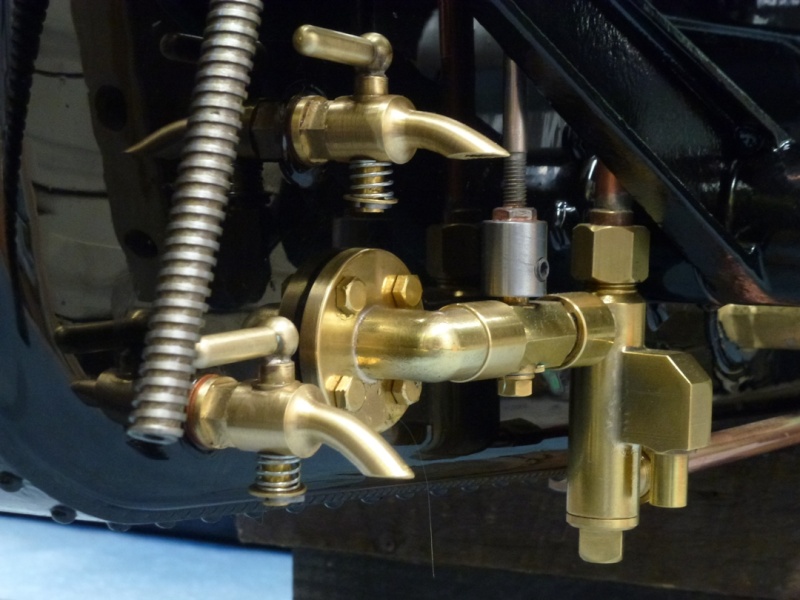
Tender taps now fitted
![]() bjwlancashire Thu 10 Jan 2013, 1:27 pm
bjwlancashire Thu 10 Jan 2013, 1:27 pm
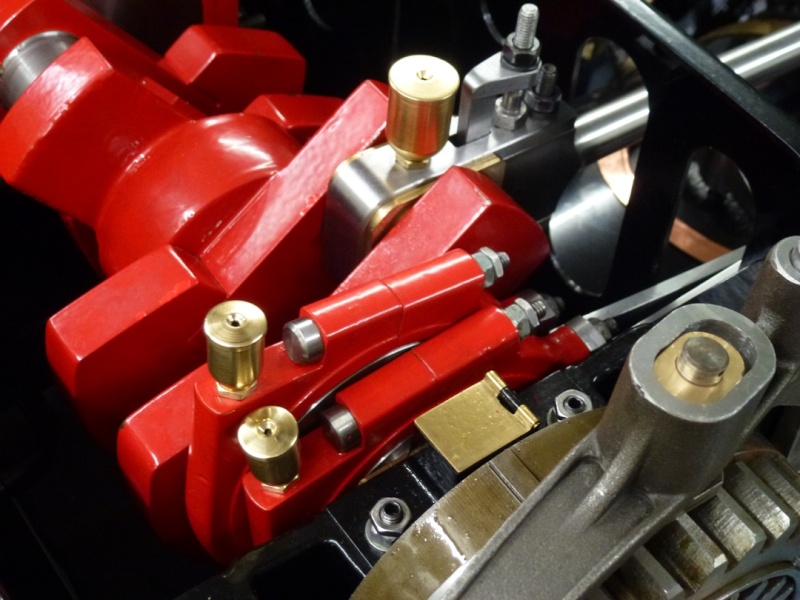
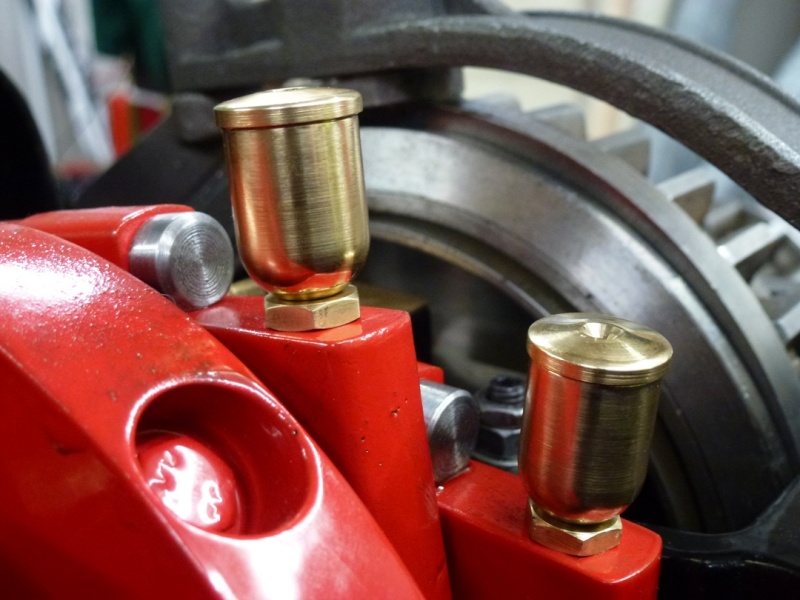
I also had to change round my brake shaft as the one I got had been machined twice due to an error. I had originally fitted it this way round first but it seemed wrong but when I had it the other way the brake blocks were only effective with the actuating arm between the middle and lower taps and this only left around an inch of the brake shaft thread left. Also, due to the size of these taps it would have interfered with them.
It is also another excuse to show off SONIC45's excellent paint finish, looking forward to getting the belly tank back soon.
bjwlancashire- Number of posts : 938
Location : Mellor, Lancashire
Registration date : 2010-09-07
How about this bad boy??????
![]() bjwlancashire Thu 10 Jan 2013, 11:25 pm
bjwlancashire Thu 10 Jan 2013, 11:25 pm
bjwlancashire- Number of posts : 938
Location : Mellor, Lancashire
Registration date : 2010-09-07
Re: Road Loco - 'Blackbeard'
![]() Flasback Fri 11 Jan 2013, 7:20 am
Flasback Fri 11 Jan 2013, 7:20 am
Your on Fire now its looking very good Brian, already been pricing the whistle about £250 all in all, these engines will look and NOW sound the business.
cheers
Dwain
Flasback- Number of posts : 191
Location : Cheshire
Registration date : 2011-01-30
Re: Road Loco - 'Blackbeard'
![]() lynnr Fri 11 Jan 2013, 8:33 am
lynnr Fri 11 Jan 2013, 8:33 am
lynnr- Number of posts : 3242
Age : 55
Location : Highland, 4inch showman
Registration date : 2010-08-06
Re: Road Loco - 'Blackbeard'
![]() bjwlancashire Fri 11 Jan 2013, 9:59 am
bjwlancashire Fri 11 Jan 2013, 9:59 am
Flasback wrote:Bitch......
Your on Fire now its looking very good Brian, already been pricing the whistle about £250 all in all, these engines will look and NOW sound the business.
cheers
Dwain
Cheshire rally is going to get NOISY!! Still can't compete with Lee Fisk's huge chime whistle on his Fowler roller - off a mainline railway locomotive you know.
bjwlancashire- Number of posts : 938
Location : Mellor, Lancashire
Registration date : 2010-09-07
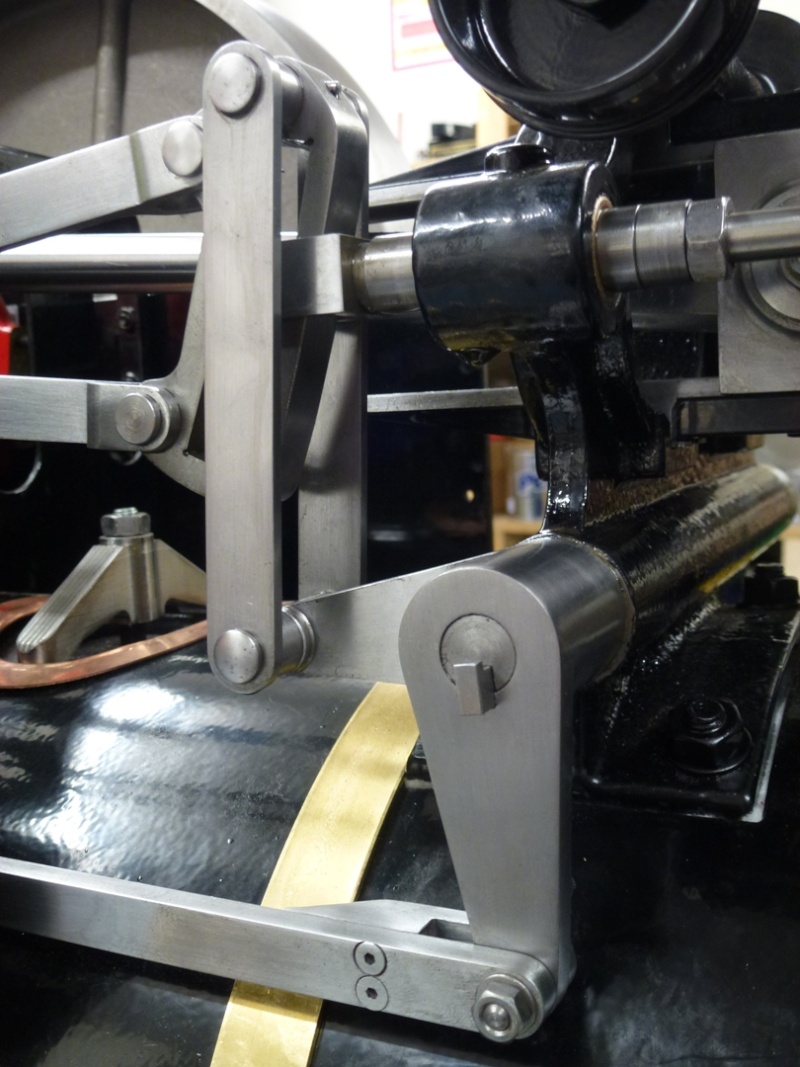
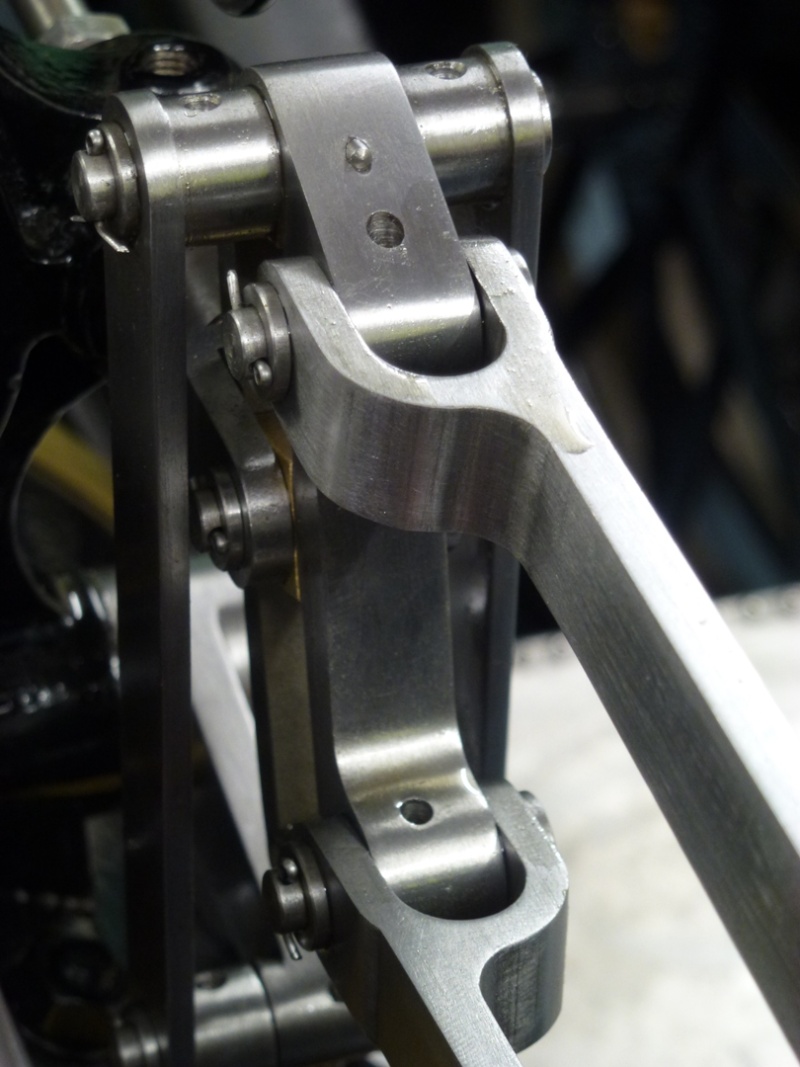
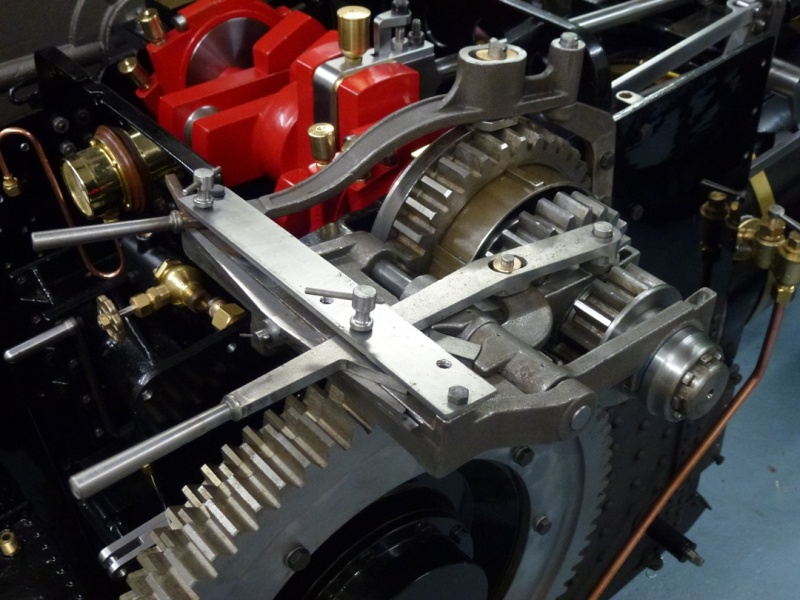
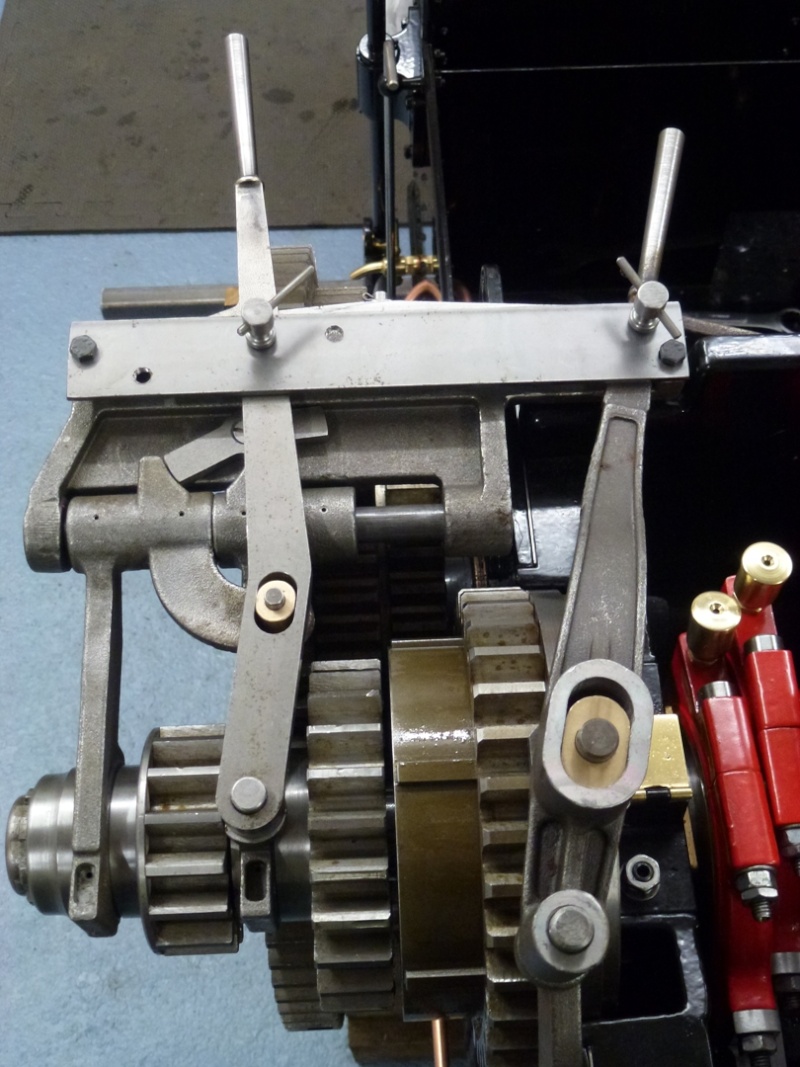
Gear Change Fitted!!
![]() bjwlancashire Sat 12 Jan 2013, 12:03 pm
bjwlancashire Sat 12 Jan 2013, 12:03 pm
What a struggle to get the second gear selector working smnooth but finally got there after much tweaking. 1st gear was OK first time and 3rd gear just need the handle tweaking as it was slightly higher at the handle end so was gently encouraged to be flat into the main gear change casting. The fixing holes in the locking plate needed opening out a little to get the plat on and allow a small amount of float for best position to get the locking pins in and the 1st/2nd gear lever will need the locking pin slot opening up the slightest amount to allow the pin to go in without holding the lever hard over on the stop.
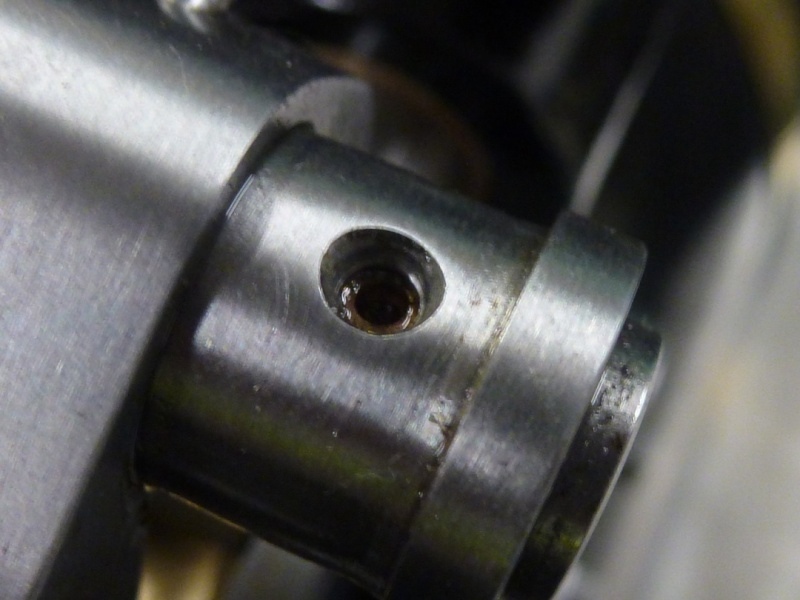
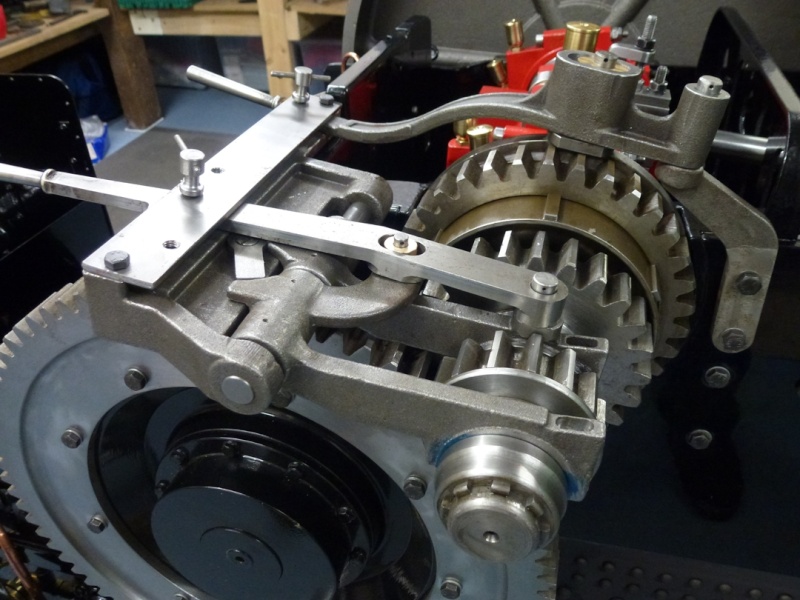
I will now strip this down and get everything polished or masked for powder coating. Also, I will counterbore the oil holes in the selector forks, the ones that lubricate the bar they slide on. If I drill down three quarters of the way through it will provide a small reservoir to hold the oil as it seems impossible to get any oil in the holes as they are, it just sits on top and then runs off.
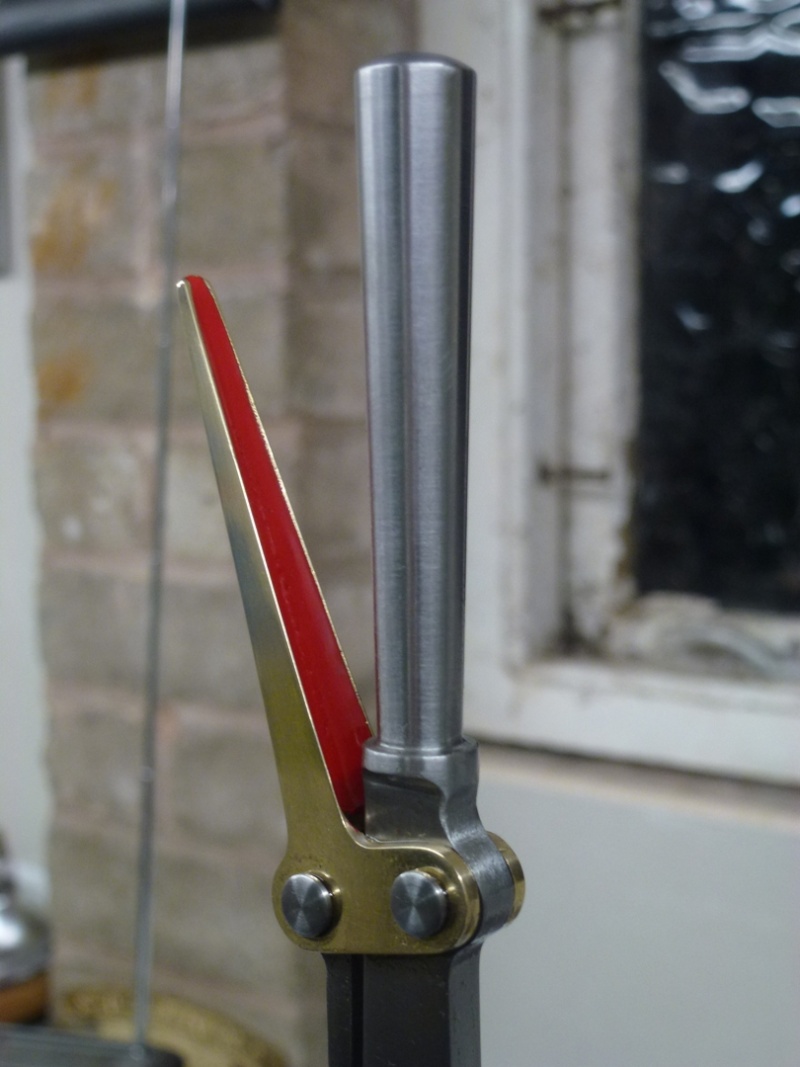
Oh by the way, brace yourself for some more colour too, the two gear change handles will be red to match the crank with the rest of the mechanism being black. Interlocking bar will be chemical blackened and the handle straps will be left natural with some deburring and polishing to match the finish of the valve gear. Locking pins will also be polished steel too.
bjwlancashire- Number of posts : 938
Location : Mellor, Lancashire
Registration date : 2010-09-07
Re: Road Loco - 'Blackbeard'
![]() Tony King Sat 12 Jan 2013, 12:24 pm
Tony King Sat 12 Jan 2013, 12:24 pm
Nice pics...........Just love to see how everyone's engines are coming on....... Heavy metal & shiney stuff..... can't beat it
Looking really good!!
regards,
Tony
Tony King- Number of posts : 856
Age : 68
Location : scotland
Registration date : 2008-10-31
Re: Road Loco - 'Blackbeard'
![]() IanL Sat 12 Jan 2013, 2:55 pm
IanL Sat 12 Jan 2013, 2:55 pm
Nice pictures, I really like the brushed / emery cloth finish on the steel, I assume with all the oil flying around in this area it should not rust too much. I am very tempted to do the same with mine when I receive it. I have chemical blacked my steering column and damper rod what have you done with yours.
Ian

IanL- Number of posts : 437
Age : 68
Location : Nottinghamshire
Registration date : 2011-07-25
Re: Road Loco - 'Blackbeard'
![]() bjwlancashire Sat 12 Jan 2013, 4:27 pm
bjwlancashire Sat 12 Jan 2013, 4:27 pm
Steering rod and damper rod are both powder coated black, flywheel brakeshaft will be too, it just needs the threads masking
Cheers
Brian
bjwlancashire- Number of posts : 938
Location : Mellor, Lancashire
Registration date : 2010-09-07
Re: Road Loco - 'Blackbeard'
![]() IanL Sat 12 Jan 2013, 4:53 pm
IanL Sat 12 Jan 2013, 4:53 pm
Many thanks for the information , wonderd if the paint would cause issues geting it through the two mounting points, hence going down the chemical blacking route.
Ian
IanL- Number of posts : 437
Age : 68
Location : Nottinghamshire
Registration date : 2011-07-25
Re: Road Loco - 'Blackbeard'
![]() bjwlancashire Sat 12 Jan 2013, 5:12 pm
bjwlancashire Sat 12 Jan 2013, 5:12 pm
Steering wheel shaft is what I meant was powdercoated - up to upper bracket anyway. I may paint the top 3" one it is fitted for the final time. The steering chain shaft I also intend to chemical blacken along with the chains and shackles.
Brian
bjwlancashire- Number of posts : 938
Location : Mellor, Lancashire
Registration date : 2010-09-07
Re: Road Loco - 'Blackbeard'
![]() IanL Sat 12 Jan 2013, 8:01 pm
IanL Sat 12 Jan 2013, 8:01 pm
I also chemical blacked the chain shaft I used the kit mentioned on earlier posts and created a tank to hold the long items from a length of plastic rain guttering. I blacked the chains and fittings but forgot the two pins that go through the front shackles and axle will need to do them sometime I the future.
Ian
IanL- Number of posts : 437
Age : 68
Location : Nottinghamshire
Registration date : 2011-07-25
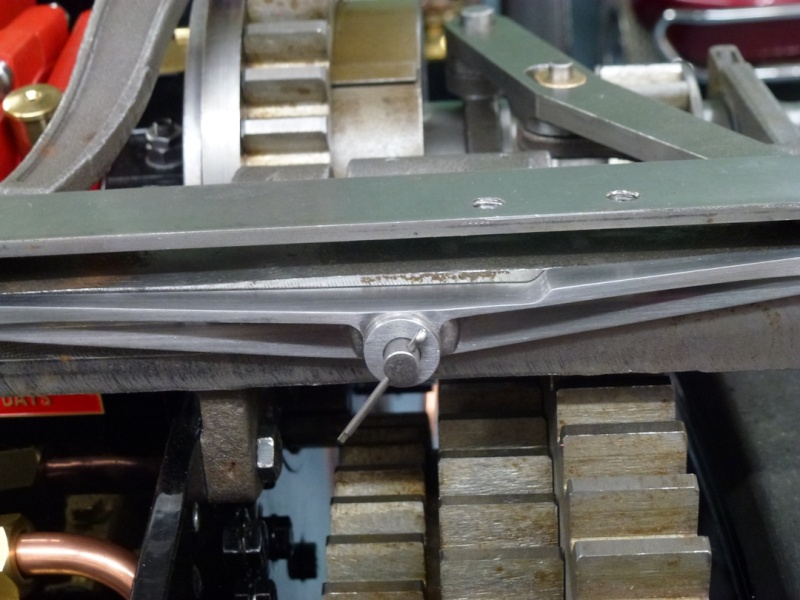
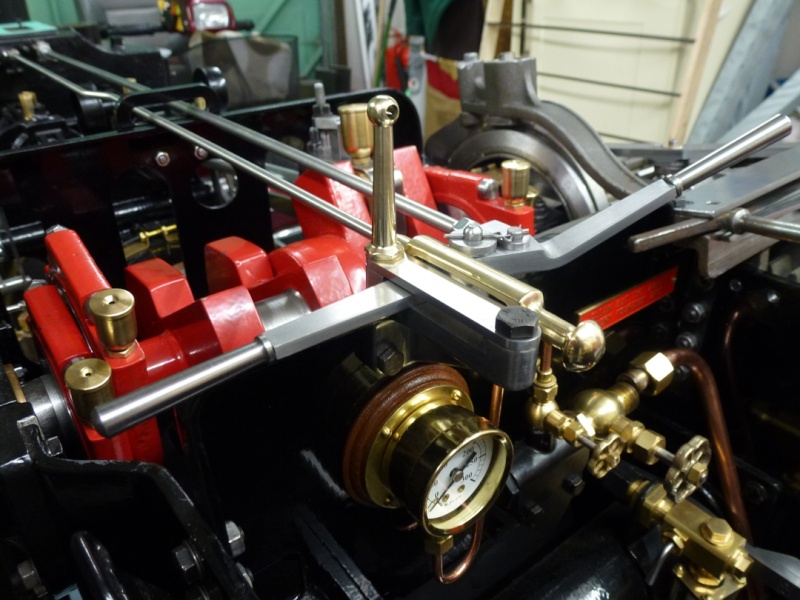
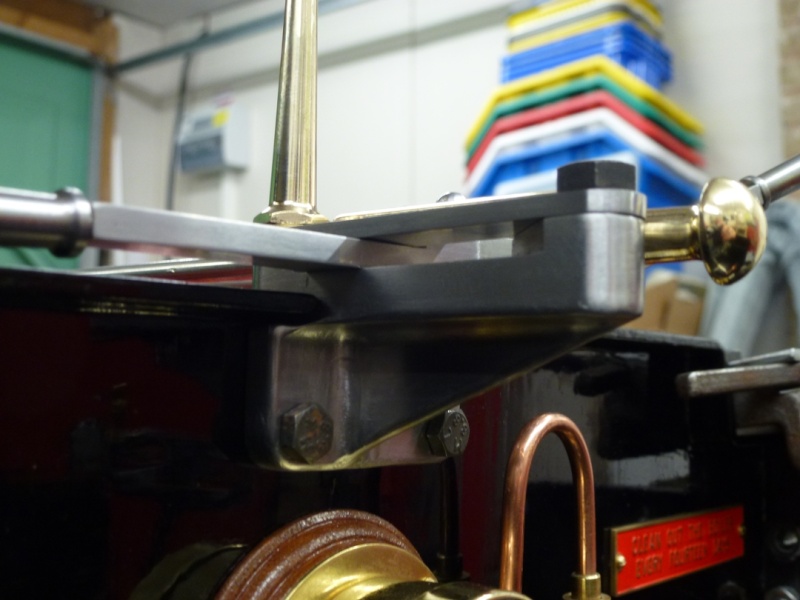
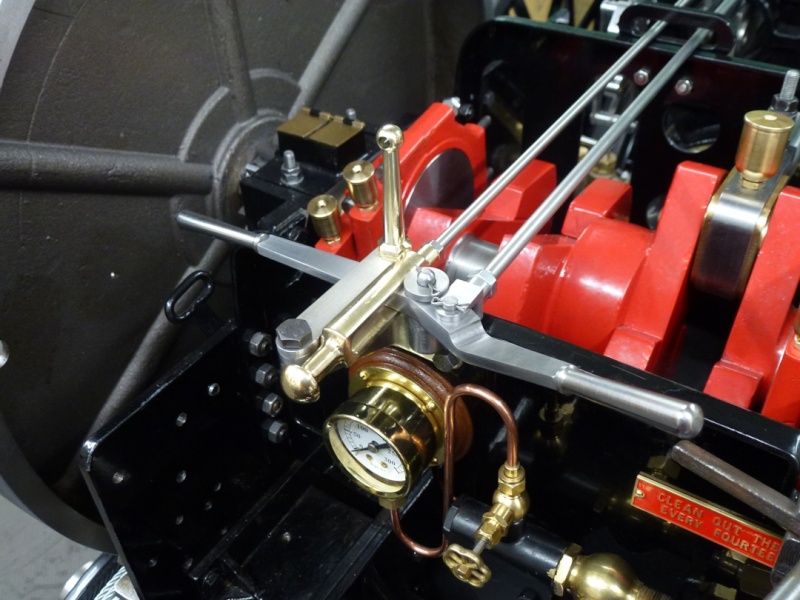
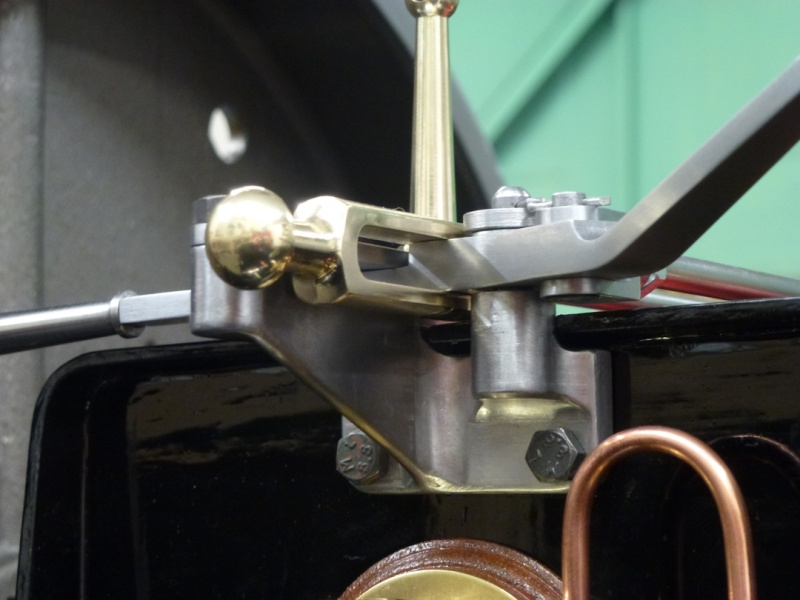
Regulator handle etc..
![]() bjwlancashire Mon 14 Jan 2013, 1:15 pm
bjwlancashire Mon 14 Jan 2013, 1:15 pm
First I fitted the pressure gauge globe valve, a part that had remained in it's bag since it arrived. I then manged to finish polishing the regulator handle bracket and then fit the whole assembly cleaning up all the componenets as I went. I now need to strip it all off again now along with the gear change mechanism to mask parts for powder coating this week.
Blackbeard has a DVLA appointment next Wednesday to be physically inspected prior to getting my registration number so I hope to have the parts back on before I go.
First though I remembered Tim's post regarding the gear change interlocking bar and the cutout he put in to clear the third speed handle so I filed that in and completely cleaned and polished the part ready for final finish.
bjwlancashire- Number of posts : 938
Location : Mellor, Lancashire
Registration date : 2010-09-07
Page 5 of 17 • 1, 2, 3, 4, 5, 6 ... 11 ... 17 ![]()
» Tone's Showmans second lot!
» 4” Road Loco ‘Rachel’
» IanL Road Loco
» MrStationHouse 4" Road Loco
|
|
|