
Pictures MK-1
5 posters
Page 1 of 1

Pictures MK-1
![]() Westcoast Steamer Thu 09 Dec 2021, 6:02 pm
Westcoast Steamer Thu 09 Dec 2021, 6:02 pm
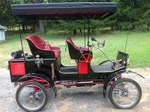
HI fellow Lykamobile builder; I'm finally finishing my 2008 Lykamobile MK-1 after moving it, in pieces twice across the continent. However, no matter how careful in packing, I have lost the final instructions / diagrams. The result being I'm currently searching for photo showing the internal layout of the plumbing etc.
If you have any photos please let me know as it would make life a bit easier!
Cheers from the west coast of Canada
Colin
If you have any photos please let me know as it would make life a bit easier!
Cheers from the west coast of Canada
Colin
Westcoast Steamer- Number of posts : 9
Location : Salt Spring Island BC Canada
Registration date : 2021-11-30
Re: Pictures MK-1
![]() lynnr Thu 09 Dec 2021, 6:42 pm
lynnr Thu 09 Dec 2021, 6:42 pm
Hi
If you call or email Dean at STW he should be able to email the missing instructions as you are a past builder.
If you call or email Dean at STW he should be able to email the missing instructions as you are a past builder.

lynnr- Number of posts : 3242
Age : 55
Location : Highland, 4inch showman
Registration date : 2010-08-06
Re Instructions etc
![]() Westcoast Steamer Thu 09 Dec 2021, 6:58 pm
Westcoast Steamer Thu 09 Dec 2021, 6:58 pm
HI; Yes I did that and they (Dean & Will) were very helpful, but as STW / Modelworks when through a change way back then they only had certain parts of the instructions still on file, hence my request for photos or perhaps copies of someones old ISO drawings etc.
I must say that from the first time Dean took me out on a test drive way back in 2006? STW has always been very helpful.
I must say that from the first time Dean took me out on a test drive way back in 2006? STW has always been very helpful.
Westcoast Steamer- Number of posts : 9
Location : Salt Spring Island BC Canada
Registration date : 2021-11-30
Re: Pictures MK-1
![]() Simon C Thu 09 Dec 2021, 8:29 pm
Simon C Thu 09 Dec 2021, 8:29 pm
Hi Colin
This might be worth a look.
http://www.steamcar.net/modelworks-news.html
This might be worth a look.
http://www.steamcar.net/modelworks-news.html

Simon C- Number of posts : 303
Location : Derby
Registration date : 2017-07-07
Pictures of MK-1 Build
![]() Westcoast Steamer Fri 10 Dec 2021, 12:05 am
Westcoast Steamer Fri 10 Dec 2021, 12:05 am
Hi Simon; I had that link way back ( many computers and providers ago) and just couldn't remember the list it was on or actual link, but you came to the rescue.
Hopefully studying the pictures will aid in assemble.
Cheers and many thanks
Colin
Hopefully studying the pictures will aid in assemble.
Cheers and many thanks
Colin
Westcoast Steamer- Number of posts : 9
Location : Salt Spring Island BC Canada
Registration date : 2021-11-30
drawings
![]() jjtjr Sat 11 Dec 2021, 9:03 pm
jjtjr Sat 11 Dec 2021, 9:03 pm
When I get back to my car which is in Florida for the winter I have the build book there, I will look. I'm in New Jersey for Christmas but will return on Jan 3.
jjtjr- Number of posts : 228
Age : 75
Location : New Jersey,usa
Registration date : 2009-07-28
Westcoast Steamer likes this post
RE:drawings
![]() Pacman Sun 12 Dec 2021, 5:33 pm
Pacman Sun 12 Dec 2021, 5:33 pm
Hi Colin I have most of the original drawings/instructions. Do you know what pages you need iso final 1 is ( water gauge,safety valve & regulator), iso final 2 is (water gauge turret) hope this helps Paul
Pacman- Number of posts : 7
Location : Norfolk
Registration date : 2021-08-06
Drawings - Thanks
![]() Westcoast Steamer Tue 14 Dec 2021, 10:35 pm
Westcoast Steamer Tue 14 Dec 2021, 10:35 pm
Hi jjtjr; Thanks for the update I might have some questions for you in January.
Cheers Colin
Cheers Colin
Westcoast Steamer- Number of posts : 9
Location : Salt Spring Island BC Canada
Registration date : 2021-11-30
Drawings - Thanks Pacman
![]() Westcoast Steamer Tue 14 Dec 2021, 10:46 pm
Westcoast Steamer Tue 14 Dec 2021, 10:46 pm
Hi and thanks; Where things went astray was when I had a newer manufactured safety vale but only references to the early "self-assembled" one. That got cleared up by studying photos of others. My current dilemma is focused around the final plumbing of the boiler. That is hand pump mechanical pump etc. No doubt I could plough though and figure it out but if there actually were some instructions or diagrams life would be easier no doubt.
My build instructions fell apart ( lost in the moves) just after the seat set (Kit 15).
Any info / pictures would be greatly appreciate. The gang at STW have been very helpful but being a MK-1 from the Modelworks days didn't help matters in the paper chase.
Cheers Colin
My build instructions fell apart ( lost in the moves) just after the seat set (Kit 15).
Any info / pictures would be greatly appreciate. The gang at STW have been very helpful but being a MK-1 from the Modelworks days didn't help matters in the paper chase.
Cheers Colin
Westcoast Steamer- Number of posts : 9
Location : Salt Spring Island BC Canada
Registration date : 2021-11-30
Question for JJTJR - Pressure Sensor Springs
![]() Westcoast Steamer Thu 06 Jan 2022, 10:41 pm
Westcoast Steamer Thu 06 Jan 2022, 10:41 pm
HI JJTJR;
I noticed way back in Dec 2016 you talked about the failure of your pressure sensor. In putting my car together this winter I found that the box that my sensor came in had no extra springs and that the sensor was just fitted with the "normal" spring. Inquires with STW (helpful as always) unfortunately resulted in no luck getting the spring part as they now use a different sensor. Hence this question to you or perhaps others who have changed out their sensors. "Would you still have the old one kicking around and if so the correct spring?"
Worth a shot before I go off and buy the new sensor or perhaps the Honeywell one you recommended.
If your like me you probably don't throw out old parts so that little spring might find a second home!
Cheers Colin
PS I hope you made it down the I-95 before the snow storm - if you drove.
Westcoast Steamer- Number of posts : 9
Location : Salt Spring Island BC Canada
Registration date : 2021-11-30
safety valve
![]() jjtjr Fri 07 Jan 2022, 12:39 pm
jjtjr Fri 07 Jan 2022, 12:39 pm
Hi Colin,
When you refer to the pressure sensor, my assumption is you are talking about the pressure safety valve that came with the series 1 likamobile. When I first built the car and started to use it, I found problems with it, it would weep when near the pop pressure and any adjustment would not stop this from happening when you adjusted the same problem would happen at the new pressure. There is more to pressure safety valves than some springs and an adjustment screw. I know that it will work but not well. There is a real science to designing a proper valve. I wrote a white paper on safety valves, when I find it I will post it. So, in the end, I replaced it with a commercial valve. This is one area that is a must because you are sitting over the boiler. I also wrote a guide on the selection of the correct safety valve. I will attach all the correspondences emails that I sent to another owner on how to select the correct valve. It is a little long but has great detail. and will help you with the selection. I gave the old valve to Doug. As you can see by the dates of the email it goes back over 10 years.
Thu, Feb 3, 2011 at 3:20 PM
Jake,
I went onto the Conbraco Industries Web site, and looked at the Apollo valves. I found the 19S Series - Safety Valve.
I have a couple of questions before I place my order. I have spec'ed out my valve as follows;
1) SERIES # = 19
2) TRIM - S = Stainless steel trim w/ metal seat
3) ORIFICE = D ( I assume this is for the 3/4" Outlet??? )
4) INLET = D - 3/4 NPT
5) SERVICE = ( Not sure if it should be; A = ASME Section I Steam, L = ASME Section VIII Steam, or P = Non-Code Steam ??? )
6) SET PRESSURE = 275
7) SPECIAL OPTIONS = A = Anti-Vibration.
Just curious what you suggest I use for number 3 and 5 above. Then I will place my order.
Thanks for your help on this.
Doug.
Jake,
What was the make of the new Safety Valve you used on your boiler? I would like to have a safety valve that I can test, one with a manual test lever.
I looked on the McMaster-Carr web site yesterday and they have a couple of models. I would like to get a pressure relief valve that allows me to go up to 275 psi, just in case I want to have the extra pressure.
One model, for Steam - 4700K23, 1/2" x 3/4" (inlet and outlet), temp range -60 to +406 degrees, only goes up to 250 psi. This is preset at the desired pressure.
A second model, for Air and Gas - 4700K31, 1/2" x 3/4", temp range -10 to +406 degrees, goes up to 300 psi. This is preset at the desired pressure (I would choose 275 psi).
Any suggestions or recommendations?
Also, Tom sent the Locomobile pressure gauge, and it's the same as yours. I was very pleased, thanks again for your help on this.
Doug.
For now I'm set at 250 psi and will see if it has to be raised. When I had the ac burner the purge time made me nuts some time it seemed to take longer then 20 or 30 seconds, by that time you were low on pressure, when the burner was changed to a dc type there was no purge time, it just fired when the pressure switch closed. I spoke to the manufacture of the burner about purge time. They said that it was not needed for steam generators. Purge time was used for a gas system to clear the boiler of any unburnt gas. The unit does not have a cad cell, also not needed for this type of operation. No more melted cell. The positive thing is when you call for pressure if fires immediately. This burner is used in portable steam generators (steam gennys)
Take a look at this you tube link for cabin fever 2011 my car was on display. Got good feedback
Fri, Feb 4, 2011 at 1:01 PM
Jake,
This is exactly what I was looking for. In my case, one of the reasons I am building a steam car, vs buying one, is that I do not know much about steam. This exercise is to learn more about it, so I can have some fun, and be safe at the same time.
I will get the manual for the burner as you suggested, and run your calculation to see what numbers I get. This will help me get the right orifice size. Now I understand a bit more about the significance of what this means, and why the manufacturer breaks it out as a separate item on the part spec.
Also, I assume that a Code valve is the one that I would want to use, just for the very reason of portability that you mention, as I plan to take my car from place to place.
Thanks for the help on this.
Doug.
Feb 4, 2011 05:14:59 PM, jjtjr@yahoo.com wrote:
Doug, The answer to the first question is, The orifice diameter is the internal opening of the valve and is used to calculate the flow capacity of the valve. Capacity is usually measured in gallons per minute (gpm) for water valves, pounds of steam per hour (lb/hr) for steam service. To obtain the lb/hr divide the BTU (max firing rate) by 1000.
The best way to find the BTU per hour is to look in the manual that came with the burner. It should tell you the BTU/HR Max. Then divide that # by 1000. That should give the max. firing rate of the boiler because that's the max heat in BTU that you can input to the boiler. Then select the orifice that is near that #. For ex. My burner is
Firing Capacities: 1.00 to 2.75 gallons per hour
Input: 140,000 to 385,000 BTU/hour
Then I would use a 19SDD(A or P) 275A
So lets put it all together 19S?D(A or P) 275A. The ? in part # is your max burner BTU. I think it will be D, the reason for using the correct ORIFICE is to release the pressure fast enough at a rate to reduce the expanded volume of steam to have the pressure vessel in a safe range again. I have a feeling that your burners BTU will be below the one that I am using, because yours was from a home heating system which typical did not run with high BTU's because it was used to heat water or low pressure steam < 15 psi . The one that I'm using was for a steam ginny which was used to generate steam.
Answer to next question. Code typically refers to the standards that the American Society of Manufacturing Engineers has come up with. They have written long detailed technical criteria on what they see as being the minimum construction to make certain components safe to use in certain service, such as under steam pressure. Most states have elected to adopt these standards as their requirements for steam vessels. In the case of the safety, if your jurisdiction inspects your vessel and they have adopted the code, you will need to have a safety valve that is approved for steam use.
In theory there could be no difference at all between a valve that is code approved and a non code approved valve, the construction could be the same and components be identical. But if the manufacturer of the valve has not elected to go through what can at times be a lengthy process that can be expensive and take lots of paperwork, then they will not get the approved stamp on the valve. I believe that valves have a "V" stamp from the ASME.
In practice I would recommend getting a code valve unless it is just impossible. The reason being is that even if you do not need one for the current jurisdiction, many times things change or boilers can be moved to other jurisdictions for shows, etc and it makes it easier to get it approved for use. There is no Code requirement for a plant to conduct a capacity test for valves that have an ASME Code symbol stamp. I would check on the price for code an non code valves. If not much difference go with the code valve.
I know that all the above info is a lot to digest, but some times its not just a quick answer without all the facts. Hope this helps.
Jake
Jan 26, 2011 12:04:48 AM, Likamobile@yahoogroups.com wrote:
For now I'm set at 250 psi and will see if it has to be raised. When I had the ac burner the purge time made me nuts some time it seemed to take longer then 20 or 30 seconds, by that time you were low on pressure, when the burner was changed to a dc type there was no purge time, it just fired when the pressure switch closed. I spoke to the manufacture of the burner about purge time. They said that it was not needed for steam generators. Purge time was used for a gas system to clear the boiler of any unburnt gas. The unit does not have a cad cell, also not needed for this type of operation. No more melted cell. The positive thing is when you call for pressure if fires immediately. This burner is used in portable steam generators (steam gennys)
Take a look at this you tube link for cabin fever 2011 my car was on display. Got good feedback
__._,_.___
jjtjr- Number of posts : 228
Age : 75
Location : New Jersey,usa
Registration date : 2009-07-28
Pressure Cut-off valve RS-397-1191
![]() Westcoast Steamer Sat 08 Jan 2022, 12:46 am
Westcoast Steamer Sat 08 Jan 2022, 12:46 am
Hi JJTJR;
Thanks for the quick reply.
It was actually the pressure / burner cut off sensor / switch RS part #397-1191 that I meant. I believe you burnt the diaphragm on yours and switched it out for a Honeywell one. The spring in question is Yellow and about 1/8 dia x 1/4 - 3/8 in length.
My Lyka being a later one in the MK-1 production run has a commercial / set safety valve ( not the ModelWorks one). Of course it fits on the opposite side of the boiler and it was not described in the build plans or ISOs. The one that was described was the one you mention in your reply. The joys of the change over to STW. I must say I feel happier with a "commercial" one. I have one (factory built) on my steam launch and it does the job. Happily it's only done its job a couple times as I don't think one should use them willy nilly to relieve steam pressure. Better to handle the steam pressure by careful firing of the boiler etc.
Cheers
Colin
Westcoast Steamer- Number of posts : 9
Location : Salt Spring Island BC Canada
Registration date : 2021-11-30
pressure switch
![]() jjtjr Sat 08 Jan 2022, 10:25 am
jjtjr Sat 08 Jan 2022, 10:25 am
I forget about it burning out. I would have to check about the spring. I don't remember if it only came with one spring I think it did.
About the safety. I like to have it pop once when I drive the car. This clears any stuff from itself and I know it's working. I also do the same with my steamboat.

About the safety. I like to have it pop once when I drive the car. This clears any stuff from itself and I know it's working. I also do the same with my steamboat.

jjtjr- Number of posts : 228
Age : 75
Location : New Jersey,usa
Registration date : 2009-07-28
» How about a Model G to follow the Lykamobile
» Hard baked!
» Presedential Candidate??
» 2'' pictures
» Lynn Robinson. Showman Scenic
» Hard baked!
» Presedential Candidate??
» 2'' pictures
» Lynn Robinson. Showman Scenic
Page 1 of 1
Permissions in this forum:
You cannot reply to topics in this forum|
|
|