
Craftmaster Foden 6" Painting & Build Thread
5 posters
Page 1 of 1

Craftmaster Foden 6" Painting & Build Thread
![]() Adam Brown Fri 17 Feb 2012, 9:03 pm
Adam Brown Fri 17 Feb 2012, 9:03 pm
I've just returned from STW HQ with the first kit of our Foden 6" Wagon. We hope to make a start on it tomorrow and add some photos in the evening.
With this thread I hope to show the painting process in a bit more detail than other build threads, indeed that will hopefully be the main focus. Though I have a tendancy to go off at a tangent which will probably result in photos of some of our other projects worming their way in!
The colour scheme we're going for isn't fully decided yet but the chassis will be in our Alfa Red. This is darker than most go for, we usually suggest Bright Red, Post Office Red, Ayres Red or similar for that sort of job. It should however go very well with an old colour I've found in a 1926 Coach Enamel colour chart I acquired last year. Its a very very dark blue thats almost black, it should go well with Gold Leaf lettering and make it really stand out
Everything will be brush painted. We'll be doing two coats of Primer and Undercoat and 2-3 coats of Top Coat.
Also if anyone has any painting related questions I'll do whatever I can to help (even if your not using Craftmaster)
Adam Brown- Number of posts : 62
Location : Cambridge
Registration date : 2012-02-07
Re: Craftmaster Foden 6" Painting & Build Thread
![]() Robfishman Fri 17 Feb 2012, 10:28 pm
Robfishman Fri 17 Feb 2012, 10:28 pm
Hi Adam
Alfa Red is a lovely colour, i wanted to used it on a car we restored a few years ago, but came with a large premium, and the paint supplier suggested an alternative which was a just not the same, and I regretted it after.
Does the same apply with the Craftmaster Alfa Red. Thinking of using it and as there is not much needed I think I'll be ordering some in the not to distant future.
I think you and I were bidding on some of the same colour charts last year before I realised it was you and pulled out, glad you got them and are bringing some of these colours back to life.
Good luck with the build, and looking forward to yous progress updates.
Many thanks
Robfishman- Number of posts : 1061
Age : 49
Location : Chandlers Ford Hants 4" showmans & 4" Roller
Registration date : 2010-11-26 -

Re: Craftmaster Foden 6" Painting & Build Thread
![]() Adam Brown Fri 17 Feb 2012, 10:52 pm
Adam Brown Fri 17 Feb 2012, 10:52 pm
Hi Rob
All colours are charged at the same rate though the pigments cost different amounts at point of manufacture (they all cost us the same as the prices get equalised). The only thing that would cost more would be pearlescent but thats a non starter as its not available to us in Synthetics (only waterbased) and thankfully theres no demand
I'm quite sad in collecting old paint charts but they do come in handy from time to time. I've only acquired a few so far but the 20's one is a real gem and I'm always on the lookout for more, I've been importing some tractor ones from America recently.
Adam Brown- Number of posts : 62
Location : Cambridge
Registration date : 2012-02-07
Re: Craftmaster Foden 6" Painting & Build Thread
![]() Adam Brown Sun 19 Feb 2012, 5:45 pm
Adam Brown Sun 19 Feb 2012, 5:45 pm
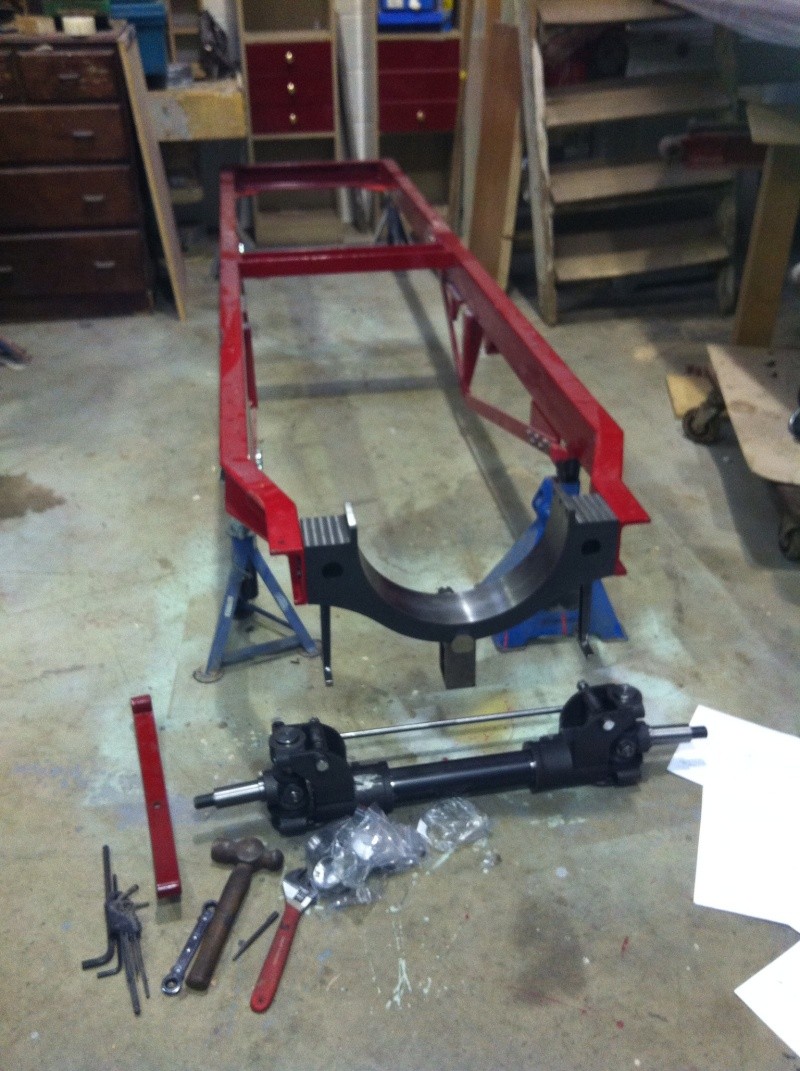
Well we got started today and there was a lot more work than I first realised. After sorting through the bits we loosely bolted everything on just to check it all went together ok.
Thoughts then turned to cleaning everything up and getting on with the painting. As time was a little limited we decided to try and get the two chassis rails primed today. We'll then do the cross members tomorrow and hopefully the main components will be finnished and bolted together for the weekend. Then we can do the other bits and pieces at our leisure. Que much filing of sharp edges and then a good going over with a wire wheel followed by a thorough degreasing with Synthetic Thinners.
We've also decided to use rust treatment on everything. Its not strictly necessary but as we've got it we thought we'd give it a go. It starts out white and turns black to show that any rust has been neutralised. After that the Chassis rails were painted with our Grey Primer and left to dry overnight
In total we'll put five coats on before bolting it back together. 2 Primer, 2 Undercoat and 1 Top Coat. We'll then assemble it and prime all the nuts and bolts then undercoat them before proceeding with a final 2 Top Coats.
Just found out the photo links weren't working so for now just one photo
Adam Brown- Number of posts : 62
Location : Cambridge
Registration date : 2012-02-07

Adam Brown- Number of posts : 62
Location : Cambridge
Registration date : 2012-02-07
Re: Craftmaster Foden 6" Painting & Build Thread
![]() Adam Brown Sat 03 Mar 2012, 7:26 pm
Adam Brown Sat 03 Mar 2012, 7:26 pm
A little later than planned an update. We've given most bits a few coats or primer & undercoat and one of topcoat so we thought we'd bolt it together (again). One problem I encountered was when tightening the nuts they stripped their own threads (I was not over tightening them). Dad got some nuts from our stores which didn't cause any problems but the last one stripped the rivet bolt! - Has anyone else encountered this problem?

Adam Brown- Number of posts : 62
Location : Cambridge
Registration date : 2012-02-07
Re: Craftmaster Foden 6" Painting & Build Thread
![]() hippy dave Sun 04 Mar 2012, 2:45 pm
hippy dave Sun 04 Mar 2012, 2:45 pm
didnt have any probs with threads stripping but did snap 2 rivit bolts,so will have to speak to steve about sending me a couple more.Have you put rivit bolts in the back corners from the inside out cheers

hippy dave- Number of posts : 188
Location : bognor regis
Registration date : 2011-07-31
Re: Craftmaster Foden 6" Painting & Build Thread
![]() bjwlancashire Mon 05 Mar 2012, 12:30 am
bjwlancashire Mon 05 Mar 2012, 12:30 am
A couple of times on the DCC Road Loco I encountered smaller bolts with very sloppy fit to the nuts, particularly some M3 and M4 ones. I did source my own so solve this, it is easy to do and not realy detrimental to the kit. Some of the M6 bols I bolted the tender on with did tend to wear the thread away if it was snug against the side of the clearance hole. Again I sourced some additional ones from the local engineering supplies for one I put it on permanently.
I stripped the odd rivet bolt too but there wew always more than required so no worries there.
Cheers
Brian
I stripped the odd rivet bolt too but there wew always more than required so no worries there.
Cheers
Brian

bjwlancashire- Number of posts : 938
Location : Mellor, Lancashire
Registration date : 2010-09-07
Re: Craftmaster Foden 6" Painting & Build Thread
![]() Adam Brown Mon 05 Mar 2012, 10:05 am
Adam Brown Mon 05 Mar 2012, 10:05 am
walters wrote:didnt have any probs with threads stripping but did snap 2 rivit bolts,so will have to speak to steve about sending me a couple more.Have you put rivit bolts in the back corners from the inside out cheers
Around the back we've put the rivet bolts into the cross member and also the outside row of three bolts on the gussett plate. The two that attach either side to the cross member won't be seen so we put the hex's in there
Adam Brown- Number of posts : 62
Location : Cambridge
Registration date : 2012-02-07
Re: Craftmaster Foden 6" Painting & Build Thread
![]() Adam Brown Tue 02 Oct 2012, 8:56 pm
Adam Brown Tue 02 Oct 2012, 8:56 pm
Well after a rather manic summer we're starting to crack on with the Foden. The wheels are about 60% painted but they seem to take forever, pictures to follow if the one I've just finished turns out ok.
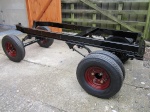
I've finally managed to make some space in the workshop to put the chassis flat on the floor. Its been sitting on its side for about 6 months and has got rather knocked (sliding it around on its side not a good idea apparently) so its going to have to be repainted and probably taken apart to some extent
I spent this afternoon loose fitting the latest kit just to see how it all fits together before cleaning and painting. Hopefully we'll have it all together within a month (just waiting for the paint on the springs to hard dry)
Adam Brown- Number of posts : 62
Location : Cambridge
Registration date : 2012-02-07
Re: Craftmaster Foden 6" Painting & Build Thread
![]() Adam Brown Sun 06 Jan 2013, 9:08 pm
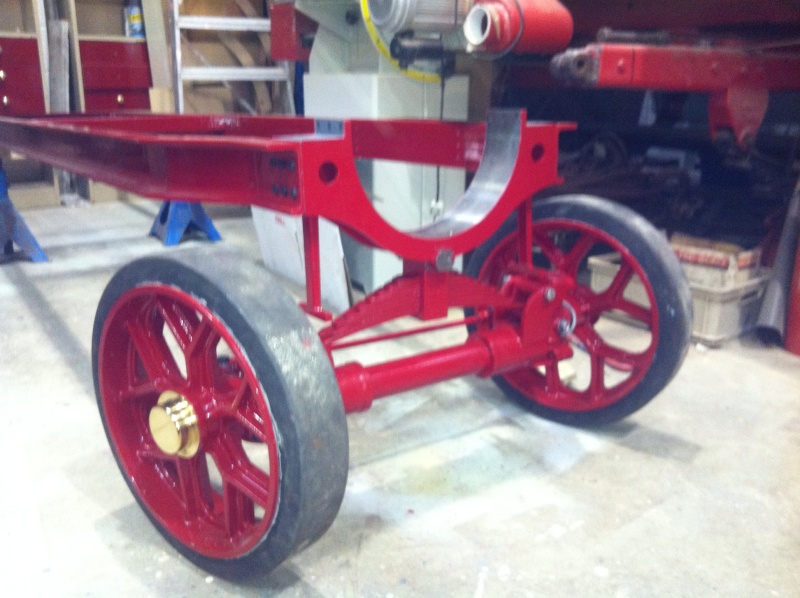
Adam Brown Sun 06 Jan 2013, 9:08 pm
Well a fairly productive Christmas break has led us to the completion of the front end (ish) Next stop back axle!
Adam Brown- Number of posts : 62
Location : Cambridge
Registration date : 2012-02-07
Re: Craftmaster Foden 6" Painting & Build Thread
![]() SSGR Mon 07 Jan 2013, 12:41 pm
SSGR Mon 07 Jan 2013, 12:41 pm
Looking very good Adam.
John
John
SSGR- Number of posts : 88
Age : 59
Location : North Yorkshire
Registration date : 2012-05-14
» Craftmaster Paint - brush painting - fine bubbles
» 6” Foden - Painting Springs
» Road Loco - 'Blackbeard'
» 6" Foden SWB
» Photo's of Foden's
» 6” Foden - Painting Springs
» Road Loco - 'Blackbeard'
» 6" Foden SWB
» Photo's of Foden's
Page 1 of 1
Permissions in this forum:
You cannot reply to topics in this forum|
|
|