Tender - tips and tricks
+6
Simon C
tef 20
Will@STW
MikeBelham
lynnr
elwood-59
10 posters
Page 1 of 2
Page 1 of 2 • 1, 2 
 Tender - tips and tricks
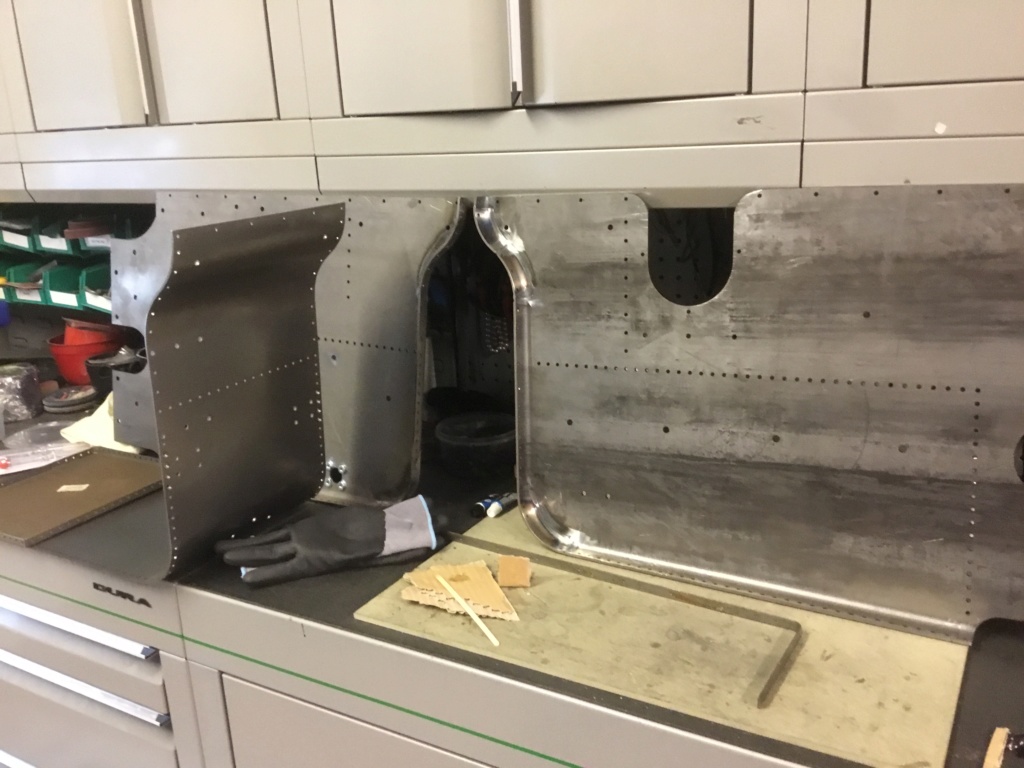
My next kit has arrived... the tender. Lots of nuts and bolts. The good news is there is not much mill scale on these parts. I am going to give them a good clean and smooth out all surfaces before I start. There is plenty of info in other threads about the sealing, so I am fine with that - I haven’t decided whether to go Isoflex, POR-15 or something else... but that decision can wait a while. I guess it’s a good idea to chamfer the edges that will be painted ? Any other tips to do with the construction will be much appreciated !

milford59- Number of posts : 307
Location : Milford on Sea
Registration date : 2019-05-19
 Re: Tender - tips and tricks
Hi,
cleaned up the parts with a angle grinder. Took a bag of M3 x 30 inhex screws and nuts and used them to assemble the tender. Put it in every other hole to get it all together then added the real rivet bolts into the gaps, followed by replacing the M3 screws by the rivet screws one by one. Worked good. A T-grip inhex tool and 5,5mm wrench helped much.
Cheers
Elwood

elwood-59- Number of posts : 306
Location : Germany-NRW
Registration date : 2014-12-17
 Re: Tender - tips and tricks
Thanks very much Elwood !
milford59- Number of posts : 307
Location : Milford on Sea
Registration date : 2019-05-19
 Re: Tender - tips and tricks
Ok... so the idea of my threads in this section are for new builders to learn some stuff from the old hands who have been there , done it and got the T-shirt !! ... and if I come up with any pearls of wisdom whilst I am building my SCC, I will add them here as well....I am a complete novice when it comes to traction engines, although I have been interested in them for many years....
I have built a kit car, rebuilt motorbikes and racing cars and am reasonably competent with MIG metalwork...but a traction engine is a brand new challenge for me.......I have been stripping the mill scale off the straps that come with the tender kit..... I have had a good result using these Poly Abrasive wheels in my angle grinder.....
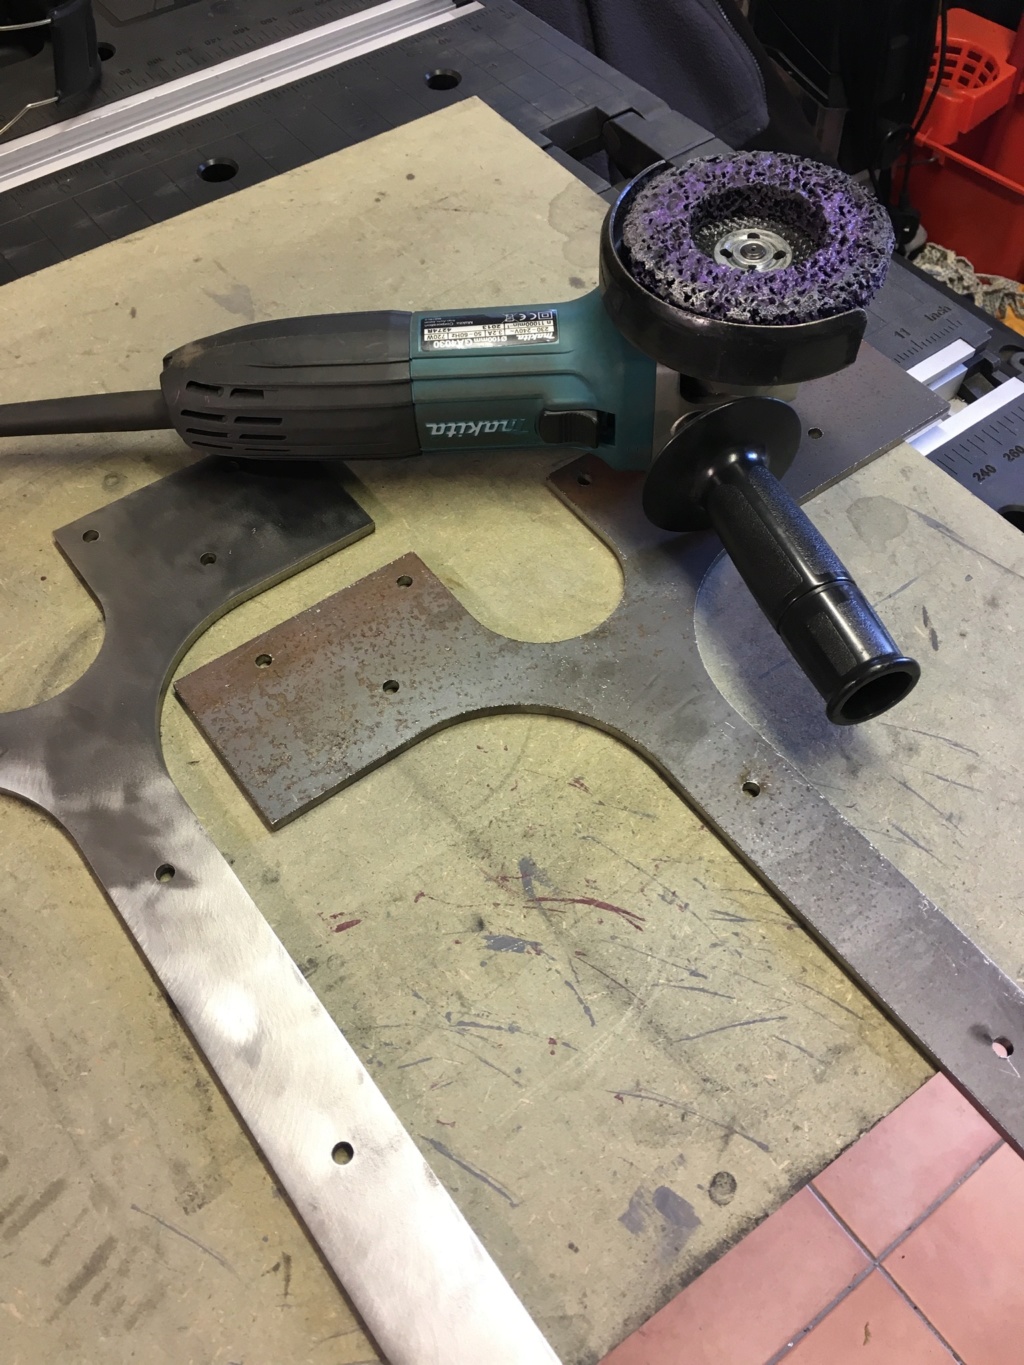
I have built a kit car, rebuilt motorbikes and racing cars and am reasonably competent with MIG metalwork...but a traction engine is a brand new challenge for me.......I have been stripping the mill scale off the straps that come with the tender kit..... I have had a good result using these Poly Abrasive wheels in my angle grinder.....

milford59- Number of posts : 307
Location : Milford on Sea
Registration date : 2019-05-19
 Re: Tender - tips and tricks
I have read about the different products that people use for sealing the tender - and I have read about people who have unfortunately got leaks after everything has been finished.....I haven’t yet decided what to use, but it occurs to me that some epoxy carefully applied in various areas might be a good starting point before I use the sealer..... For example, these gaps would benefit from some epoxy...

Why haven’t I read about this idea before ? Is it a bad idea ? Any comments gratefully received..

Why haven’t I read about this idea before ? Is it a bad idea ? Any comments gratefully received..
milford59- Number of posts : 307
Location : Milford on Sea
Registration date : 2019-05-19
 Re: Tender - tips and tricks
Hi
Epoxy can be heat and oil sensitive. The front panel of the tender does get heated during running and will get oily.
I actually left the front panel off the tender. Painted inside up to 1/2” of the edge. Painted the flat of the front panel. Bolted in then sealed around the edge through the inspection hole. All with isoflex. To stop the sealant leaking I wax filled the screw and bolt holes then just used masking tape on the “open” edges etc.
First time zero leaks.

lynnr- Number of posts : 3242
Age : 56
Location : Highland, 4inch showman
Registration date : 2010-08-06
 Re: Tender - tips and tricks
milford59 wrote:I have read about the different products that people use for sealing the tender - and I have read about people who have unfortunately got leaks after everything has been finished.....I haven’t yet decided what to use, but it occurs to me that some epoxy carefully applied in various areas might be a good starting point before I use the sealer..... For example, these gaps would benefit from some epoxy...
Why haven’t I read about this idea before ? Is it a bad idea ? Any comments gratefully received..
Thanks for your posts, always good to see other peoples builds in progress.
I have previously used JB Weld to fix a Landrover diesel cylinder head and am using it on my SCC build.
This is what the manufacturer says about their product
"J-B Weld
Hope this helps
Mike
MikeBelham- Number of posts : 43
Location : Worcestershire
Registration date : 2020-05-02
 Re: Tender - tips and tricks
Thanks very much for that info Mike.
I am making good progress on my tender, but I have made a slight balls-up.... it’s not drastic..... I used the 10mm screws on the filler piece instead of the 12mm ones.... I am going to replace them..... shouldn’t take too long.....I am trying to work out which holes should be left..... I am guessing that when the “Tender Fittings” kit arrives, there is a plate or something to enclose the area where the water goes... and also the bit that raises the height at the back of the tender (sorry, don’t know the right terminology !.... I can tell you all about the insides of a Hewland race car gearbox, but like I have said previously , the traction engine stuff is all new to me, although I have been going to GDSF for about 15 years)
I am making good progress on my tender, but I have made a slight balls-up.... it’s not drastic..... I used the 10mm screws on the filler piece instead of the 12mm ones.... I am going to replace them..... shouldn’t take too long.....I am trying to work out which holes should be left..... I am guessing that when the “Tender Fittings” kit arrives, there is a plate or something to enclose the area where the water goes... and also the bit that raises the height at the back of the tender (sorry, don’t know the right terminology !.... I can tell you all about the insides of a Hewland race car gearbox, but like I have said previously , the traction engine stuff is all new to me, although I have been going to GDSF for about 15 years)
milford59- Number of posts : 307
Location : Milford on Sea
Registration date : 2019-05-19
 Re: Tender - tips and tricks
milford59 wrote:Thanks very much for that info Mike.
I am making good progress on my tender, but I have made a slight balls-up.... it’s not drastic..... I used the 10mm screws on the filler piece instead of the 12mm ones.... I am going to replace them..... shouldn’t take too long.....I am trying to work out which holes should be left..... I am guessing that when the “Tender Fittings” kit arrives, there is a plate or something to enclose the area where the water goes... and also the bit that raises the height at the back of the tender (sorry, don’t know the right terminology !.... I can tell you all about the insides of a Hewland race car gearbox, but like I have said previously , the traction engine stuff is all new to me, although I have been going to GDSF for about 15 years)
After kit 8 you will have a complete tender, and should have everything needed before putting in the sealant. I believe that the bunker extension is also in kit 8 (after this kit anything to involving the tender will be pipework or fitting the tender to the engine).
Many thanks
Will@STW

Will@STW- Number of posts : 196
Age : 27
Location : Daventry
Registration date : 2019-01-29
 Re: Tender - tips and tricks
Thanks very much for that info, Will.
milford59- Number of posts : 307
Location : Milford on Sea
Registration date : 2019-05-19
 Re: Tender - tips and tricks
If you would like any pictures or a copy of the next kit instructions let me know as I have my tender off and sitting on stools so easy to take pictures of it before I strip it down.
milford59 wrote:Thanks very much for that info Mike.
I am making good progress on my tender, but I have made a slight balls-up.... it’s not drastic..... I used the 10mm screws on the filler piece instead of the 12mm ones.... I am going to replace them..... shouldn’t take too long.....I am trying to work out which holes should be left..... I am guessing that when the “Tender Fittings” kit arrives, there is a plate or something to enclose the area where the water goes... and also the bit that raises the height at the back of the tender (sorry, don’t know the right terminology !.... I can tell you all about the insides of a Hewland race car gearbox, but like I have said previously , the traction engine stuff is all new to me, although I have been going to GDSF for about 15 years)
tef 20- Number of posts : 161
Location : Livingston 4 " Burrell
Registration date : 2008-06-19
 Re: Tender - tips and tricks
tef 20 wrote:If you would like any pictures or a copy of the next kit instructions let me know as I have my tender off and sitting on stools so easy to take pictures of it before I strip it down.milford59 wrote:Thanks very much for that info Mike.
I am making good progress on my tender, but I have made a slight balls-up.... it’s not drastic..... I used the 10mm screws on the filler piece instead of the 12mm ones.... I am going to replace them..... shouldn’t take too long.....I am trying to work out which holes should be left..... I am guessing that when the “Tender Fittings” kit arrives, there is a plate or something to enclose the area where the water goes... and also the bit that raises the height at the back of the tender (sorry, don’t know the right terminology !.... I can tell you all about the insides of a Hewland race car gearbox, but like I have said previously , the traction engine stuff is all new to me, although I have been going to GDSF for about 15 years)
That would be great, and much appreciated..... some pictures and the next kit instructions..... I will send you a PM with my e-mail address.... that is very kind of you. Thanks !
milford59- Number of posts : 307
Location : Milford on Sea
Registration date : 2019-05-19
 Re: Tender - tips and tricks
A bit more progress on the tender..... I have chamfered the inside edges of the straps and dry fitted the straps and brackets approximately in place, but a bit more work with the angle grinder is needed.....they are not quite sitting perfectly right yet.....
Another question for those that have done it before.......I plan to paint the straps and brackets black to contrast with my Crimson Lake tender.....should I paint those parts separately (I think I should get a better end result that way)..... or maybe some builders will paint those parts a different colour when it’s all been assembled, by masking carefully... It’s a lot of fun and enjoyment, this traction engine building !!

Another question for those that have done it before.......I plan to paint the straps and brackets black to contrast with my Crimson Lake tender.....should I paint those parts separately (I think I should get a better end result that way)..... or maybe some builders will paint those parts a different colour when it’s all been assembled, by masking carefully... It’s a lot of fun and enjoyment, this traction engine building !!

milford59- Number of posts : 307
Location : Milford on Sea
Registration date : 2019-05-19
MikeBelham likes this post
 Re: Tender - tips and tricks
Hi Milford
If this is the look you want then these were painted separate then installed on the tender touching in the bolt heads later with an artists brush.

If this is the look you want then these were painted separate then installed on the tender touching in the bolt heads later with an artists brush.


Simon C- Number of posts : 305
Location : Derby
Registration date : 2017-07-07
 Re: Tender - tips and tricks
Thank Simon - that looks very good indeed !
milford59- Number of posts : 307
Location : Milford on Sea
Registration date : 2019-05-19
 Re: Tender - tips and tricks
OK - I am back to ask another couple of questions..... the tender build is going well, although I haven’t finished the beading round the top yet.... I will obviously be cutting off the screws where they come through the beading.... but what about screws on the inside of the tender.... have other builders cut those off with a Dremel, or similar ??
Also - I have about 28 round-headed screws left over.... there are not enough to do all the horizontal holes, where I think the lid for the water tank (Kit 8 ?) will go, and I have filled all the other holes that I can see..... so what (if anything) has gone wrong !! ??
Thanks for any pointers !

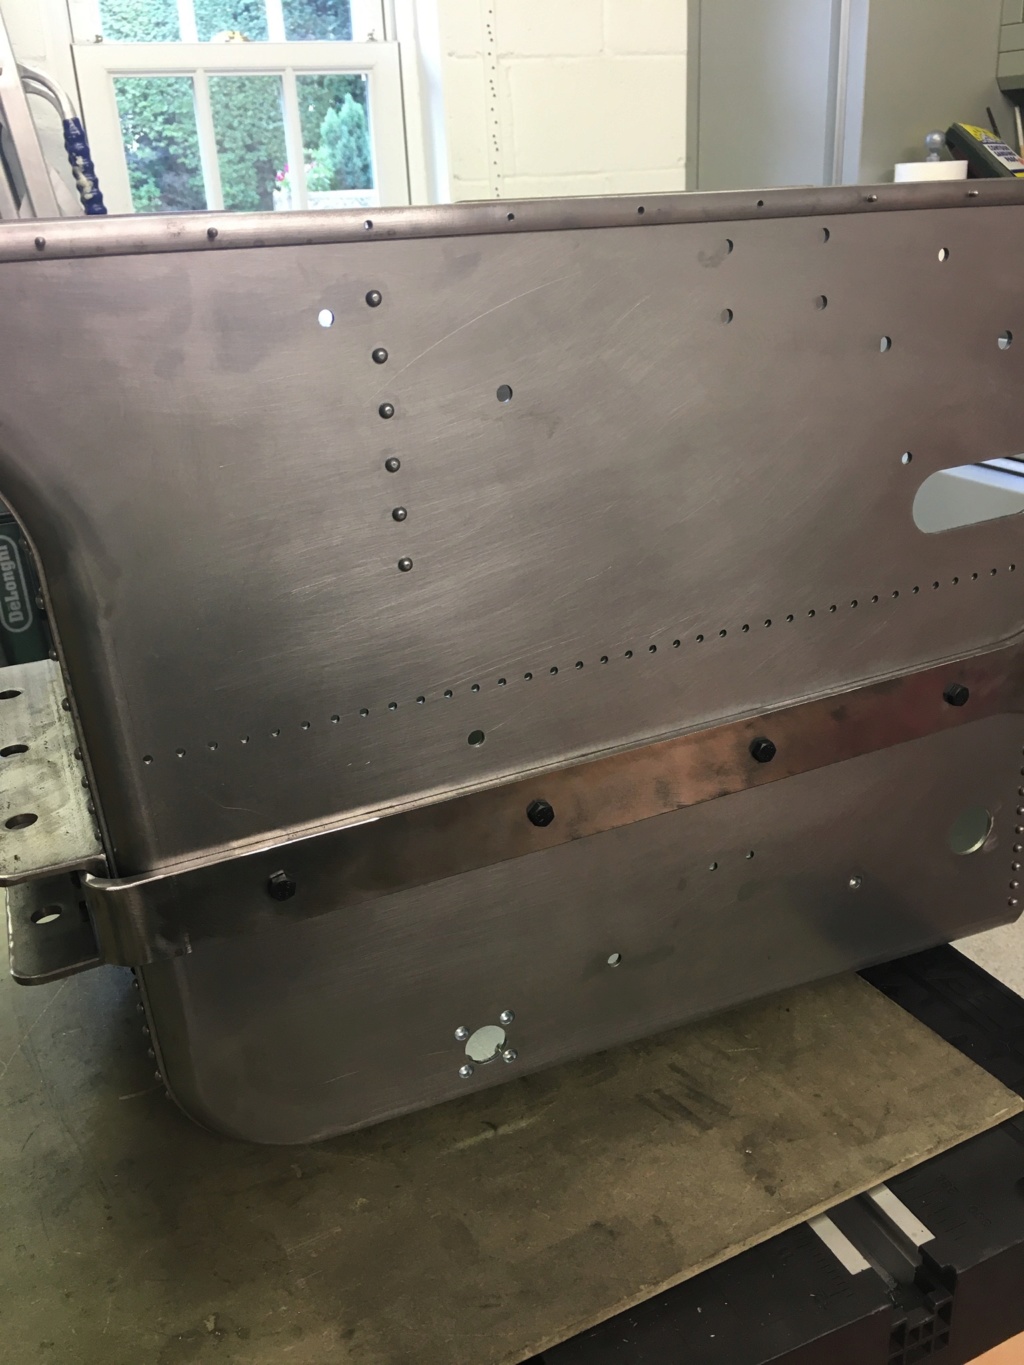
Also - I have about 28 round-headed screws left over.... there are not enough to do all the horizontal holes, where I think the lid for the water tank (Kit 8 ?) will go, and I have filled all the other holes that I can see..... so what (if anything) has gone wrong !! ??
Thanks for any pointers !


milford59- Number of posts : 307
Location : Milford on Sea
Registration date : 2019-05-19
 Re: Tender - tips and tricks
Hi,
to clean up the visible areas I cut off/rounded off the bolts like at the tender rear as this will be used later for storing coal or tools or... Same with the threads on the rivet bolts that mount the „footplate“ i.e. top of tender.
During my build usually I had only one ot two bolts/nuts etc left over, so Helen has really counted them very good ;-) have you used the countersunk bolts at the areas where the tow straps will end up? Also some holes are left open intentionally for the steps etc. But, that could have been on a DCC only so on a Agri I cannot say for sure.
Cheers
Elwood

elwood-59- Number of posts : 306
Location : Germany-NRW
Registration date : 2014-12-17
 Re: Tender - tips and tricks
The tank inspection hatch comes with its own brass bolts.

lynnr- Number of posts : 3242
Age : 56
Location : Highland, 4inch showman
Registration date : 2010-08-06
 Re: Tender - tips and tricks
milford59 wrote: Also - I have about 28 round-headed screws left over.... there are not enough to do all the horizontal holes, where I think the lid for the water tank (Kit 8 ?) will go, and I have filled all the other holes that I can see..... so what (if anything) has gone wrong !! ??
Hi Milford59
The tender tank top also comes with the rivet bolts it needs, which will fill the holes in question. We always try to more bolts than you need rather than less than you need, especially with the rivet bolts as the heads on some can at times become damaged.
Many thanks
Will@STW

Will@STW- Number of posts : 196
Age : 27
Location : Daventry
Registration date : 2019-01-29
 Re: Tender - tips and tricks
Will@STW wrote:milford59 wrote: Also - I have about 28 round-headed screws left over.... there are not enough to do all the horizontal holes, where I think the lid for the water tank (Kit 8 ?) will go, and I have filled all the other holes that I can see..... so what (if anything) has gone wrong !! ??
Hi Milford59
The tender tank top also comes with the rivet bolts it needs, which will fill the holes in question. We always try to more bolts than you need rather than less than you need, especially with the rivet bolts as the heads on some can at times become damaged.
Many thanks
Will@STW
Thanks very much Will... that makes sense - as you say, it’s easy to damage a head or even strip the thread if you are occasionally ham-fisted.... don’t ask me how I know that !!
milford59- Number of posts : 307
Location : Milford on Sea
Registration date : 2019-05-19
milford59- Number of posts : 307
Location : Milford on Sea
Registration date : 2019-05-19
 Re: Tender - tips and tricks
Ok - I have asked a lot of questions - thanks to all who have replied - now I have a “tip” for new builders - the old hands can look away now, but I have found this product to be just the job for filling in the gaps around the top of the tender, where the beading bends round. It’s like a putty which comes in a cylindrical shape with a dark grey exterior and a light coloured middle. You cut off a slice and you knead it in your fingers until you get a uniform colour (wear latex gloves !!) and then it can be pressed into position. Don’t mix up too much at once as it goes “off” in literally 3-4 minutes.

When it’s dry it can be sanded.

When it’s dry it can be sanded.
milford59- Number of posts : 307
Location : Milford on Sea
Registration date : 2019-05-19
 Re: Tender - tips and tricks
The nut is missing for the bush
Mark the spark- Number of posts : 389
Location : Edinburgh
Registration date : 2015-04-26
 Re: Tender - tips and tricks
Mark the spark wrote:The nut is missing for the bush
Thanks Mark.... I figured that was most likely.... appreciate your quick reply.
milford59- Number of posts : 307
Location : Milford on Sea
Registration date : 2019-05-19
 Re: Tender - tips and tricks
HI milford59
Try part SP 59008 on the bush its in the same kit
Simon C
Try part SP 59008 on the bush its in the same kit
Simon C

Simon C- Number of posts : 305
Location : Derby
Registration date : 2017-07-07
Page 1 of 2 • 1, 2 
 Similar topics
» Front axle and perch - any tips and tricks ?
» Tender and Tender Fittings put together in Duesseldor
» Kit 7 construction tips
» Tips for a Newbie
» aralditing hubs
» Tender and Tender Fittings put together in Duesseldor
» Kit 7 construction tips
» Tips for a Newbie
» aralditing hubs
Page 1 of 2
Permissions in this forum:
You cannot reply to topics in this forum
