DCC rear wheel
+3
elwood-59
lynnr
Adam.C
7 posters
Page 1 of 1
 DCC rear wheel
Hello,
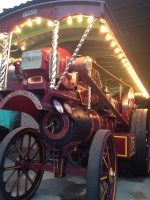
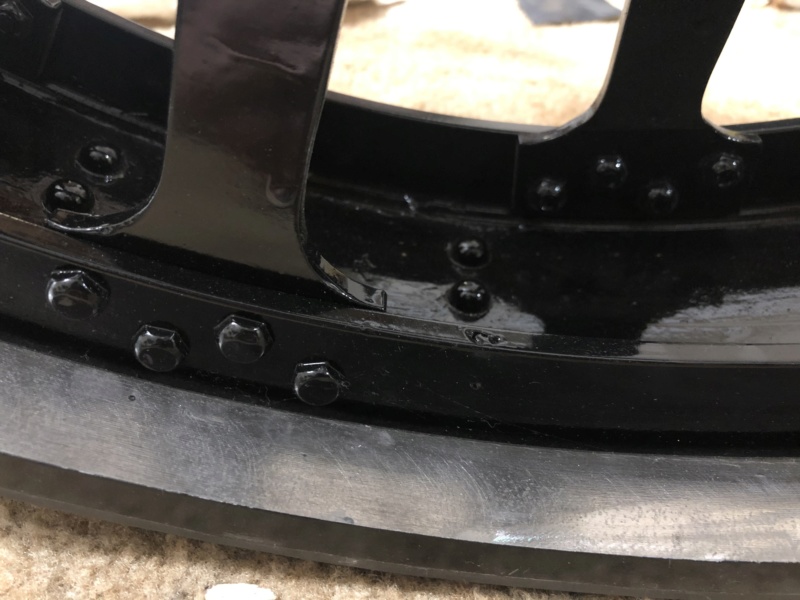
I have not posed yet so thought I would introduce myself. I first saw Steam Traction World at Welland steam fair a fair few years ago. (Must of been around 11 years old) I have now been building a road loco since November 2018. I have now assembled the last rear wheel however it seems to be thicker than the rest of them, and the bolts must only be holding by a couple of threads. Just wondering if anyone else has had this issue? Any advice would be appreciated. Just out of curiosity is there anyone else in there early 20’s building as I believe it is important young people join in and find it as facinating as myself. Hopefully I inserted the photo correctly as I’m not sure how it works.

Thanks in advance,
Adam
I have not posed yet so thought I would introduce myself. I first saw Steam Traction World at Welland steam fair a fair few years ago. (Must of been around 11 years old) I have now been building a road loco since November 2018. I have now assembled the last rear wheel however it seems to be thicker than the rest of them, and the bolts must only be holding by a couple of threads. Just wondering if anyone else has had this issue? Any advice would be appreciated. Just out of curiosity is there anyone else in there early 20’s building as I believe it is important young people join in and find it as facinating as myself. Hopefully I inserted the photo correctly as I’m not sure how it works.

Thanks in advance,
Adam
Adam.C- Number of posts : 10
Age : 26
Location : Cheltenham
Registration date : 2020-05-02
 Re: DCC rear wheel
HI Adam
Welcome to the STW family.
First observation. The slotless bolts are in the wrong way. They should go in from the outside with the nuts on the inside. This will allow you to use the rivet snap, supplied, to drive the bolt in to the flange and through the spoke and looks like proper rivets from the outside. Also debur and using a bigger drill chamfer the holes slightly to account for the bolts having a fillet where the head is formed.
On the thickness. Contact Will via email to confirm the thickness of the T ring before anything drastic is done. Longer slotless crews might be the answer. Again contact Will.

lynnr- Number of posts : 3242
Age : 56
Location : Highland, 4inch showman
Registration date : 2010-08-06
 Re: DCC rear wheel
Hi Adam,
welcome on board.
Just went out to take some measurements:
on my DCC the spoke is about 6 mm thick, the T-ring on the rim about 7mm („about“ as it is painted - min 6 layers brushed on).
the rivet bolt should be 18 mm flange to tip, when I use my measurements, and if my menory is correct, the thread of the bolt is visible about 1 turn.
And as Lynn rightfully said, the holes need a GOOD chamfer as the rivet bolts do have a larger fillet. I even went out and reamed the holes slightly so not to have to hammer the rivets into the hub resp. spoke, just don‘t overdo it, a bit is ok so the rivet bolt still „catches“ in the bore, otherwise you are struggling with keeping the bolt from turning while tightening the bolt.
Hope that helps
Cheers
Elwood

elwood-59- Number of posts : 306
Location : Germany-NRW
Registration date : 2014-12-17
 Re: DCC rear wheel
Thank you for the advice.
I have taken a few measurements now. The T-ring goes from 6.5mm to 8.5mm in places, and the rivet bolts are 1mm shorter. I have measure from the nut to the end of the rivet bolt when it is done up and it shows it is 2mm from being flush. I have tried adding a larger chamfer but this has not made a difference. I will shoot Will an email.
Cheers,
Adam
Adam.C- Number of posts : 10
Age : 26
Location : Cheltenham
Registration date : 2020-05-02
 Re: DCC rear wheel
I used a drill bit down the holes of the spokes to make sure they’re big enough to allow the rivet bolt to pass through. You’re also gonna have to tap it through with a hammer to set it flush, should have some threads poking through the bolt went all is said and done. Included is what my rear wheels look like from the back, I ran a grinder with a flap wheel over the ends to make it look like a rivet


Midwest Steam- Number of posts : 137
Location : MO, USA
Registration date : 2018-09-19
 Re: DCC rear wheel
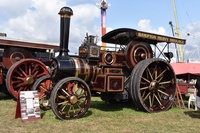
I may not of built the road loco, however I did build the 4" agricultural near enough by my self from 2017 and finished earlier this year. I'm 18 so I started when I was 16. I did get my grandad to paint it and also pay for it though
https://i.servimg.com/u/f66/19/99/47/96/img-2011.jpg
https://i.servimg.com/u/f66/19/99/47/96/img-2011.jpg
Lufccrowther- Number of posts : 50
Age : 23
Location : Swindon
Registration date : 2017-09-20
 Re: DCC rear wheel
It looks really nice mate. Started a year before me, I have found the painting to be a bit of a pain to get a good finish (even though I’m spraying it) so I’ve been wet sanding and polishing it. Fingers crossed the wheels come out ok.
Adam.C- Number of posts : 10
Age : 26
Location : Cheltenham
Registration date : 2020-05-02
 Re: DCC rear wheel
Yeah, it can be a bit tricky, I did paint a few bits myself, I brush painted and if you do it right it looks good. The lining isn't perfect but it was my grandad first try at it. At the end of the day, practice makes perfect. It will be good to follow your progress.
Kind regards
Luke
Kind regards
Luke
Lufccrowther- Number of posts : 50
Age : 23
Location : Swindon
Registration date : 2017-09-20
 Re: DCC rear wheel
Adam.C wrote:It looks really nice mate. Started a year before me, I have found the painting to be a bit of a pain to get a good finish (even though I’m spraying it) so I’ve been wet sanding and polishing it. Fingers crossed the wheels come out ok.
Spray painting can be a bit tricky, I didn’t like painting the wheels since maneuvering the spray around the spokes to get every bit covered was tricky. There is an art to spraying a good coat of paint, the biggest secret is the prep. Getting the surface clean and free of all dirt and oil as well as sanding the surface to give the paint something to adhere to. Getting the mixture of paint and thinners is critical, has to be thin enough to atomize the paint but too much thinner and it can cause the paint to develop runs. Next is getting the right pressure dialed In, there isn’t much of a trick other than trial and error. It’s better to spray multiple thin coats and wet sanding with 1000grit between coats.
I’ve started using a 26 gallon tank with a Devilbiss Finishline 4 HVLP, I think the upgrade in tools was worth it.


Midwest Steam- Number of posts : 137
Location : MO, USA
Registration date : 2018-09-19
 Re: DCC rear wheel
Thanks for the advice.
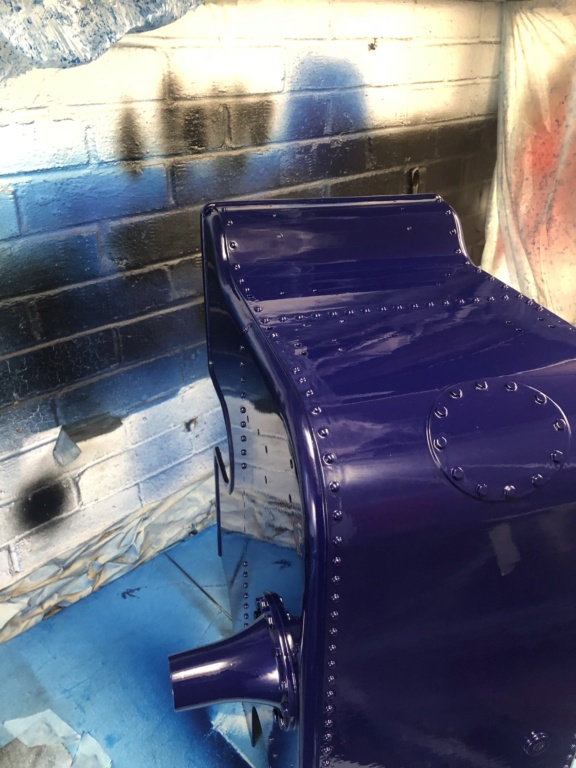
I have now bought mixing cups and made a “spray booth” to keep the dust off the parts while they dry. Starting to get the hang of things now. Three of the wheels are in undercoat just waiting to get the other one ready after I get the new bolts from STW so I can top coat them all in one go, I will post a picture of how they come out. Haven’t got an up to date picture of the tender without the runs in it, but the overall finish is about the same as in the photo below.
.

Adam.C- Number of posts : 10
Age : 26
Location : Cheltenham
Registration date : 2020-05-02
 Re: DCC rear wheel
For the wheels.
you have put the rivet bolts in the CORRECT way with nut on the inside out of sight the snap gets into them ok and you don't want the nut visible from the outside.
looks like you wheel rim is not machined correctly and should be sent back for a new one or longer rivet bolts supplied. I had to get a replacement wheel due to damage but then suffered from coolant seepage under the rim rivets and around the rim that came through the primer and the filler! was a nightmare!
Paint. I know it's desirable to get a perfect finish but really you have to remember it's a steam engine! it WILL be covered in oil and soot that will scratch the hell out of it and all those little imperfections and dust bits your flatting out will be a thing of the past and you'll wonder why you bothered! As long as it's not got runs everywhere or just dreadful orange peal then trust me it will be fine.. If your making your engine to win awards for perfect paint and to sit in a display case then the time is worth it!
I'm spraying 2K gloss and it's great for getting a deep shine but I do get the odd dust particle in mine too, you just can't not get them unless your in a sealed booth with proper setup. 2K has it's own complications as it likes to try and kill you! so I have an air-fed mask running it's own dedicated airline. with the gun fed from it's own line. it's running from a 7 foot tall by 2 feet wide air tank that I was lucky to be given driven by 2 compressors!
also wheels painting. For my fronts I found that once I had sprayed then sitting vertical I then laid them down flat with a spacer in the hub to lift the rim of the board. this helps the paint flat out and will stop any runs from forming on your spokes or around rivets. you might need help to move the rear wheels once they are painted but it does help the finish. I would also always start with the edges and difficult to reach parts first then do the rest of the wheel. they really are a pain to paint to be honest..! but remember the old boys used a brush and they would have never had as good a finish as what we do these days..
keep up the good work and keep us posted might be worth starting a thread in the gallery like most of us have done. happy building!
BurrellSimplicity- Number of posts : 74
Location : Scotland
Registration date : 2019-04-29
 Re: DCC rear wheel
That is for the advice mate. Should be getting longer rivet bolts for the wheel. Very good point on the engine getting dirty, main reason for wet sanding it because of orange peel. I think once I get some time to sort the garage out I’ll start a thread about it. Just got a few other projects I’ve been sorting at the moment!
Adam.C- Number of posts : 10
Age : 26
Location : Cheltenham
Registration date : 2020-05-02
 Re: DCC rear wheel
You have four layers of 6 coats of paint that will probably have added at least a couple of mm to the overall thickness

IanL- Number of posts : 437
Age : 69
Location : Nottinghamshire
Registration date : 2011-07-25
 Similar topics
» Rear wheel rivets
» KIT 4 (REAR WHEEL)
» Rear wheel build
» Lynn Robinson. Showman Scenic
» Rear wheel painting.
» KIT 4 (REAR WHEEL)
» Rear wheel build
» Lynn Robinson. Showman Scenic
» Rear wheel painting.
Page 1 of 1
Permissions in this forum:
You cannot reply to topics in this forum