
Chimney Modification
3 posters
Page 1 of 1

Chimney Modification
![]() Weston Tue 28 Feb 2012, 10:07 pm
Weston Tue 28 Feb 2012, 10:07 pm
Hi all,
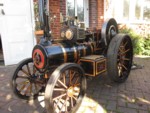
Progress has been a bit slow on the engine over the last month or so, a mix of bad weather and heavy work load has mean that I have not been able to get as much done as I would have liked. Anyways with the hint of spring in the air I have been able to get back to work on the engine. I hadn't really payed much attention to the chimney so I thought that I would finish that to get the front end finished. To say that putting the chimney together took longer than I thought is a bit of an understatement. Putting the rivets in was fine, a fairly straight forward job, but when it came to fitting the spun copper cap I could not make it fit properly. I had huge gaps on the underside of the cap.

Not being satisfied with the fit I had achieved I needed to find a way to remove the gap, I found that if I move the chimney cap up slightly the cap sat a lot better on the taper.

So my plan is to slightly increase the length on the chimney and insert a steel ring that will have a snug fit around the top of the cap too.
this will also help later on in running the engine as I will have a good base to fit a fan for raising steam and also a chimney extension for keeping the smoke out of my eyes
I tried rolling a piece of steel to fit around the top of the chimney but it was still leaving gaps. So I decided to go to the lathe and turn a ring to sit on top.

Lot of material to remove

Finished ring

Ring to be tacked to the top of the chimney,

Cleaned up

Copper cap put back in place,

A nice sturdy support ring to hold a fan or chimney extension in place

Its been a little quiet on here recently so I thought I would add a little of what I've been upto, really enjoying the build so far, hows everyone else been getting on?
Regards
Ryan
Progress has been a bit slow on the engine over the last month or so, a mix of bad weather and heavy work load has mean that I have not been able to get as much done as I would have liked. Anyways with the hint of spring in the air I have been able to get back to work on the engine. I hadn't really payed much attention to the chimney so I thought that I would finish that to get the front end finished. To say that putting the chimney together took longer than I thought is a bit of an understatement. Putting the rivets in was fine, a fairly straight forward job, but when it came to fitting the spun copper cap I could not make it fit properly. I had huge gaps on the underside of the cap.
Not being satisfied with the fit I had achieved I needed to find a way to remove the gap, I found that if I move the chimney cap up slightly the cap sat a lot better on the taper.
So my plan is to slightly increase the length on the chimney and insert a steel ring that will have a snug fit around the top of the cap too.
this will also help later on in running the engine as I will have a good base to fit a fan for raising steam and also a chimney extension for keeping the smoke out of my eyes
I tried rolling a piece of steel to fit around the top of the chimney but it was still leaving gaps. So I decided to go to the lathe and turn a ring to sit on top.
Lot of material to remove
Finished ring
Ring to be tacked to the top of the chimney,
Cleaned up
Copper cap put back in place,
A nice sturdy support ring to hold a fan or chimney extension in place
Its been a little quiet on here recently so I thought I would add a little of what I've been upto, really enjoying the build so far, hows everyone else been getting on?
Regards
Ryan
Weston- Number of posts : 64
Age : 36
Location : Beds
Registration date : 2011-11-04
Re: Chimney Modification
![]() hudmut Wed 29 Feb 2012, 8:38 am
hudmut Wed 29 Feb 2012, 8:38 am
I did some thing like that on mine but I just turned a lump of wood and then pressed in down the chimney with the tailstock to sort of flair the chimney at the bottom of the copper ring but I do like your idea.
If you can get at a lathe I found putting the chimney base ring in the chuck then the stack its self in to the base then its a easy way to get every thing to be straight and parallel just turn the chuck by hand and keep tapping the top of the stack until it runs true. I was worried about it leaning over and looking odd
Good to see some one else here setting to with machine tools iv modded a lot of my engine what else are you thinking of tinkering with iv remade a lot of stuff in stainless steel as I don’t like the look of plating an don’t want to spend lots of time cleaning rust off.

hudmut- Number of posts : 74
Age : 46
Location : Derby
Registration date : 2010-07-05 -

Re: Chimney Modification
![]() highpressure Wed 29 Feb 2012, 8:41 am
highpressure Wed 29 Feb 2012, 8:41 am
Hi Ryan,
Thats a very smart extention, but I will say you wont want a fan to raise steam. If you are doing the 4" which it would seem they are readily capable of raising setam with just a long draft tube, about 5 feet or so which I think STW will supply. Not only that raising steam without a blower allows the boiler to get to temperature slowly, if you use a forced draft it can cause uneven, quick heating which will cause the tubes to leak after a while. Use parafin soaked kindling first, a couple of handfuls and then when well alight add a few shovel fulls of coal every couple of minutes. If there is a slight breeze going over the chimney top and you can turn the engine so the fire box is facing into the wind you will have a full pressure in about 45 minutes.
And you will enjoy that!!!!
Well done, Cheers Kev.
highpressure- Number of posts : 1096
Age : 57
Location : West Sussex, 4" DCC Road Loco
Registration date : 2008-06-18 -
Re: Chimney Modification
![]() Weston Wed 29 Feb 2012, 11:29 am
Weston Wed 29 Feb 2012, 11:29 am
Thanks guys,
I have been following your build hudmut and I must say most impressive, nice colour too! I will be upgrading parts here and there, as I am a monthly builder I will look and assess parts as and when they come, as to what I may change. I think that small changes like this give the engines a person feel, something a little different.
I saw in some of your pictures you used a lathe to square up the cap....good idea
Thanks for the tip kev, will keep that in mind, I've only ever had small engines and I have always needed a blower.
Ryan
Weston- Number of posts : 64
Age : 36
Location : Beds
Registration date : 2011-11-04
Re: Chimney Modification
![]() hudmut Fri 02 Mar 2012, 9:25 pm
hudmut Fri 02 Mar 2012, 9:25 pm
Thanks Ryan
I wasn't fishing for complements just trying to help but thank you any way. A lot of the mods iv done on my engine are up dates iv come across after doing a lot of miles on a batch one model or hiding the fact that it is a STW engine. If you have ever had to do a water pump gland packing on a hot engine you will soon swop out the hex head bolt's for cap heads because you will soon get a lot of burns trying to get the hex head bolts out on the back of you hands not totally scale i agree but nor is the size of the model.
When it comes to your tender and if you want some more beading to go around the leg hole just as ill be happy to give you some iv got 5.5 meters left. I all so have cnc at home so if there's any other bits i can help with just as
Stu
hudmut- Number of posts : 74
Age : 46
Location : Derby
Registration date : 2010-07-05 -
» Thetford Works (Cornwall)
» Bill's 6" Foden SWB Lorry
» New Chimney for the Burrell
» Gear guard modification
» Piston Rod Packing Nut Modification
» Bill's 6" Foden SWB Lorry
» New Chimney for the Burrell
» Gear guard modification
» Piston Rod Packing Nut Modification
Page 1 of 1
Permissions in this forum:
You cannot reply to topics in this forum|
|
|