
More kits done in Duesseldorf
Page 1 of 1

More kits done in Duesseldorf
![]() karl heinz marschner Fri 28 Oct 2022, 4:00 pm
karl heinz marschner Fri 28 Oct 2022, 4:00 pm
I am still waiting for the boiler, it is on the way, but this time there is a problem either with the parcel service or with the German customs. I cannot do anything about it, because I have not got any tracing number. Hopefully Rosemary will help me. In the meantime I will tell you about my experiences with the hornplates, bearing housings, cylinder & fittings, steering and crank & con rod.
Kit no. 9 - Hornplates
Again, a tremendous number of ball headed bolts! Before I started to put the parts together I signed inside and outside of the righthand and the lefthand hornplates using a felt pen. I did not want to mix up them. All parts fitted together pretty well.
As far as the dummy rivets are concerned, I decided to fix them mechanically by following the instructions. I did not do any painting. As I told you before, I will not start painting before I have received all metal sheet parts.
The first week of October I spent in the United Kingdom, I started with a visit to Steam Traction World. Dean and Rosemary were very friendly and helpful to me, Dean showed me the production site, where I could see two 2-inch boilers waiting for final mechanical machining, one of them was supposed for me. And we went through the aisles of the warehouse. Very, very interesting, quite impressive! In the show room I was allowed to make a lot of photos. Now I can really put up my mind about painting and lining.
Kit no. 10 - Bearing Housings
Once more I was very pleased, how accurate the shafts, shaft tubes, flanges and bearing housings were made. Everything fitted together perfectly. I considered to chamfer alle the edges of those parts, which were made of cast iron in the original. I didn't do it, because these parts will not be visible in the finished model. So I only removed all sharp edges.
I had some - small - problems to screw in the side oilers. After recutting the threads with the according tap and die (M4) everything was okay. The only real - again relatively small - problem I had with the lids of the RH and the LH bearing cap: Somebody from STW had mixed up the hinges. See photos.
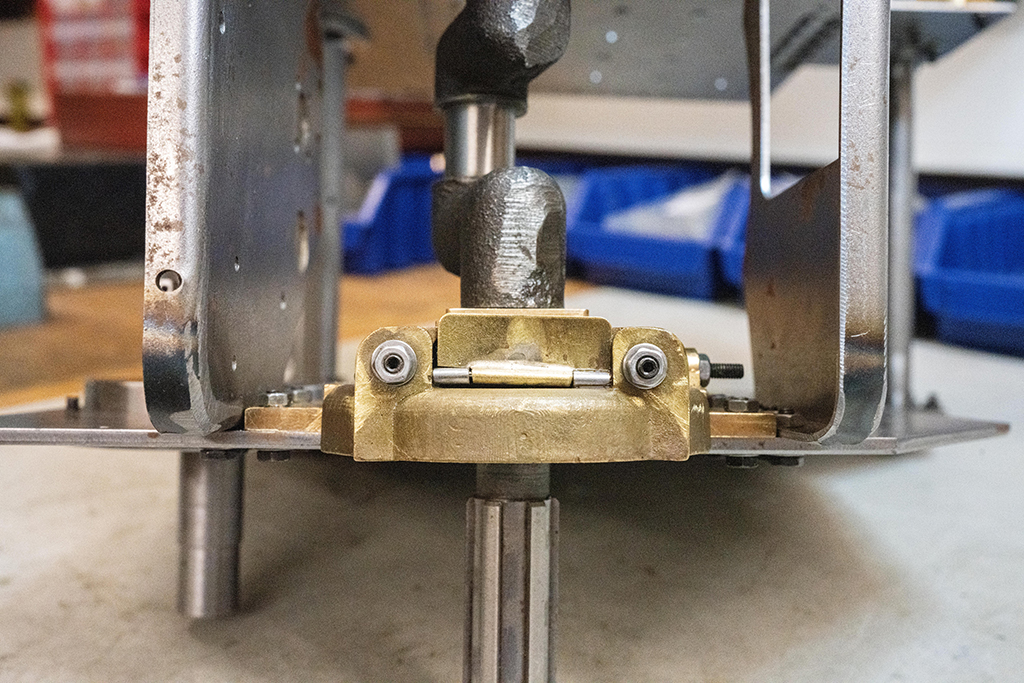
The hinge of the RH Bearing Cap was too short, I had to add two short pieces of proper steel tube
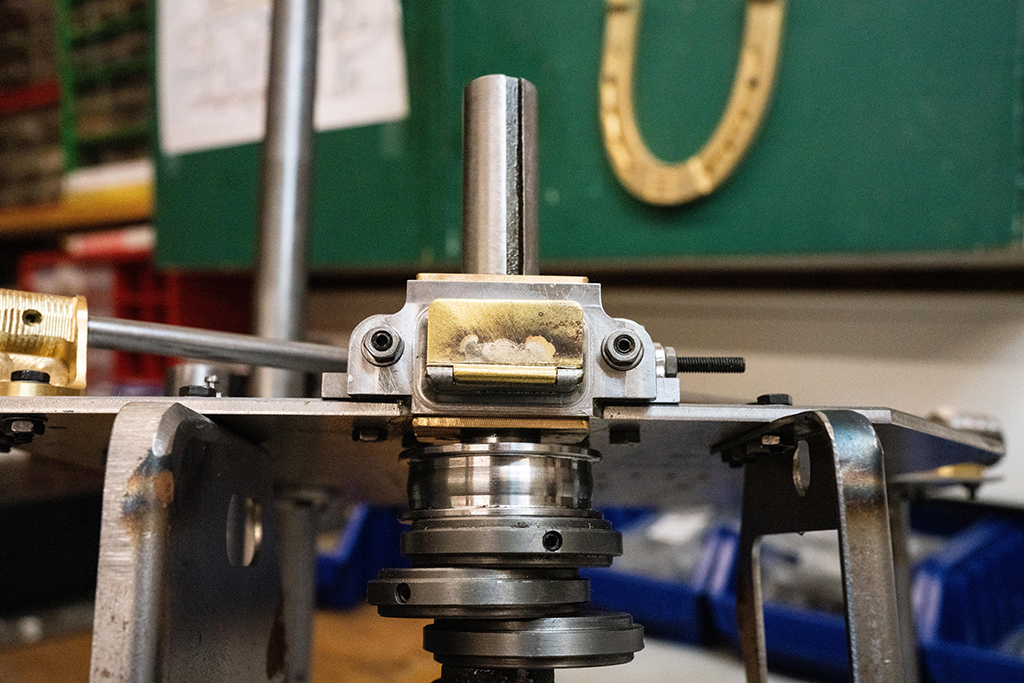
The hinge of the LH Bearing Cap was too long, I had to file it off from both ends
Kit no. 11A & B - Cylinder & Cylinder Fittings
What a fine piece of equipment! It was real fun to put the parts together. I realized that these parts will be the first parts to be moved by steam, when the Burrel is finished. But I had a problem to translate the English text of the instructions. They recommend to use a Jubilee Clip to fumble the piston with the piston rings into the cylinder. What the hell, means Jubilee Clip? I could not find this term in any dictionary. Anyway, with some finger acrobatics I managed it finally. Later on my model maker colleague Ulrich Janz told me, that Jubilee Clip means a hose clip.
Here is my urgent recommendation to STW: Do not use terms in your instructions which can only be understood by native English speakers!
Two of the M3x16 skt grub screws for the Front & Rear Cylinder Covers were too long (Those, where the Cylinder Drain Bushes are located), so I had to shorten them, no problem.
When all parts, except the gland packings, were put together, I was able - with some effort - to move the piston with two fingers. But this was only possible when I left the two slide bars pretty loose. I will not fasten them until I get the weigh shaft bracket (another term which I could not find in any dictionary, but I understood what it meant). With the Weigh Shaft Bracket in place it will be easier to balance the two slide bars.
The Slide Valve Buckle and the Regulator Nut needed some very fine grinding with my finest needle files to get a nice sliding fit.
Kit no. 15 - Steering
No problems, therefore no further comments. Only one thing: The chain I got from STW looks a bit too coarse for a 2-inch model, at least for my impression. So I will look to find a finer one in one of our Do it Yourselve Stores. What do the other forum-members think about it: The inner dimensions of the chain links which I got are 16,5 x 7,5 mm. Isn't that too much?
Kit no. 16A - Crank & Con Rod
To get the excentrics on the crank shaft I had to widen the key seats in all of the three excentrics, no problem. And it took me quite some time with fine grinding work to fit the bearing blocks smoothly into the bearing housings.
Before I assembled the bearing blocks together with the crank shaft, I loosend all the hex head screws and ball headed screws, which hold the horn plates together. Doing this I made sure the two bearings would aligne perfctly. Then I applied some diamond paste into the bearings and rotated the crank shaft until I was able to rotate it without too much effort. I only had Grit 90-medium coarse grinding paste, which is definitely too coarse for this job. So I had to be careful not to overdo it. After removing the grinding paste and adding some oil I am able to move the crankshaft very easily and smoothly with two fingers without any clearance.
I will be back after receiving the boiler.

karl heinz marschner- Number of posts : 33
Location : Duesseldorf, Germany
Registration date : 2021-04-13
Vapor likes this post
» 4" Burrell Single Crank Compound Kits 1-5, plus kits 7 & 8. Reduced further Now Saving over £2250!! (NOW SOLD!)
» A new guy with some ideas from Duesseldorf, Germany
» News from Duesseldorf, Germany
» Putting together a Burrel in Duesseldorf
» Rear wheels made in Duesseldorf
» A new guy with some ideas from Duesseldorf, Germany
» News from Duesseldorf, Germany
» Putting together a Burrel in Duesseldorf
» Rear wheels made in Duesseldorf
Page 1 of 1
Permissions in this forum:
You cannot reply to topics in this forum|
|
|