
DCC Kit One (the beginning)
5 posters
Page 1 of 1

DCC Kit One (the beginning)
![]() Steve Traill Fri 11 Dec 2009, 10:42 pm
Steve Traill Fri 11 Dec 2009, 10:42 pm
The first kit arrived yesterday and eagerly awaited it was too! The rims seem huge compared to my 4" burrell Agricultural. All was well packed with nothing missing or damaged. First job was to clean up the rims, I went for the vulcanised rims so they had some light surface rust from the vulcanising. This came off with a flap wheel and were soon bright & shiny. The spokes were next for some treatment with the flap wheel and I have to say that laser cutting has improved no end in 5 years, the edges of the spokes were smooth and apart from taking the sharp edges off and a general rub up were fine. One little wrinkle I used was to use a grinding disc in a 4" grinder to take the sharp edges off the spokes. Two light passes on each edge with the grinder just helps when it comes to putting it on the flap wheel. If you are not confident using a grinder near your fingers then don't! The rims need a fillet of filler running around both sides to make them look like T rings. The instructions suggest various types of car body filler however I like JB Weld. It's expensive for what it is but very strong and easy to apply. I needed two packs (one for each wheel) they are only small like the size of araldite tubes and cost about £5 a pack. I squirted the lot out on a piece of ply and mixed it up, then I found a small syringe and spooned it into this. This meant I could apply it just where I wanted it, STW supply a handy little filleting tool which if kept at 90 degrees to the rim gives a perfect radius all round. You will find that some of the filler oozes out either side of the radius, this can be knifed off easily and reused further around the rim (waste not want not). When you have removed as much of the surplus as possible with a flat knife then with some mildly soapy water and a mark 1 finger run a wet finger around the filler to remove any tooling marks, after that there is virtually no sanding required. Put the rims somewhere warm for 6 hours and have a rest. The instructions for fitting the spokes are logical once you start and it's just a matter of working through it steadily. The hubs are beautifully machined and once they are degreased shine like a piece of jewelry! The countersunk socket screws for the outer face are a little short but this is being rectified with longer screws being supplied I understand. Tomorrow I will glue up all the spokes and put a picture of the finished wheel on the forum.

Steve Traill- Number of posts : 800
Age : 67
Location : Illogan Redruth Cornwall
Registration date : 2008-06-29
The front wheels
![]() Steve Traill Sat 12 Dec 2009, 5:16 pm
Steve Traill Sat 12 Dec 2009, 5:16 pm
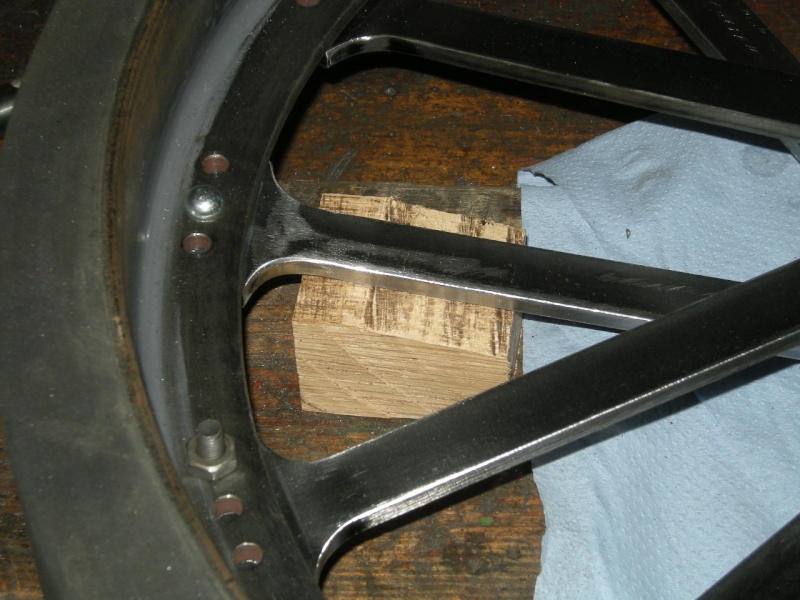
Fitted all the rivet bolts today, as you can see from the picture I cut a small piece of hardwood to take the strain when hiting the rivet into the rim. The rivets are a fairly snug fit and without the block of wood the filler might crack with the strain.
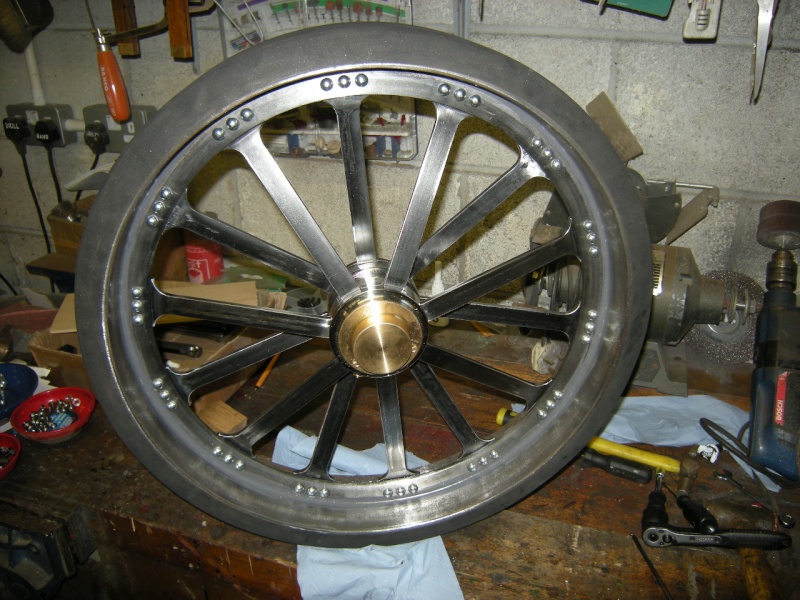
Here's the finished wheel (well nearly, the hub needs a session on the buffing wheel) I use acetone to clean the araldite off, I used just under the two 4" tubes one buys in the shops to glue up both wheels. I've left fitting the bushes until I have the front axle to ensure everything lines up. Roll on kit 2!
Steve Traill- Number of posts : 800
Age : 67
Location : Illogan Redruth Cornwall
Registration date : 2008-06-29
Re: DCC Kit One (the beginning)
![]() highpressure Sat 12 Dec 2009, 5:33 pm
highpressure Sat 12 Dec 2009, 5:33 pm
Do you get special dispensation to get your kit so quick? I thought they were packing everything next week!!
Still roll on delivery I cant wait to put that together. Just out of interest how much bigger are they to the 4" agricultural?
Regards Kev.
Still roll on delivery I cant wait to put that together. Just out of interest how much bigger are they to the 4" agricultural?
Regards Kev.
highpressure- Number of posts : 1096
Age : 57
Location : West Sussex, 4" DCC Road Loco
Registration date : 2008-06-18 -

Wheel sizes
![]() Steve Traill Sat 12 Dec 2009, 6:11 pm
Steve Traill Sat 12 Dec 2009, 6:11 pm
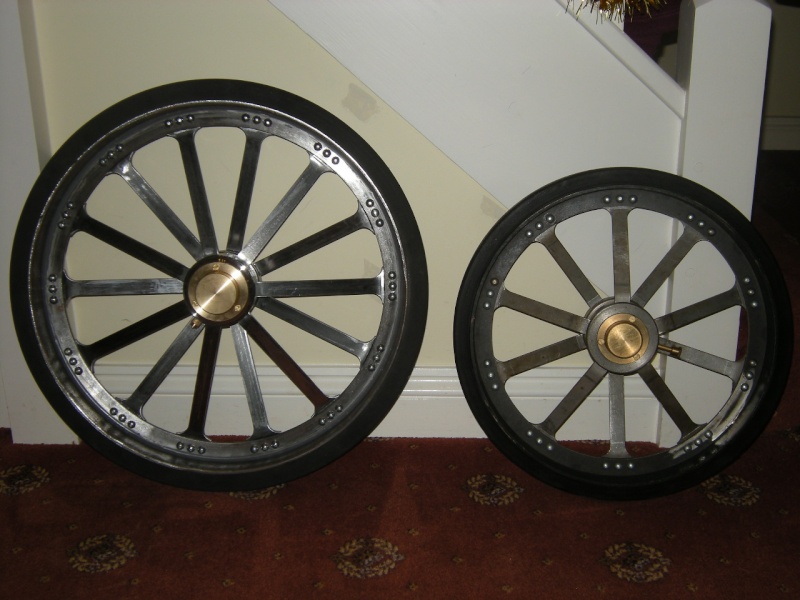
Just so you can see the difference in size from a standard 4" Burrell front wheel and the DCC front wheel here's one I had lying about! As for getting the kit before everyone else I am chief guinea pig/test pilot for the kits so as to keep quality control to a high standard and save everyone else a lot of phone calls! (hopefully) I will be doing write ups of my trials and tribulations as I go, so hope it all helps.
Cheers for now
Steve
Steve Traill- Number of posts : 800
Age : 67
Location : Illogan Redruth Cornwall
Registration date : 2008-06-29
Re: DCC Kit One (the beginning)
![]() highpressure Sat 12 Dec 2009, 6:14 pm
highpressure Sat 12 Dec 2009, 6:14 pm
HOLY S**T!!!!!  That wheel is enormous!!!!!!!!!!!!! This is gonna be one big engine when its finished!! How long do we have to wait for all the kits!!!!!!!
That wheel is enormous!!!!!!!!!!!!! This is gonna be one big engine when its finished!! How long do we have to wait for all the kits!!!!!!!
highpressure- Number of posts : 1096
Age : 57
Location : West Sussex, 4" DCC Road Loco
Registration date : 2008-06-18 -
Re: DCC Kit One (the beginning)
![]() miller Sat 12 Dec 2009, 6:49 pm
miller Sat 12 Dec 2009, 6:49 pm
yes, i can confirm that Steve had his kit early as the decision was made to "test" the kit on one customer before the rest of the batch is sent out, it's just another step in our attempt to gets the kits out to you without any "silly" problems. it is often true that a fresh set of eyes will spot something that we may have missed.
Steve has had some of the very first parts to be completed. there is often be a long period of time between the parts going on the machine and the full batch being complete. the milling op on the hubs took 19 minutes each and they have taken over a week to complete. with Mark off work due to illness and me having Wednesday off as holiday, things have taken time
the only parts that are still being made are the half-nuts (due to the huge quantities involved). every thing else is done.
maybe we are being over cautious?, but i am sure you can appreciate that we want our first proper STW kit to be problem free. the kits will be going out this week

miller- Number of posts : 270
Location : STW
Registration date : 2008-06-16
Re: DCC Kit One (the beginning)
![]() Vapor Sat 12 Dec 2009, 7:56 pm
Vapor Sat 12 Dec 2009, 7:56 pm
Craig,
I shall have to have a word with Dean, holidays, people off sick and a blooming heater whatever next, I suppost you'll want paying??
I shall have to have a word with Dean, holidays, people off sick and a blooming heater whatever next, I suppost you'll want paying??

Vapor- Number of posts : 383
Age : 113
Location : Isle of Wight (2" Burrell & 5" Duchess ex MW)
Registration date : 2008-06-18
Re: DCC Kit One (the beginning)
![]() eng14110 Sun 13 Dec 2009, 10:12 am
eng14110 Sun 13 Dec 2009, 10:12 am
Looking good guys.
The sickness and holidays are easily overcome by working at night. I know that working at night might be a bit dodgy given that Dean won't allow any light or heating but whats a few fingers and toes amongst friends ?
On a serious note looking forward to the first kit
Colin
The sickness and holidays are easily overcome by working at night. I know that working at night might be a bit dodgy given that Dean won't allow any light or heating but whats a few fingers and toes amongst friends ?
On a serious note looking forward to the first kit
Colin
eng14110- Number of posts : 44
Age : 60
Location : Staines Middx
Registration date : 2009-02-04
Page 1 of 1
Permissions in this forum:
You cannot reply to topics in this forum|
|
|